


Create Salesforce Campaign and Add Campaign Members
eComm specialists are responsible for creating audiences in Salesforce and Marketing Cloud, which might include Campaigns.
NOTE When sending emails, you should be sending to either reports or data extensions. Sending to a campaign will result in a CAN-SPAM violation. For this reason (among others) eComm specialists are responsible for initially creating Campaigns (instructions below) and converting them to a Report or Data Extension as needed. After that, users should be able to manage small changes to the Campaign by adding and removing Campaign Members.
APPLY YOURSELF
Those tasked with creating audiences can apply the entire process as practice by cloning the eComm specialist Training Plan (referenced below).
Create & Share Campaign
Campaign Naming Conventions
- Campaign Name: 08 UREL 20211010 Invitees
- 08 = The first two numbers of a report name represent the campus on which it was created.
- 01 = Boulder, 02 = Anschutz, 03 = Denver, 04 = Colorado Springs, 08 = System, 09 = Advancement
- UREL = The next four letters of your report name represent the unit that owns the report, in this case, University Relations. You'll also come across examples like ALUM (for alumni association), HIST (for the department of history), and CHAN (for the Office of the Chancellor).
- OT/DATE = The next component represents whether your campaign one-time (OT) or the date you uploaded the information (YYYYMMDD).
- Invitees = The next portion of your report name specifies the audience, in this case, invitees to an event.
- 08 = The first two numbers of a report name represent the campus on which it was created.
Create Campaign
In our Salesforce environment, we already have thousands of Campaigns. For that reason, it is most common for eComm specialists to clone an existing Campaign. Note that a cloned Campaign does not clone the members of that Campaign or the shared settings.
- Navigate to the Campaign
- You could search for the Campaign with the Global search at the top
- You could navigate to the Campaigns tab if you recently viewed the Campaign
- Select Clone in the top right
- TIP: You can view the Sharing of the original Campaign before cloning it (found to the left of the clone button, in the top right). The cloned Campaign will not inherit this sharing, so you'll need to do it manully after the Campaign is cloned (if relevant).
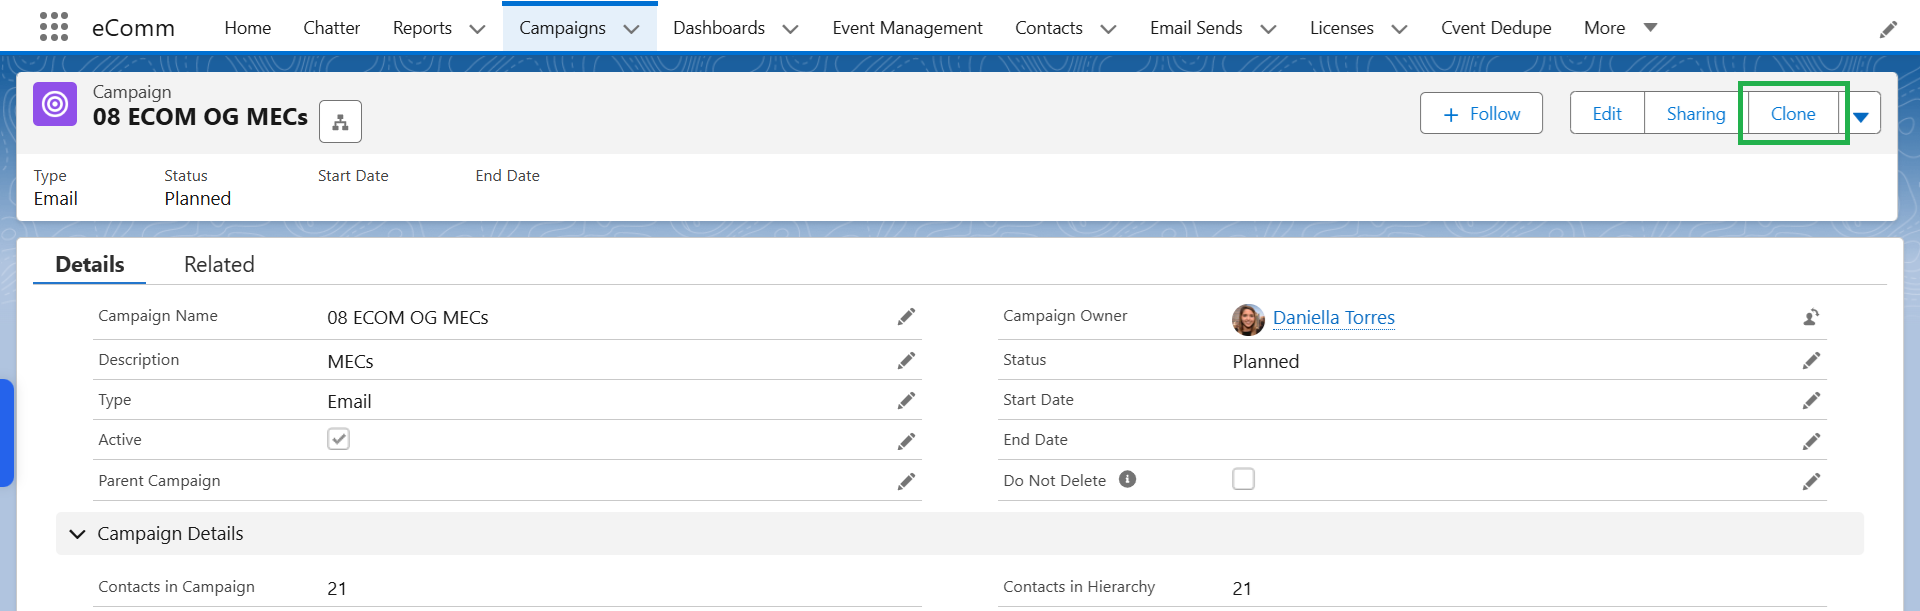
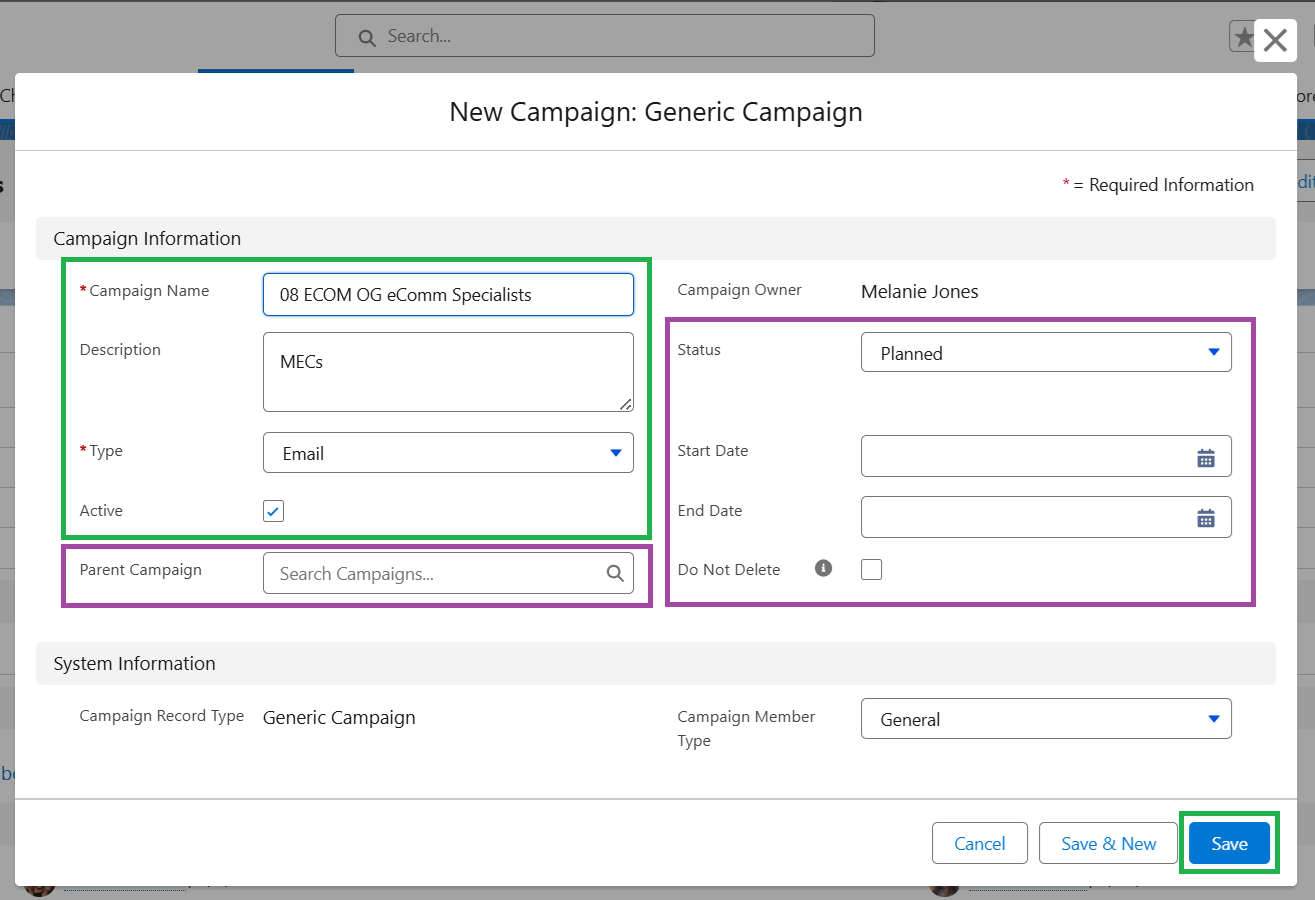
- Modify the Name and Description of the Campaign
- The cloned Campaign will inherit most values from the original Campaign.
- The following fields must be updated or confirmed to be accurate:
- Name
- Description
- Type - should be Email or Subscription
- Active - must be checked
- The following fields are not required, but can be populated:
- Parent Campaign
- Status
- Start Date
- End Date
- Do Not Delete: this is a new field as of May 2026
- Per eComm data retention practices, Campaigns that have not been created or changed (having Campaign Members added or removed) within 2 years will be removed from Salesforce. Generally, Campaigns that have not been modified in 2 years are no longer used. Check this box if there will be no changes to this Campaign for an extended period, but it is still in use. Campaigns with the Do Not Delete box checked will not be removed from Salesforce, regardless of when they were last modified.
- The following fields must be updated or confirmed to be accurate:
- Click the blue Save button in the bottom right
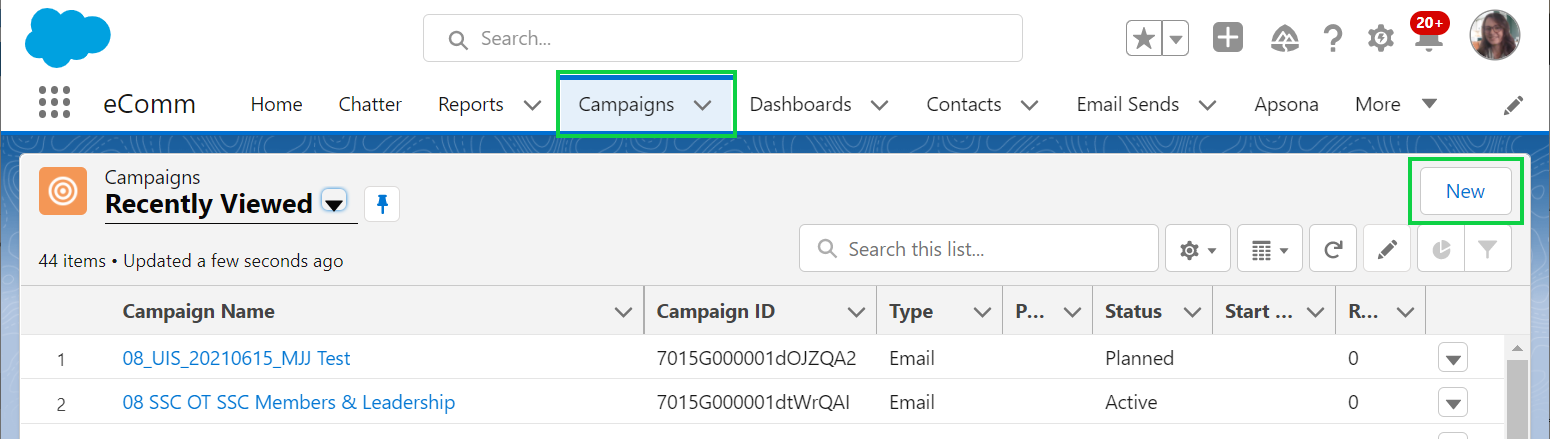
- Select Campaign in the top navigation
- Click New in the top right corner
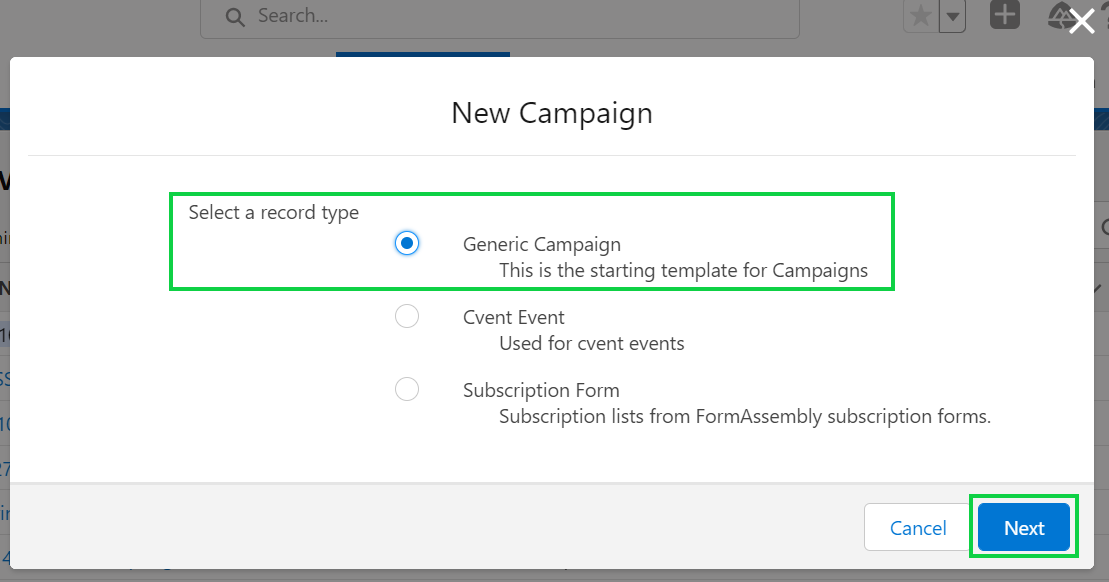
- Generic Campaign is set by default.
- Slect the blue Next button in the bottom right
- The following fields must be populated:
- Name
- Description
- Active - must be checked
- Type - should be Email or Subscription (based on what was selected on the previous screen)
- The following fields are not required, but can be populated:
- Parent Campaign
- Status
- Start Date
- End Date
- Do Not Delete: this is a new field as of May 2026
- Per eComm data retention practices, Campaigns that have not been created or changed (having Campaign Members added or removed) within 2 years will be removed from Salesforce. Generally, Campaigns that have not been modified in 2 years are no longer used. Check this box if there will be no changes to this Campaign for an extended period, but it is still in use. Campaigns with the Do Not Delete box checked will not be removed from Salesforce, regardless of when they were last modified.
- Click the blue Save button in the bottom right
Share Campaign
SHARE CAMPAIGN Don’t forget to share the Campaign with the Public Group or Individual User so they have access. Failure to do so will likely result in a failed send.
There are two ways to share a Campaign:
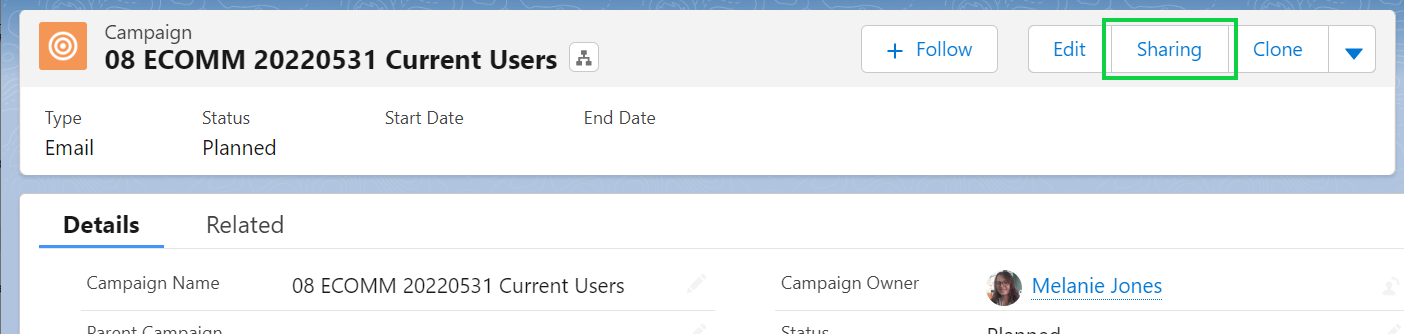
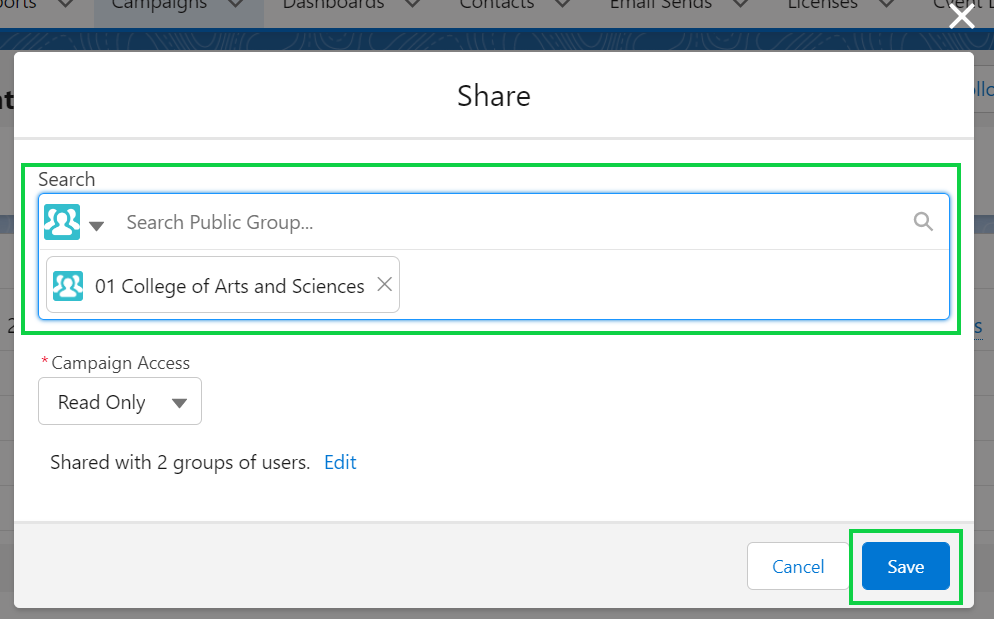
- Once a Campaign exists, click the Sharing button in the top right
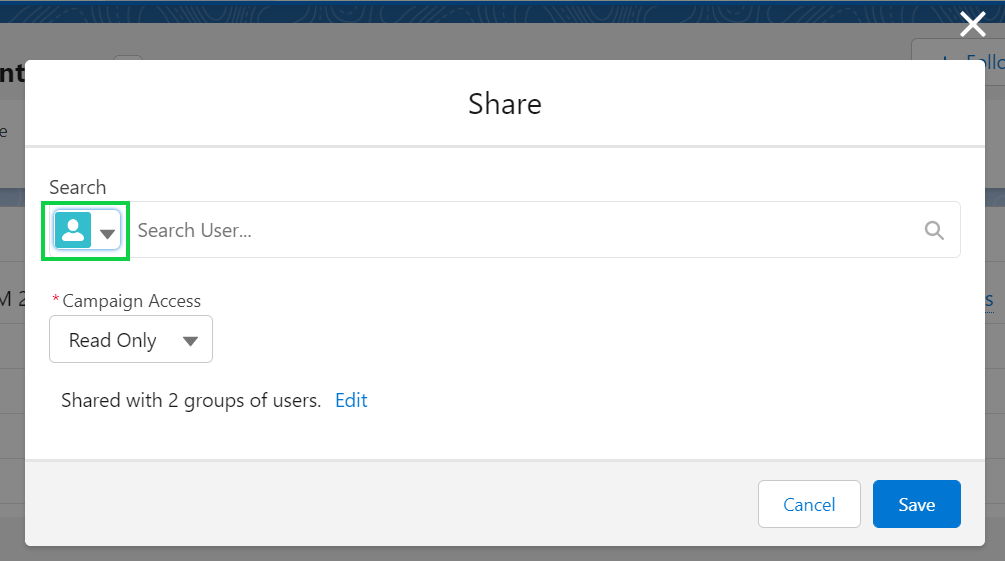
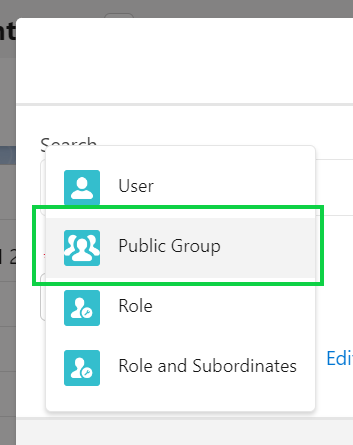
- In the pop-up, it defaults to Users. Click the down arrow with the image of a person to select Public Groups in the dropdown.
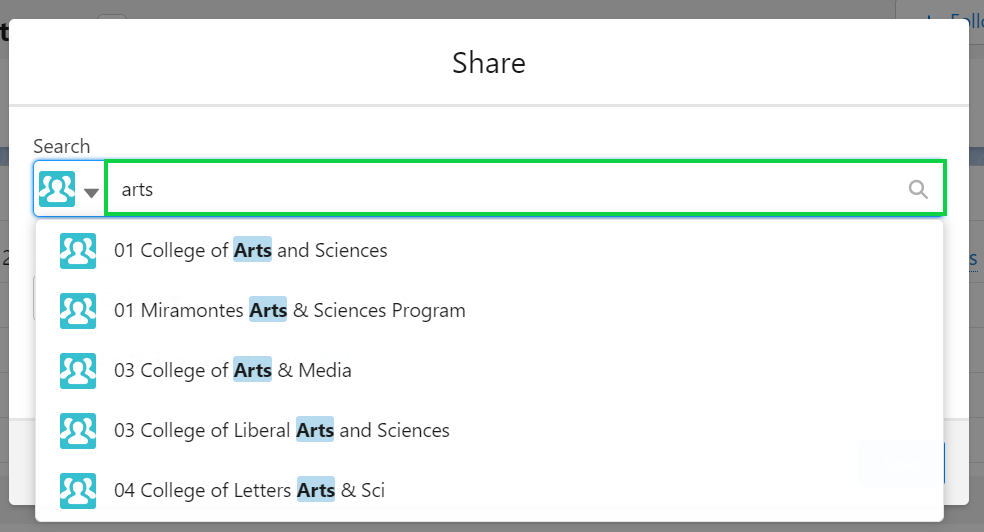
- Search for the name of the Public Group. Click the Public Group name once it appears.
- Confirm the Public Group (or Users) selected are correct. Click the blue Save button.
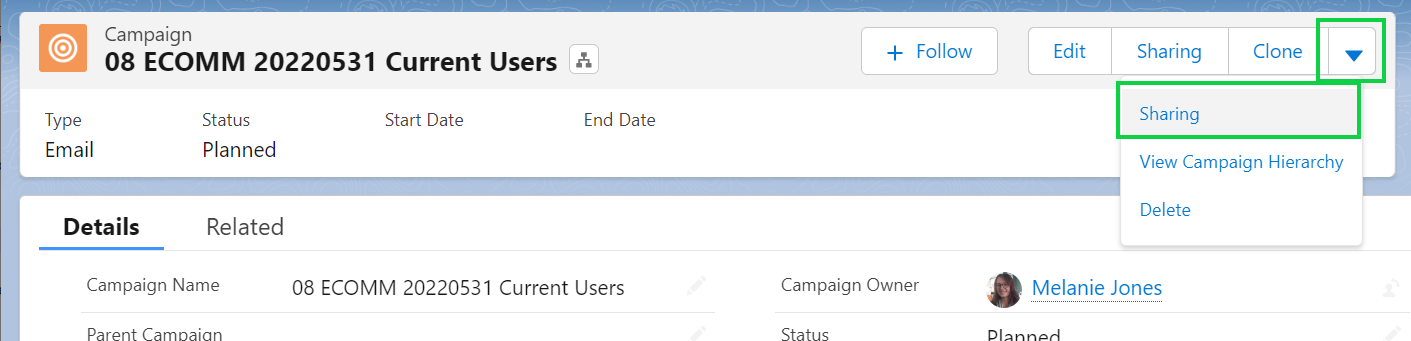
- Click the down arrow next to Clone. Select Sharing in the dropdown.
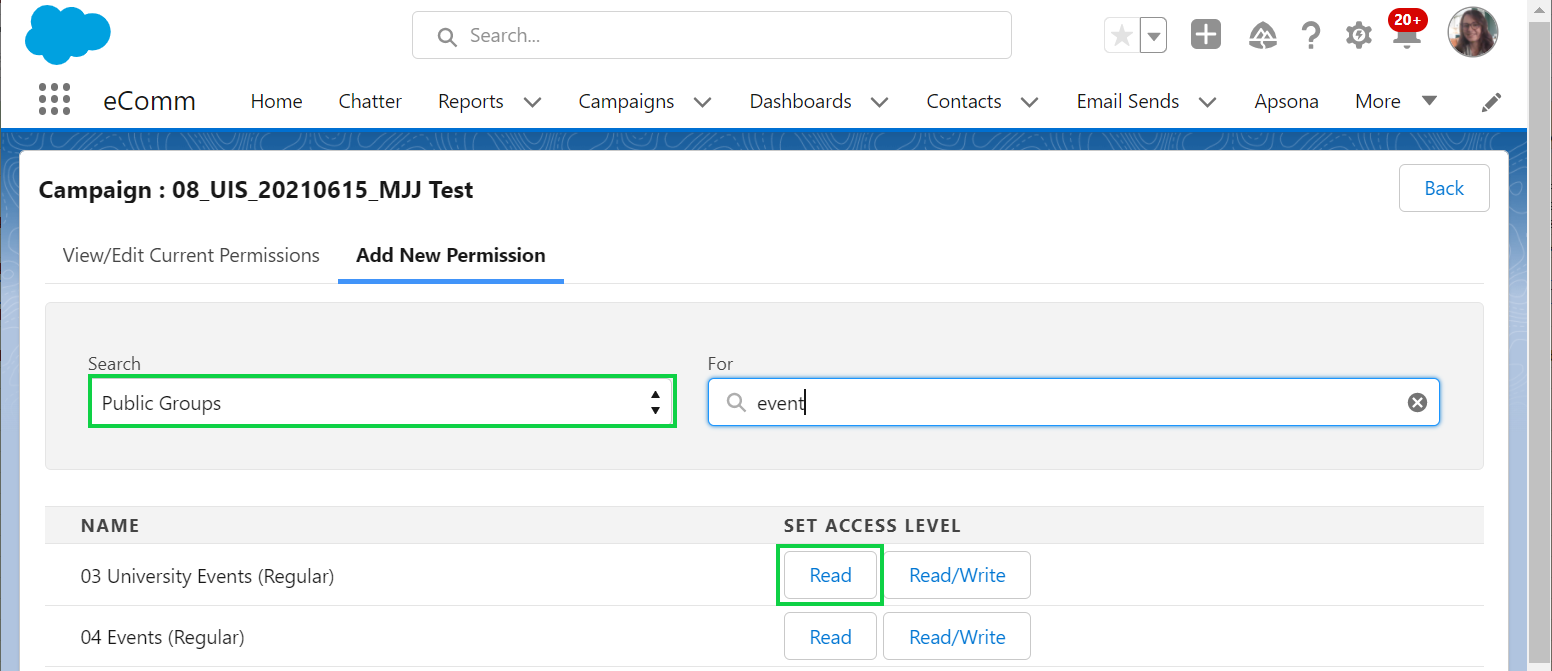
- Chose the Add New Permission tab
- Search the Public Group or Individual name
- Grant Read access
Manage Campaign Members
When a list is provided, there is no telling the quality of the data provided. Lists require varying amounts of 'cleanup' that is best done before processing the list. Failure to 'cleanup' a list can cause technical issues when adding Campaigns Members in bulk with Apsona and/or make the process more fragmented and cumbersome for you.
Manage Campaign Members Individually
eComm specialists can add & remove Campaign Members individually. Users can also add and remove Campaign Members and should be encouraged to do so. It's a great way to empower users to manage their audience after being created initially.
- Walk through a test scenario (Campaign 1) by following along with the video above (0:00-1:55). Do not be shy about adding random folks to this Campaign and removing them to practice.
Add Campaign Members in Bulk
It's most common for eComm specialists to add Campaign Members in bulk via Apsona.
- Walk through a test scenario of matching on a single data point (Campaign 2) by following along with the video above (1:56-6:55). Complete the same process for the remaining tabs (Campaign 3-7).
- Walk through a test scenario of matching on numerous data points (Campaign 8) by following along with the video above (6:56-13:39). Then complete the same process for the remaining tab (Campaign 9).
Add New Contacts
Unable to find a contact in Salesforce to add to a Campaign? When this occurs, the Contact needs to be created first. eComm specialist can create new contacts in bulk with an upload process via Apsona or individually with the same process users leverage. Once the Contact(s) exists, use Apsona to add the Campaign Members to the Campaign (above).
- Walk through a test scenario (Campaign 10) by following along with the video above (13:40-19:41). Then complete the same process for the remaining tab (Campaign 11).
Recorded Sessions
The following session took place in Nov. 2023 as a refresher for existing eComm specialists.
TEST YOURSELF eComm specialists and other audience creators - regardless of their previous experience - are highly encouraged to complete an extensive quiz to ensure a deep understanding of Campaigns / Campaign Members / Apsona annually. Please set aside 30-60 min. to complete the quiz of 35+ questions, many being open-ended. Do not miss the opportunity to review correct responses after submitting your answers to see how they match up for self-correction.
Related Content
- What is the difference between a campaign and a report?
- How are campaigns connected to reports?
- Why do campaigns have such complicated names?
- How do I modify or delete a campaign?
- How do I add an individual contact to a Salesforce campaign?
- How do I add contacts to a Salesforce campaign in bulk?
- How do I share a campaign with a public group?