Salesforce Visibility and Sharing
NOTE Users can only share campaigns for which they are listed as the owner. If you are a user in need of sharing other campaigns, reports, or dashboards, contact your eComm specialist for assistance.
Since eComm has hundreds of users across all four campuses, system, and Advancement, staying organized and protecting users' assets can be challenging. Luckily, Salesforce has built-in visibility and sharing rules that control who can access certain content and how certain content can be shared.
Visibility
Visibility of Salesforce Reports or Dashboards is controlled at the parent folder level. Salesforce Campaign permissions are assigned at the individual campaign level. If you or your user cannot access a Report, Dashboard, or Campaign, check permissions at the campaign or report/dashboard folder level.
Sharing Content with Other Users
REMINDER Much of eComm's sharing in Salesforce is accomplished through Public Groups. Learn more about Public Groups and how they are managed in our Public Groups wiki.
Sharing a Report Folder
- Navigate to the Reports tab
- Select All Folders listed on the left-hand side
- Find your Report Folder by scrolling or "Search all folders" in the top
- Click the carrot on the far right of the row with your Report Folder name
- Select Share from the dropdown
- In the new popup window, Share with Public Groups or Users, View Access
- Click Share, and then Done

Sharing a Dashboard
- Navigate to the Dashboards tab
- Select All Folders listed on the left-hand side
- Find your Dashboard Folder by scrolling or "Search all folders" in the top
- Click the carrot on the far right of the row with your Dashboard Folder name
- Select Share from the dropdown
- In the new popup window, Share with Public Groups or Users, View Access
- Click Share, and then Done

Sharing a Campaign
There are two ways to share a Campaign:
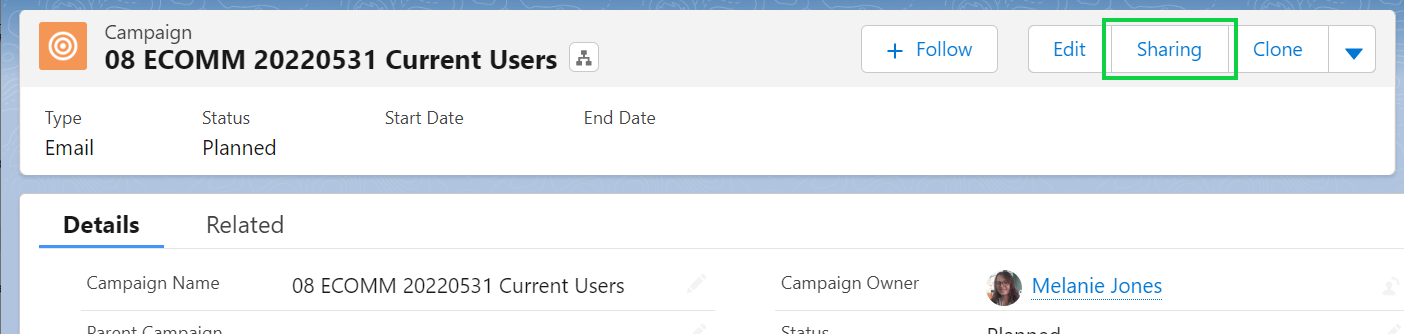
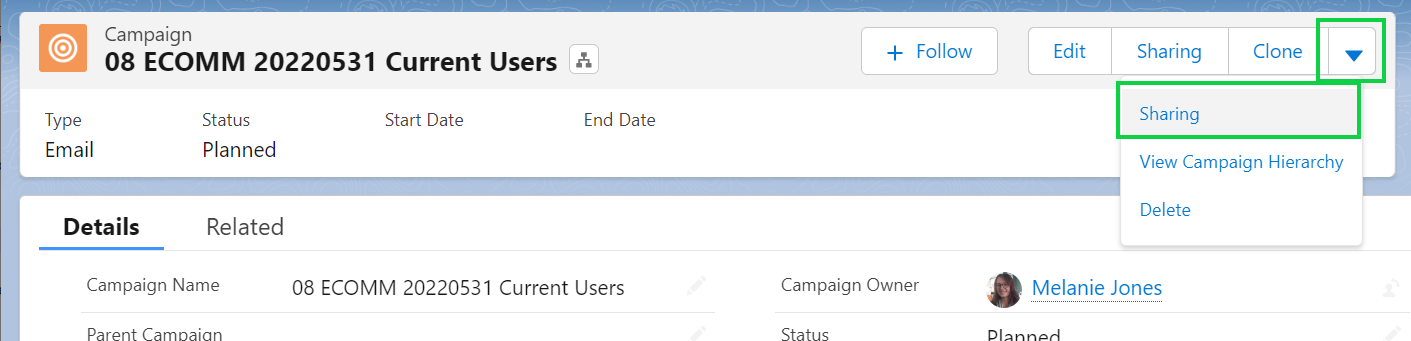
- Once a Campaign exists, click the Sharing button in the top right
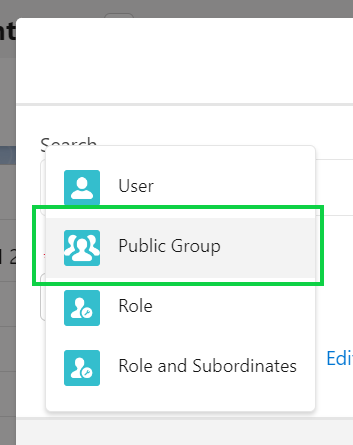
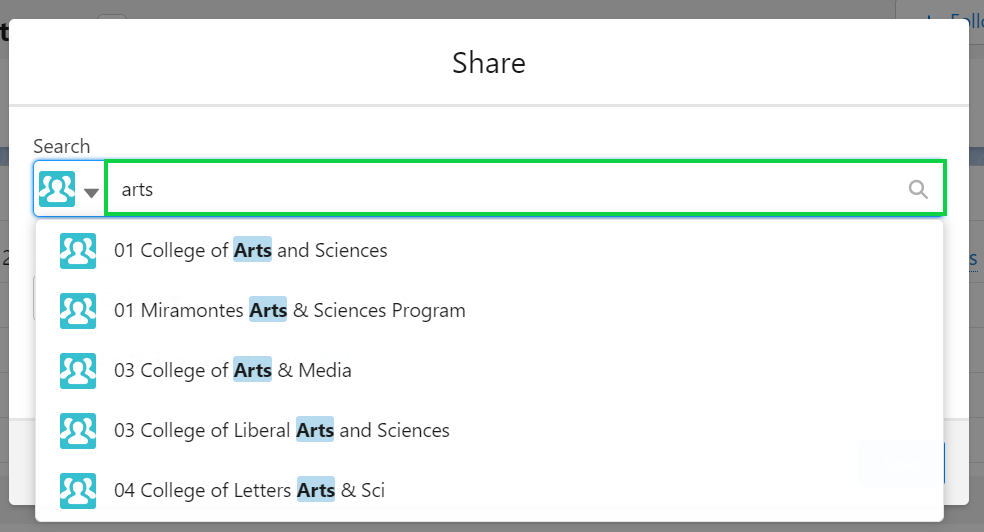
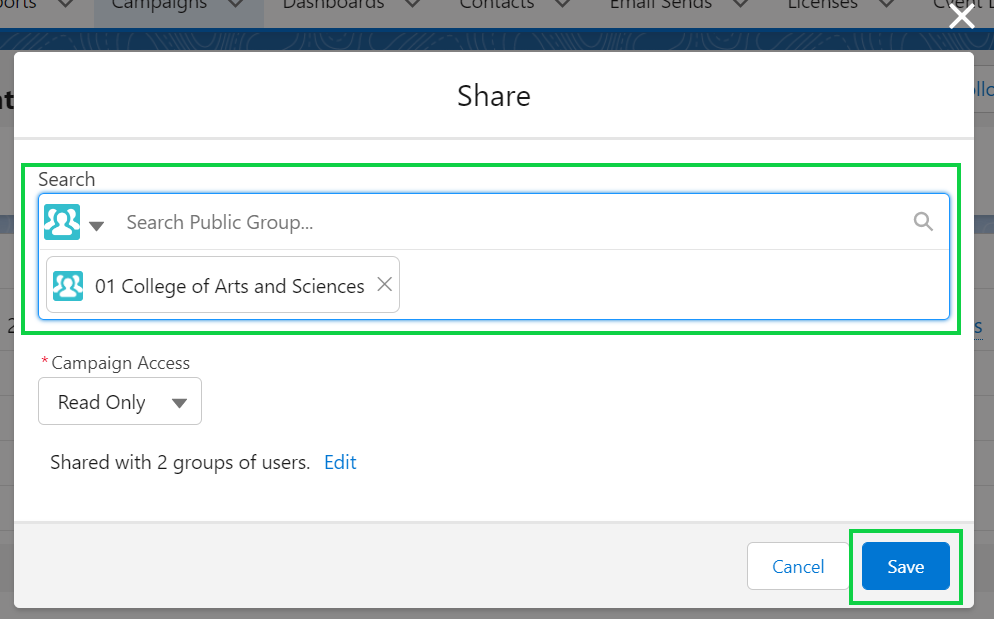
- In the pop-up, it defaults to Users. Click the down arrow with the image of a person to select Public Groups in the dropdown.
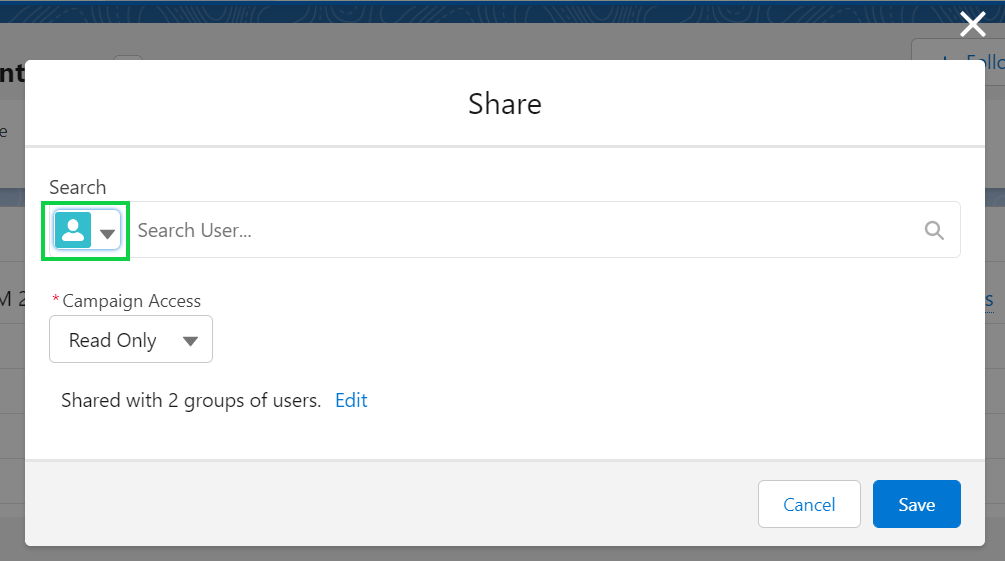
- Search for the name of the Public Group. Select the Public Group name once it appears.
- Confirm the Public Group (or Users) selected are correct. Click the blue Save button.
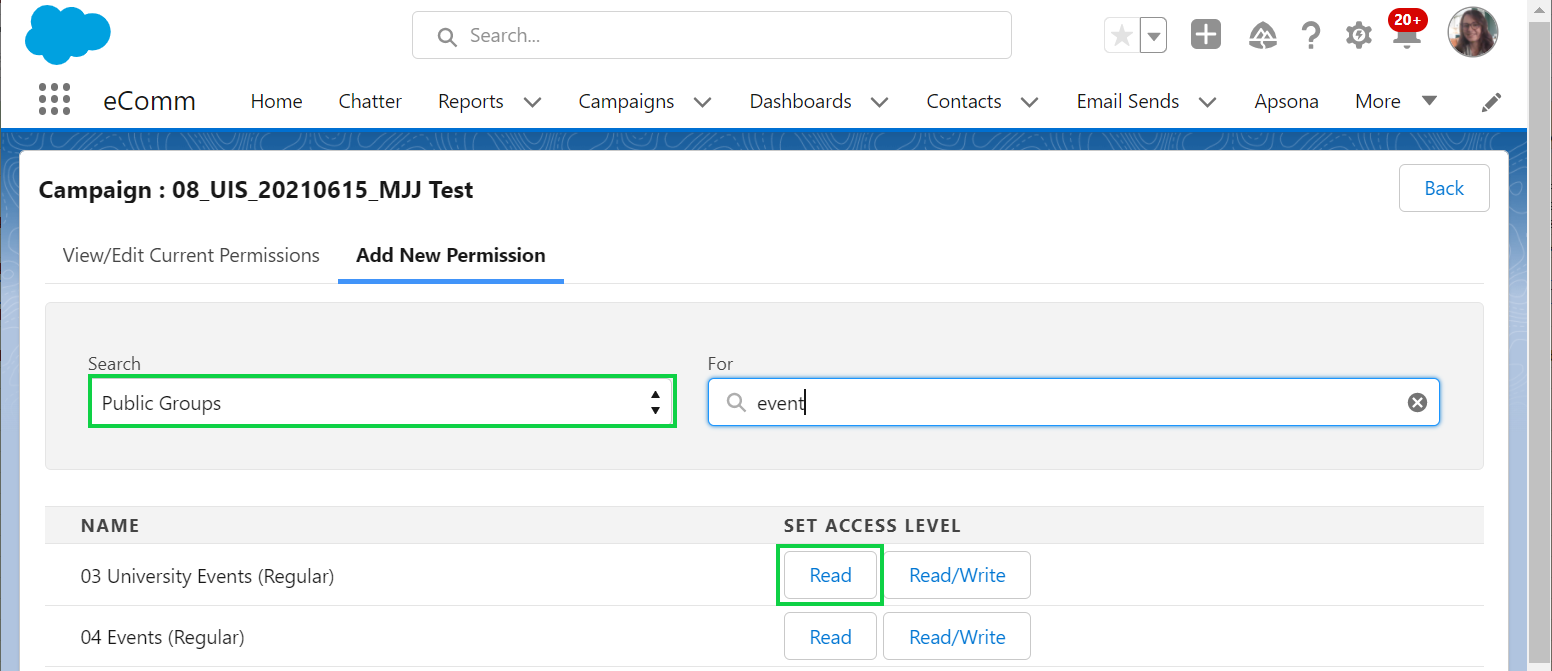
- Click the down arrow next to Clone. Select Sharing in the dropdown.
- Chose the Add New Permission tab
- Search the Public Group or Individual name
- Grant Read access