Audience Creation
A crucial role of an eComm Specialist is to create audiences. Before diving into the multi-step process, it's important to have a basic understanding of terminology and the end-user experience.
- Salesforce Data Model
- Standard vs. Individual Contacts
- Campaigns vs Reports vs Data Extensions
- Sharing Salesforce Report Folders
- Marketing Cloud Data Extensions
- Send Marketing Cloud Email
APPLY YOURSELF
Make a copy of the eComm Specialist Training Plan for the opportunity to apply each step.
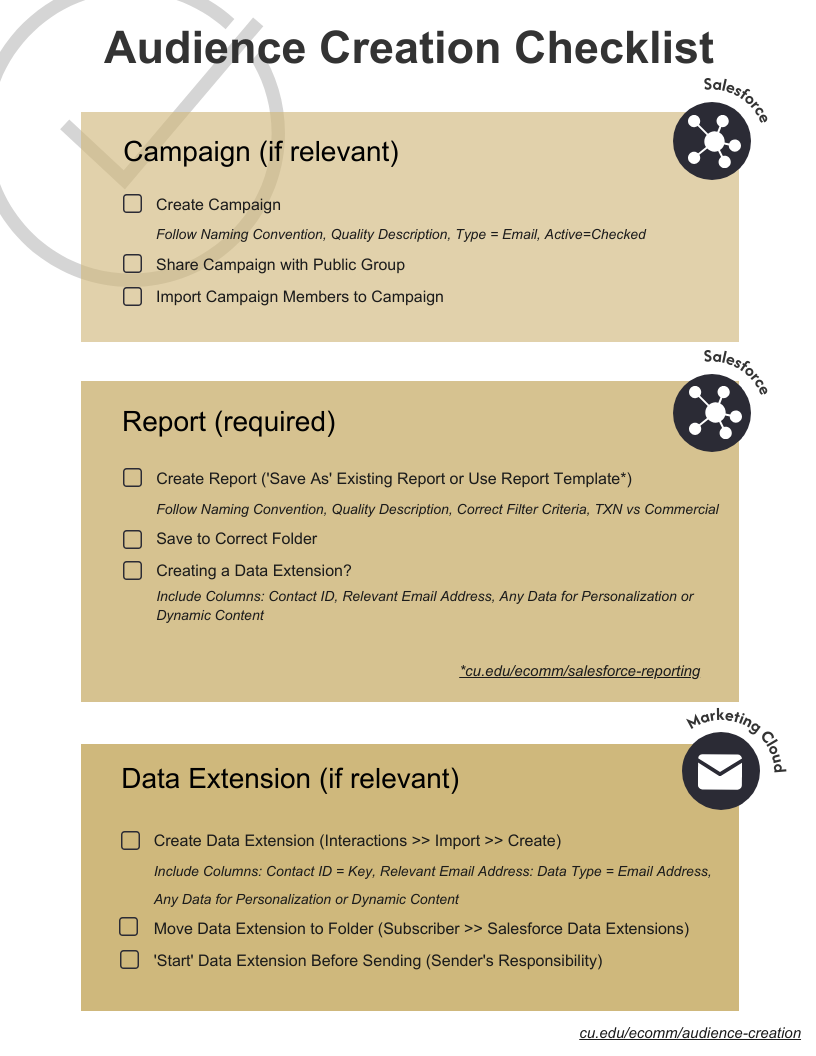
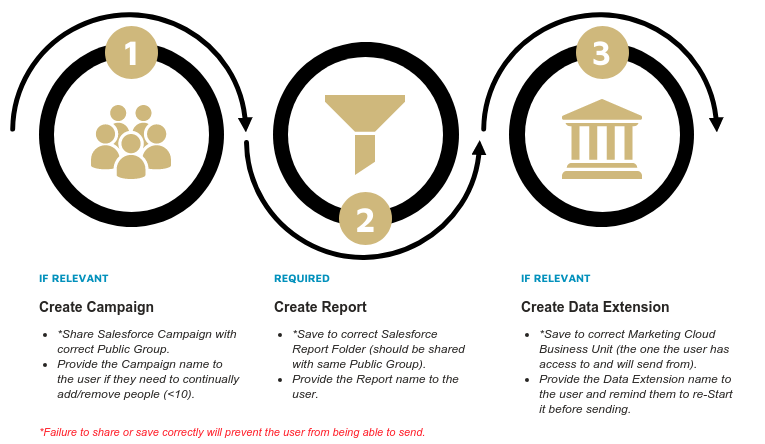
1) Create Campaign (if applicable)
If a user provides a list of folks to email, you'll need to create a Salesforce Campaign (share it) and add Campaign Members. eComm Specialists can add Campaign Members to a Campaign in bulk using Apsona or one by one.
Use your copy of the eComm Specialist Training Plan to create 11 different Campaigns and practice uploading Campaign Members. Each tab (Campaign 1-11) contains a test data set to upload. Paste the Campaign URL into C1 of the respective tab.
Reporting on Email and Event Campaigns is the same - the only difference is Event Campaigns are automatically created via a Cvent-Salesforce Integration while Email Campaigns are created manually.
2) Create Report (required)
A Report is how an audience is captured in Salesforce for a Marketing Cloud email to deliver to. Salesforce Reports are based on Salesforce data - this could be the Campaign created in step one or data from a source system (examples below). Use the Reporting wiki with templates for common audience queries. Each template can be customized to specify your targetted population further.
Examples of Reports based on Campaigns:
- Donors who gave to a specific fund
- People who walked into my office today
- Prospective Students
- Event Registrants (if using Cvent, this Campaign is automatically created via an integration)
All of these populations must leverage Campaigns. In other words, they do not exist in Salesforce as a data point from a source system, so this data must be uploaded (via Campaigns and Campaign Members).
Examples of Reports based on Source System Data:
- UCCS Degreed Alumni
- Active CU Denver Business School students
- System Employees
All of these populations can be queried in Salesforce based on data integrated from a source system.
Use your copy of the eComm Specialist Training Plan to create a variety of Reports. Navigate to the tab labeled Reports to use the description in Column A to create a Report (paste the URLs in Column C).
3) Create Data Extension (if applicable)
If the communication is intended for internal audiences (faculty, staff, or students), you'll want it delivered to their campus email addresses (e.g., @colorado.edu, @ucdenver.edu, @cu.edu, or @uccs.edu). To do so, you'll need to send to a Data Extension. An eComm Specialist will create the Data Extension, but it's the sender's responsibility to re'Start' it before each send.
Use your copy of the eComm Specialist Training Plan to create Data Extensions. See the tab labeled Data Extensions and paste the Data Extension name in Column E.
It's also possible to upload external data from a CSV file into a Data Extension.
Audience Creation Checklist PDF