


Automatic Cvent-Salesforce Integration
There is an automatic integration that occurs between Cvent and Salesforce. By tracking registrants' event participation to Salesforce, we can better understand our constituents and how they engage with CU. Users can leverage this data to exlude registrants from reminders or target future messages.
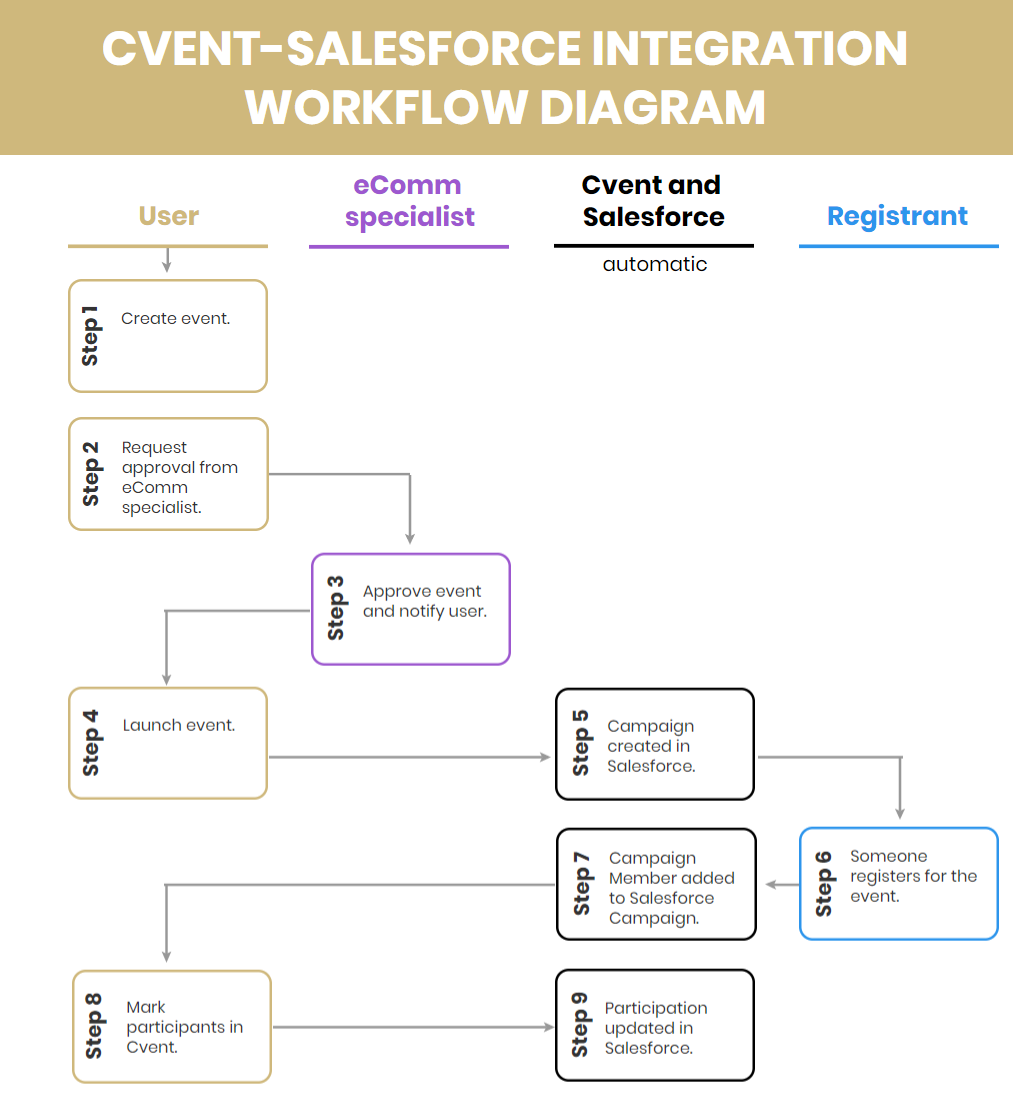
STEP 1 | Create Event
Create your event to fit your needs. The Cvent-Salesforce integration will occur automatically, where Primary Registrants will be tracked in Salesforce.
The only consideration for you is if you want to track the Primary Registrant's Guests to Salesforce as well. If yes, you'll need to configure your event to 1) collect Guest Email Address and 2) send Guests to the Address Book. If it's you first time, ask your eComm specialist to review it when approving your event.
How-To Capture Guests in Salesforce
STEP 2, 3 & 4 | Request Approval & Launch Event
Once you have tested your event, send it to your eComm specialist for Approval. You will be notified once it's approved and ready for you to launch.
Cvent Approval & Launch How-To
STEP 5 | Campaign Automatically Created in Salesforce
- When you launch your event, Cvent automatically:
- creates the Campaign in Salesforce
- The only person who has access to this Campaign in Salesforce is the person who created the event. You need to share it with your Public Group if other's need access.
- If the person who created the event does not have a Salesforce license, their eComm specialist will need to share their Campaign.
- The only person who has access to this Campaign in Salesforce is the person who created the event. You need to share it with your Public Group if other's need access.
- integrates the particular event with the particular Salesforce Campaign
- creates the Campaign in Salesforce
Required Event Approval
Your eComm specialist must approve your event before you can launch it.
- Your Salesforce Campaign name is created based of information in Cvent to follow a consistent naming convention.
| Campus_ | Event Start Date_ | Event Name |
|
01 = Boulder |
YYYYMMDD |
- EXAMPLES
- 01_20190601_2019 Buffalo Bicycle Classic
- 02_20190325_April First Friday Breakfast
- 08_20190411_eComm Training
Campus - Select the campus that you work at, not the location the event is hosted. In other words, if you work at UCCS and are hosting the event in Boulder, you should indicate your campus as UCCS.
Event Name - If you have multiple events on the same day, it's best to give your event a unique name. That will make differentiating between different Campaigns in Salesforce easier.
FIND YOUR CAMPAIGN IN SALESFORCE
To easily search for your Salesforce Campaign, search for the event name or start date.
STEP 6 & 7 | People Register for Event
When folks register for your event, they will automatically be sent to the Salesforce Campaign as a Campaign Member. Their status will be Registered. To view this:
- Navigate to the Salesforce Campaign
- Click the 2nd tab: Related
- Click View All under the Campaign Members that are listed.
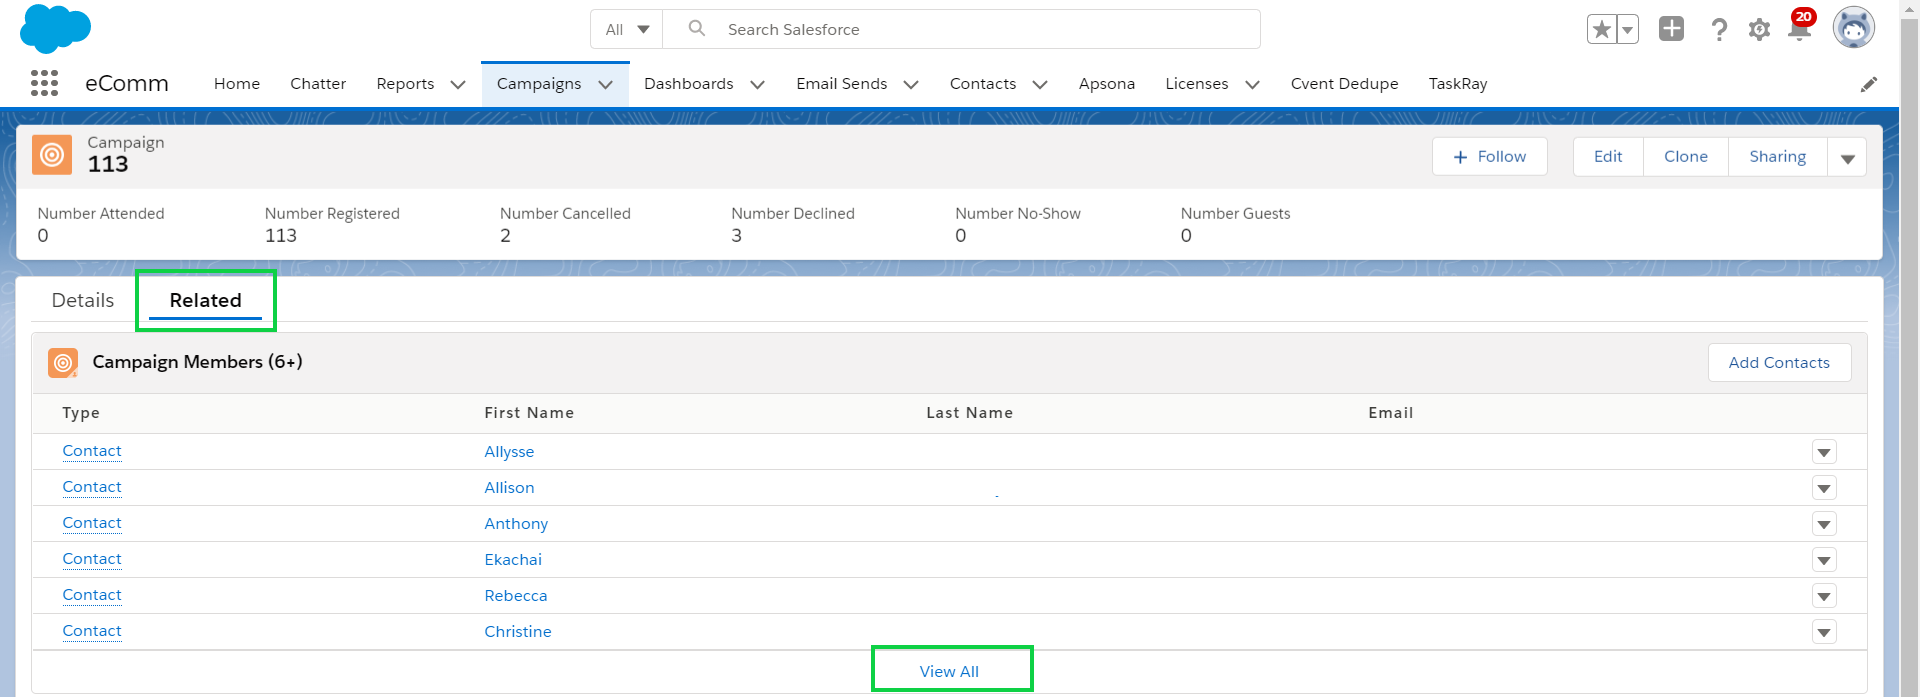
- Now you will see a Status column
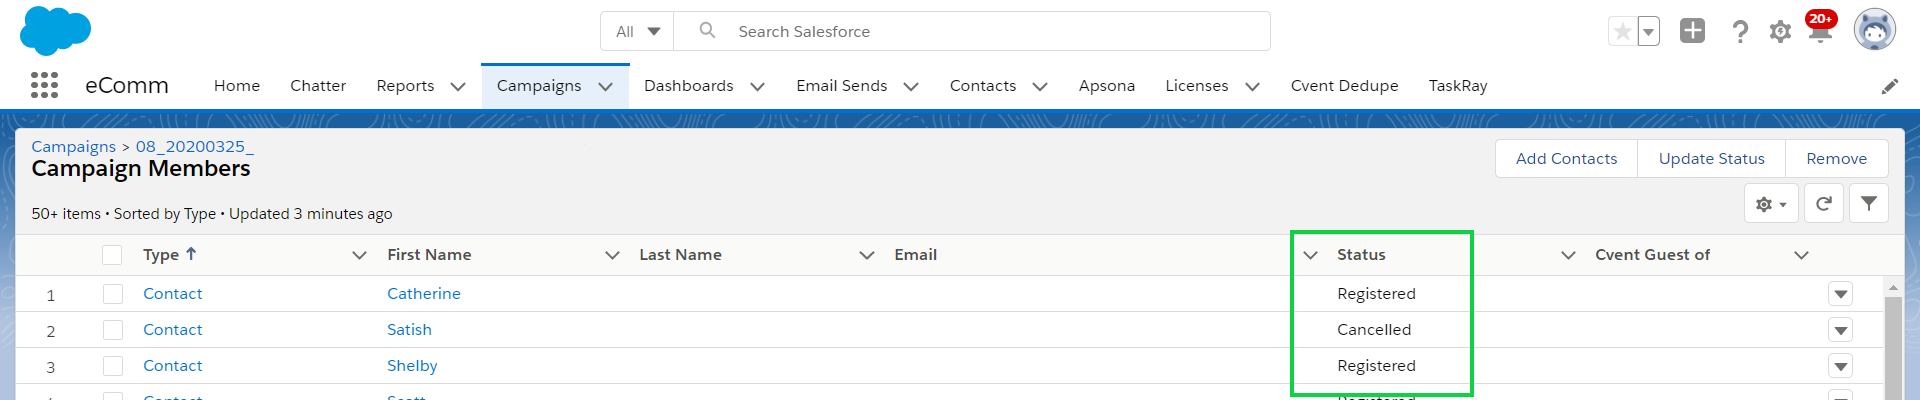
NOTE If a registrant Declined or Cancelled their registration, that status will be reflected in Salesforce.
STEP 8 & 9 | Mark Attendee Participation
Marking event attendance is an easy way to collect powerful, actionable data. Rather than knowing just who registered for your event you can differientate between those who actually attended and others who were no-shows.
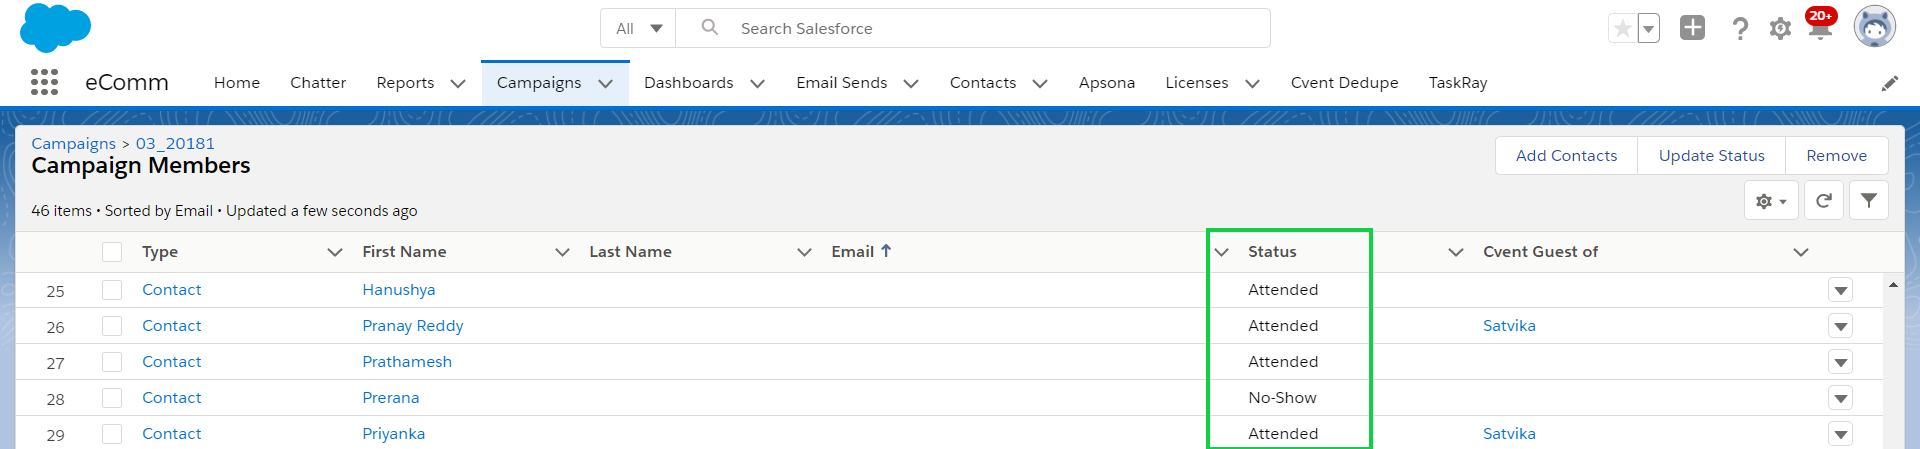
IMPORTANT If you do not track who attends your events, it will appear in Salesforce that everyone was a No-Show for the event.
In-Depth Cvent-Salesforce Integration