


Cvent | Welcome to the New User Experience!
Cvent's new design experience updates the look and feel of almost all their core products. By unifying the visuals and navigation across the applications, it is meant to make Cvent products easier to learn and use. The accompanying design standards also help Cvent develop and release new features faster.
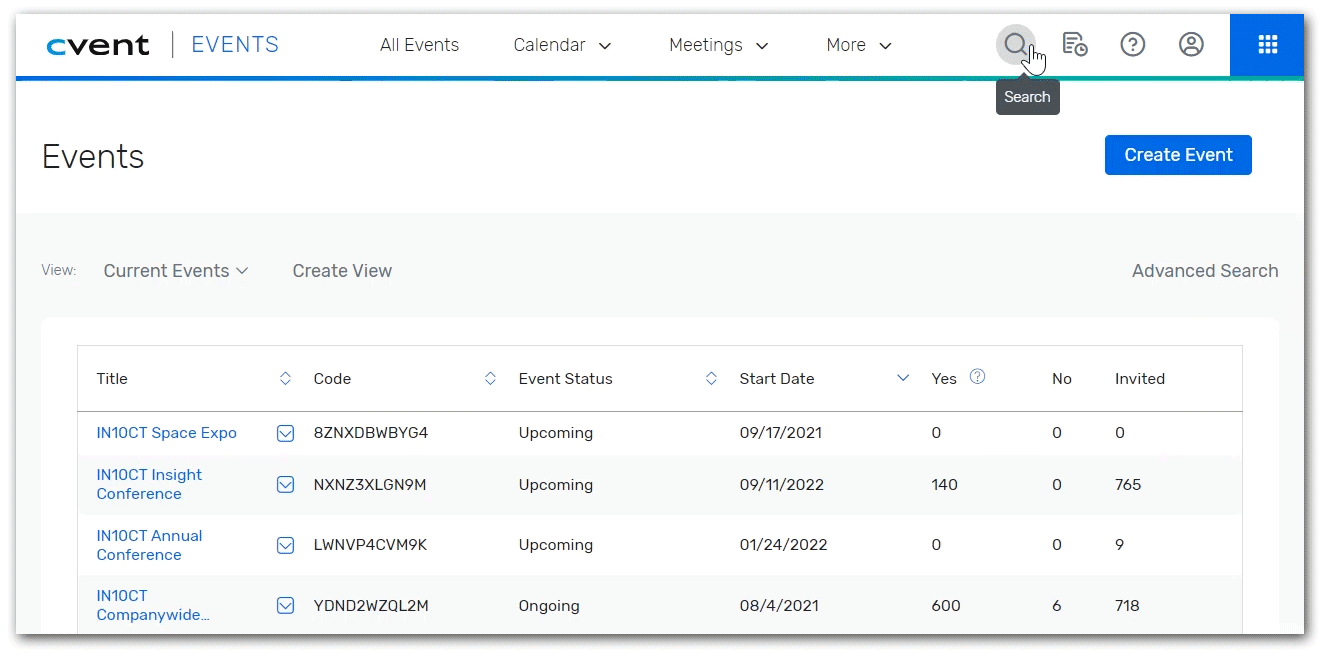
Homescreen Navigation
Once switched to the new user experience, you'll notice a different look with a lighter color scheme. For the most part, the location of different actions has remained the same.
Four common actions that are still located in the top right include:
- Search | Click the magnifying glass icon to search for events.
- Recent Items | Click the paper with a timer icon to quickly access events you recently viewed.
- Help & Support | Click the question mark icon to access Cvent's Knowledge Base.
- User Utilities | Click the profile icon to log out.
CHANGE: Event Creation
There are two ways to clone an existing event.
IMPORTANT Not all events can be copied. Classic events cannot be cloned since they are sunsetting. Express and Flex events can be cloned.
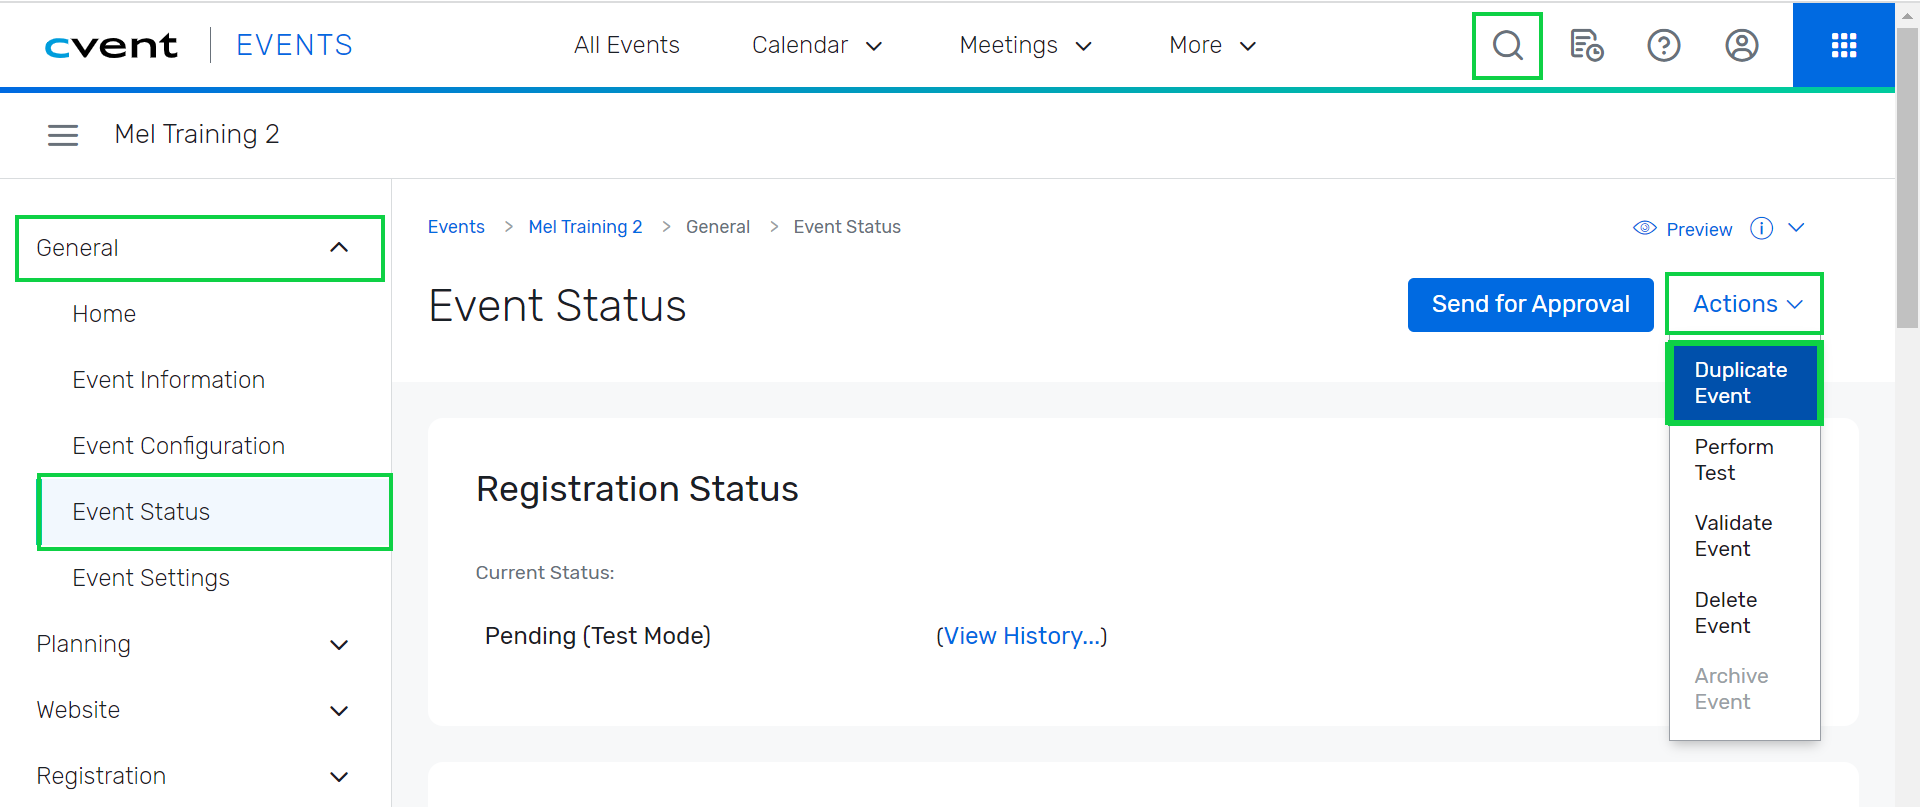
Open Event To Be Cloned
- Open the event you wish to clone
- You can search for your event with the magnifying glass icon in the top right.
- Under the General section of the left navigation, click Event Status.
- Click Actions in the top left, select Duplicate Event in the dropdown.
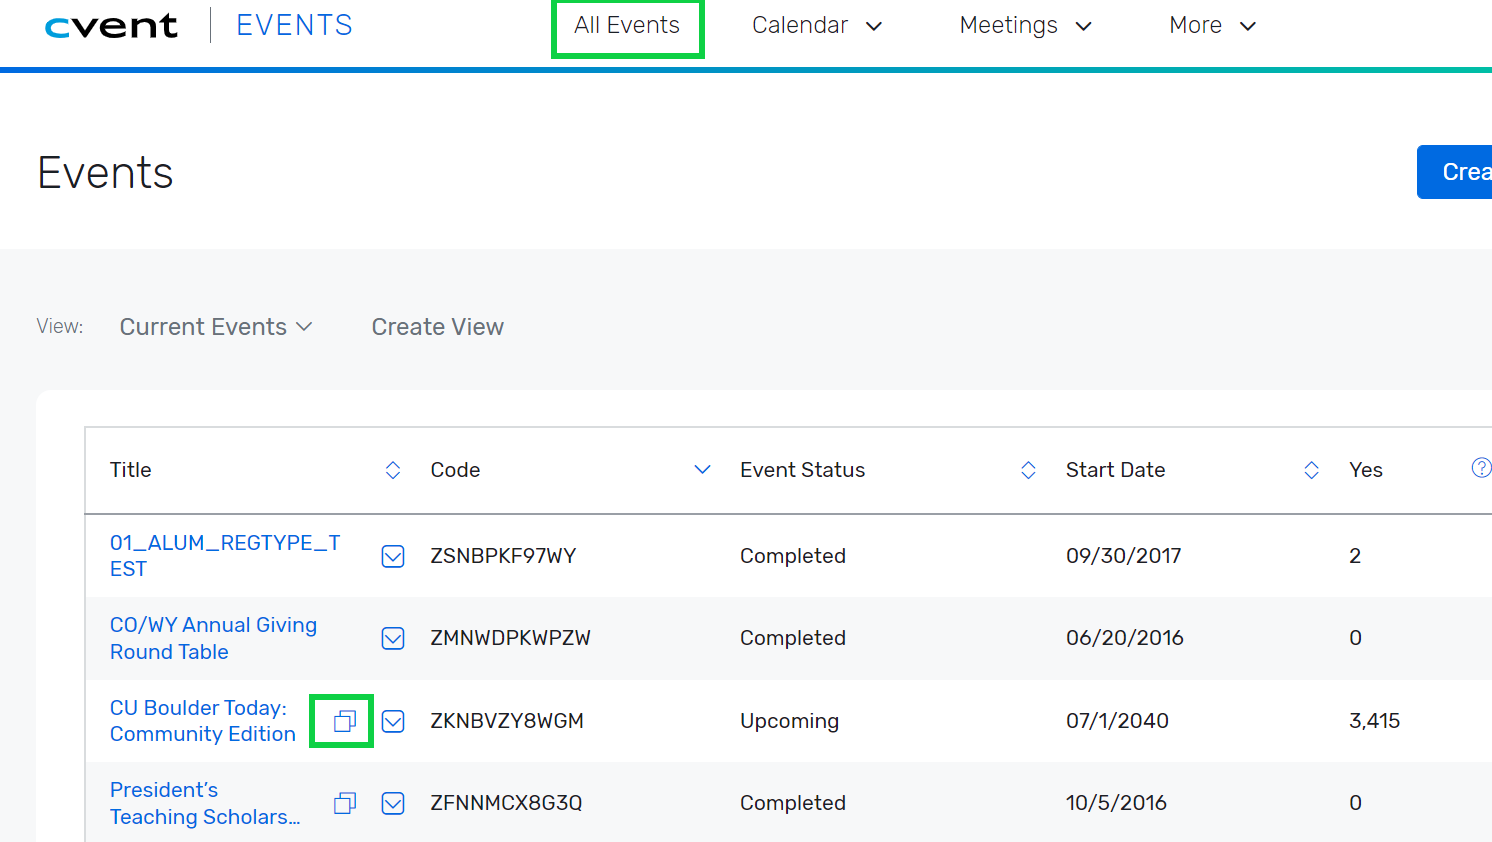
All Events Page (1-Click Clone)
- If your event is listed in the All Events homepage (top navigation), click the blue Copy Event icon to the right of the event title you want to clone.
- TIP! Create Views to customize your All Events page with the events you clone or access most often.
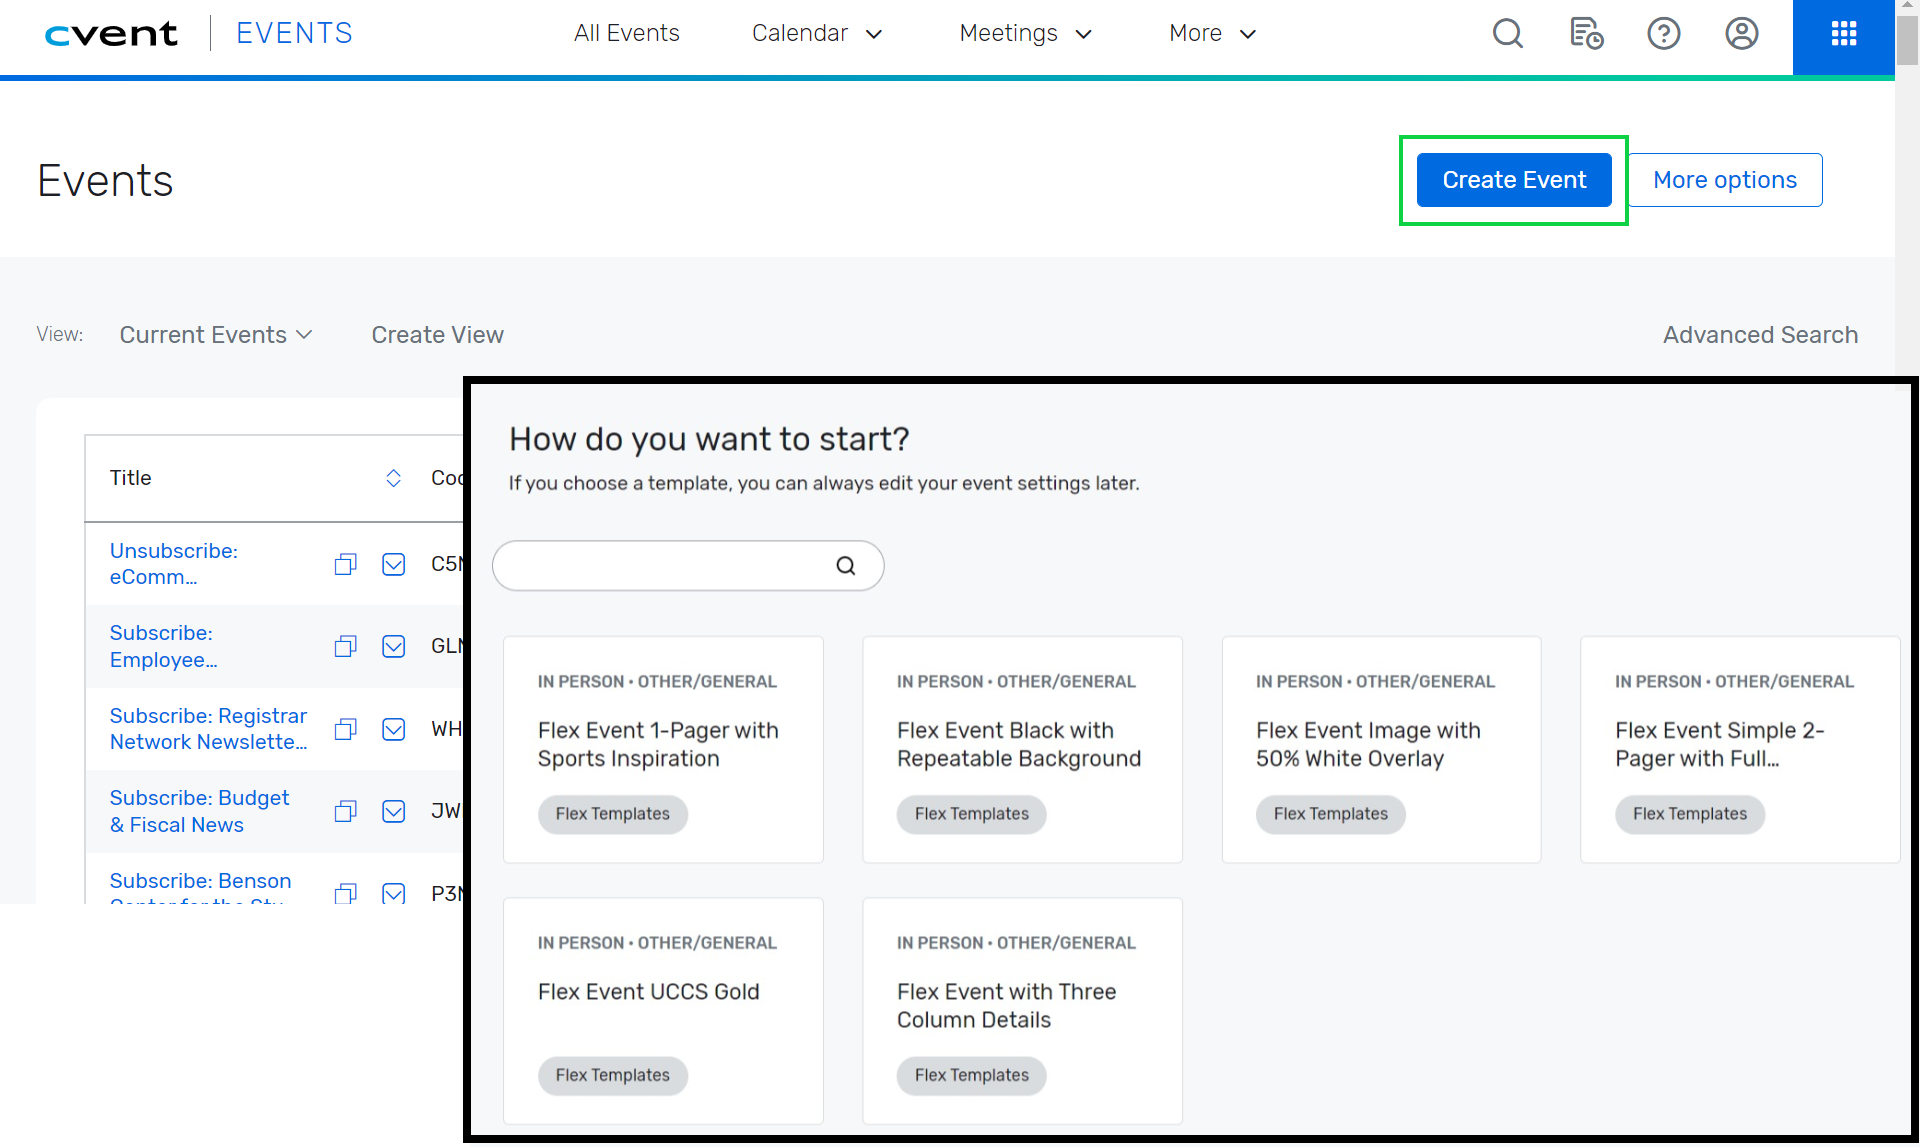
Users can clone one of our CU Branded Templates by:
- Clicking the blue Create Event button
- Selecting one of the available templates
Event Navigation
Once you open an event, you'll notice the biggest difference of the new user experience; the left side, vertical navigation. Let's review some key areas:
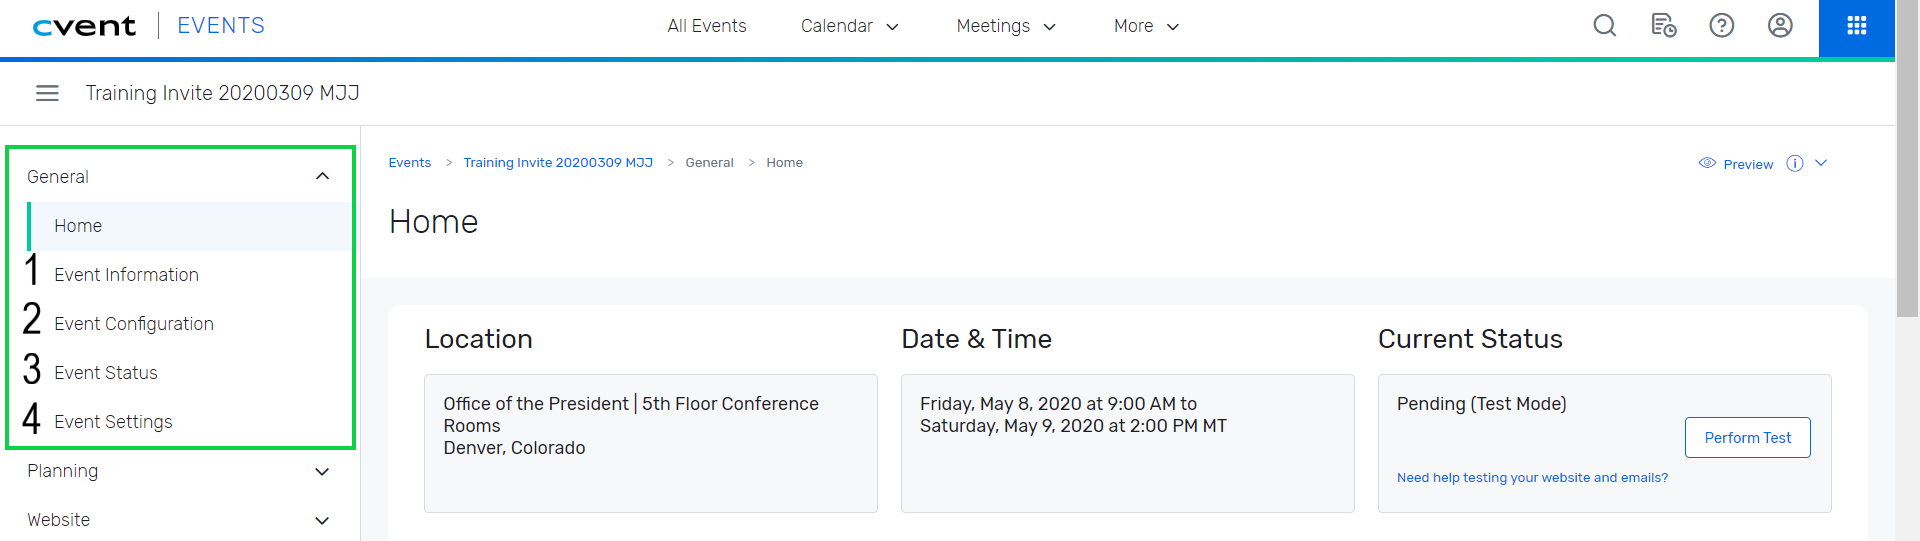
General
- Event Information | For your basic event details, such as: event title, start/end date, event planner, etc.
- Event Configuration | For enabling additional event features, like: guests, sessions, speakers, social media, etc.
- Event Status | For requesting event approval from your eComm specialist.
- Event Settings | For sharing your event with other Cvent users.
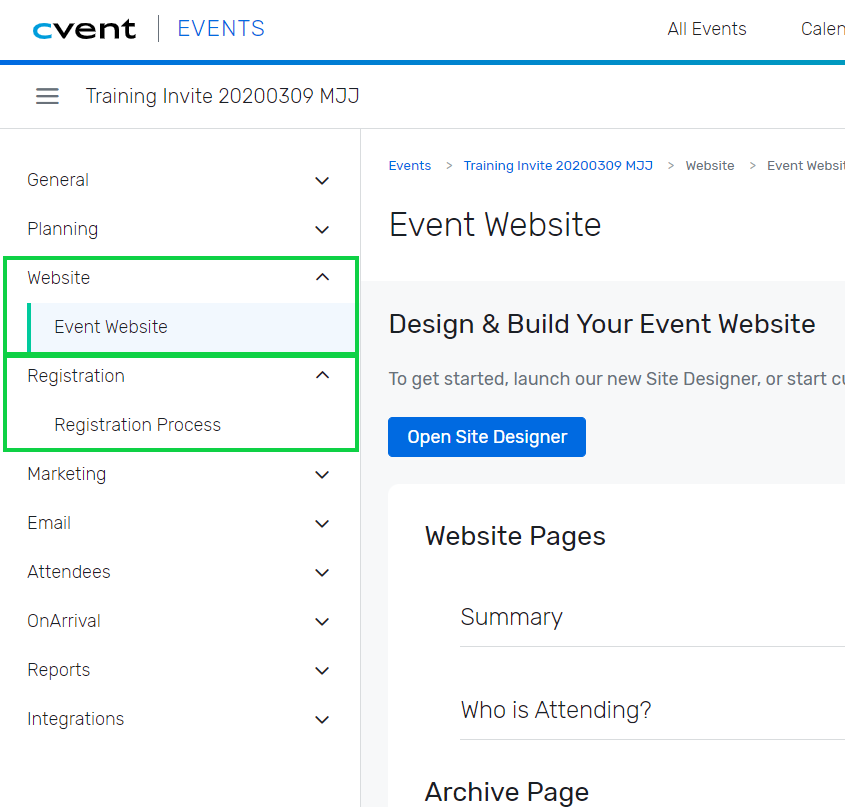
Website & Registration
You can open the Site Designer to customize your website and registration process in two ways. In the left navigation, either:
- Click Event Website after expanding the Website section.
- Click Registration Process after expanding the Registration section.
Each path will present you with a blue button to Open Site Designer.
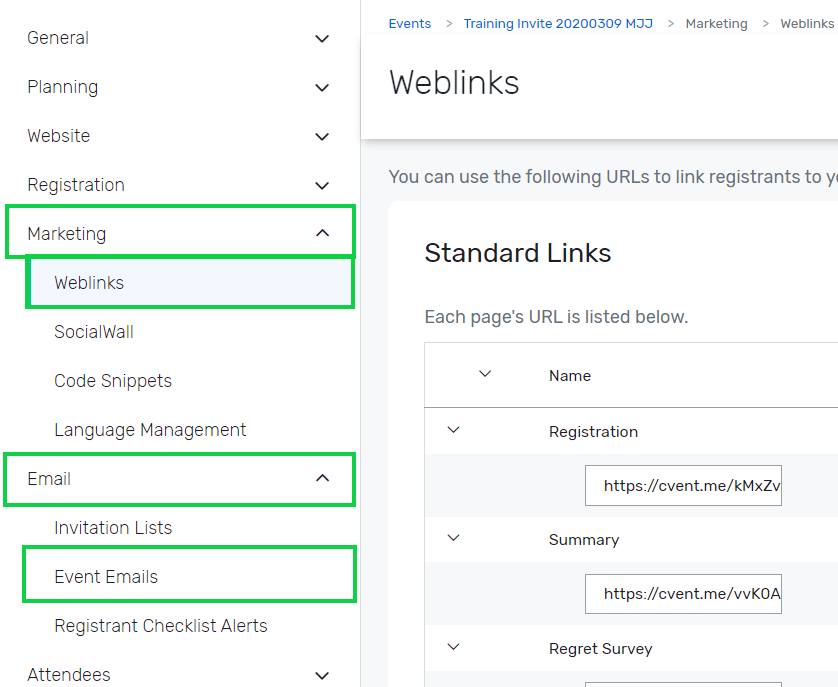
Marketing & Email
- Weblinks can be found after expanding the Marketing section. Learn more about Weblinks.
- Event Emails are found after expanding the Email section.
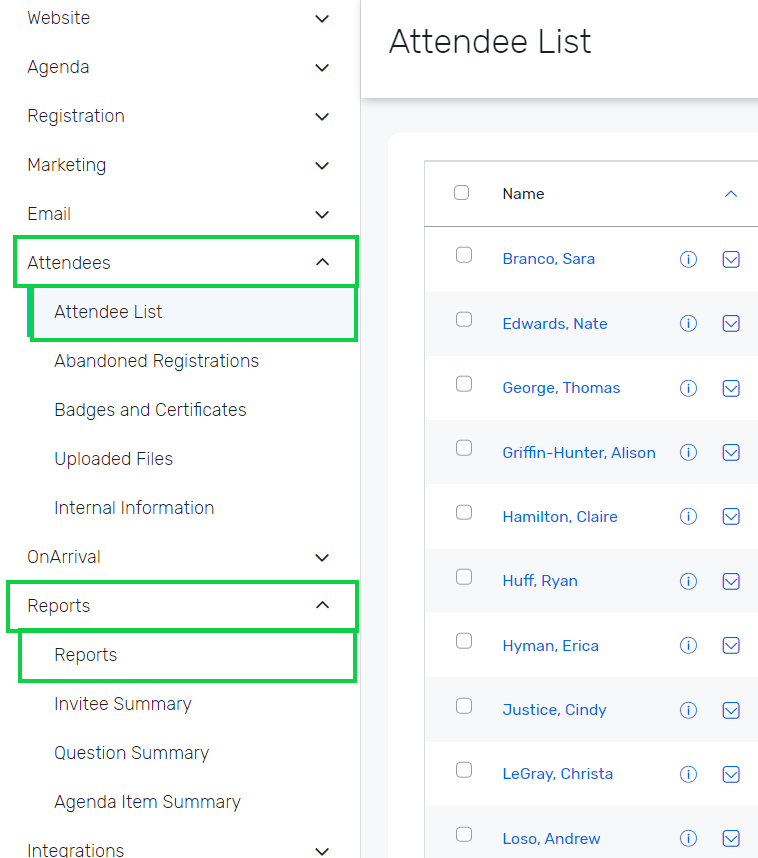
Attendees & Reports
- Attendee List found under Attendees present a list of registrants to view, search and modify. You can also quickly register an invitee here. Learn more about registrant management.
- Reports under the Reports section can provide details on registrants, email engagement, financials and more. Learn more about Reporting. Take it a step further by working with your eComm specialist on getting Reports published to the Portal to get others access for free.
- Cvent Knowledge Article
- Cvent Video, 17 min.
- eComm Video, 15 min.