


Cvent Reporting
Reports provide data for your event, including registrant details, emails, survey responses and more. Reports are grouped into categories to help you locate the one you need, since starting with the right one is key to accessing the desired data.
Trying to get your Report Published to the Portal?
Don't forget to share the Report Visibility with your eComm specialist. Otherwise, the eComm specialist cannot view the saved Report or Publish it to the Portal. Learn more about the Portal.
Depending on what features were enabled in the event, different Report Templates will be available. If you're not sure which report to run, you can reference this list of commonly used reports, the reporting consolidation guide, or create an entirely custom one from scratch.
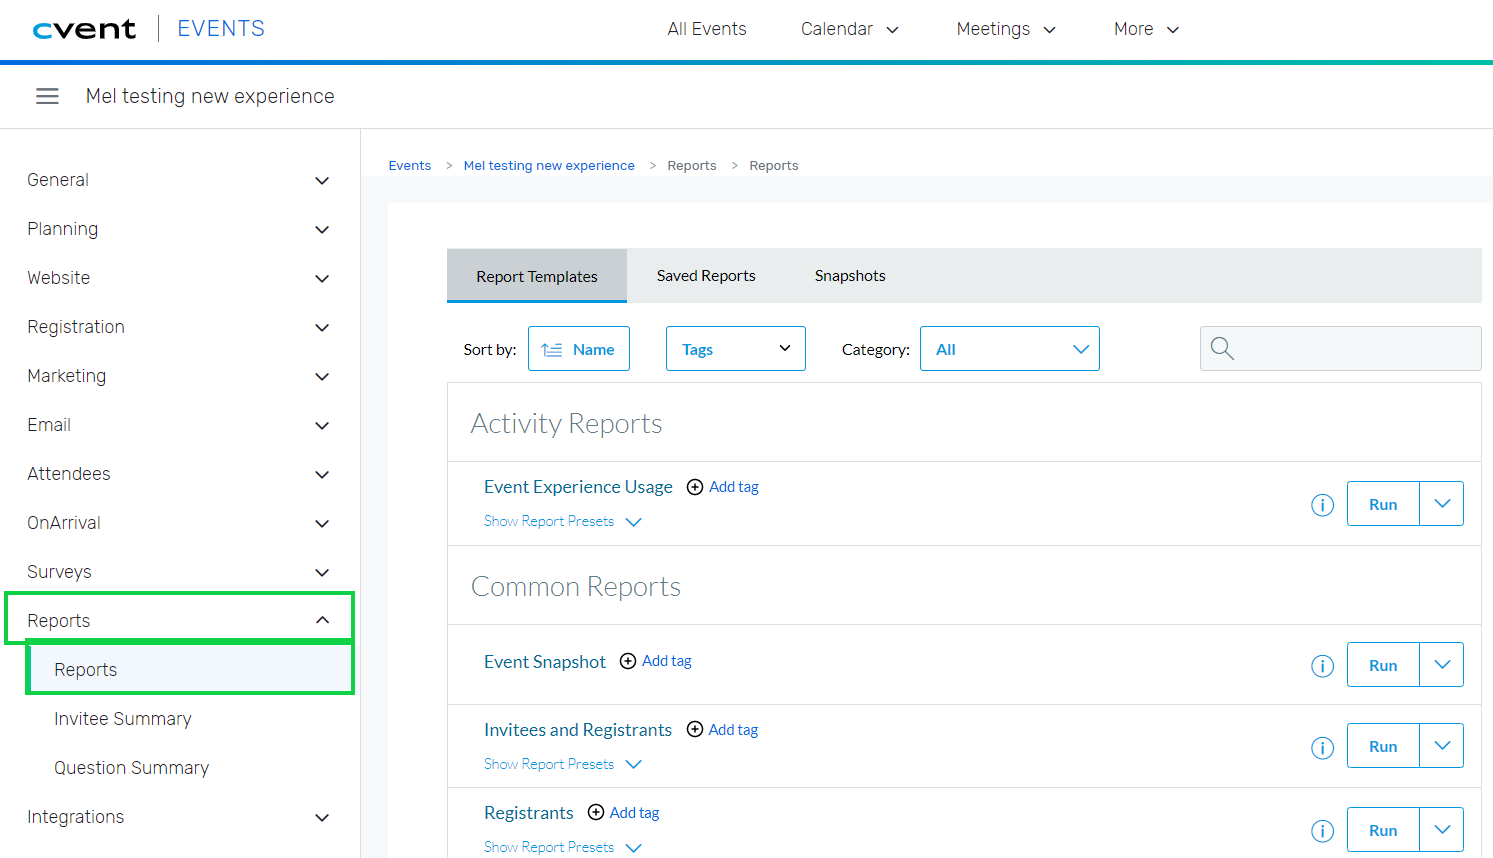
- To access Event Reports, begin by selecting your event.
- In the left navigation, click Reports after expanding the Reporting section
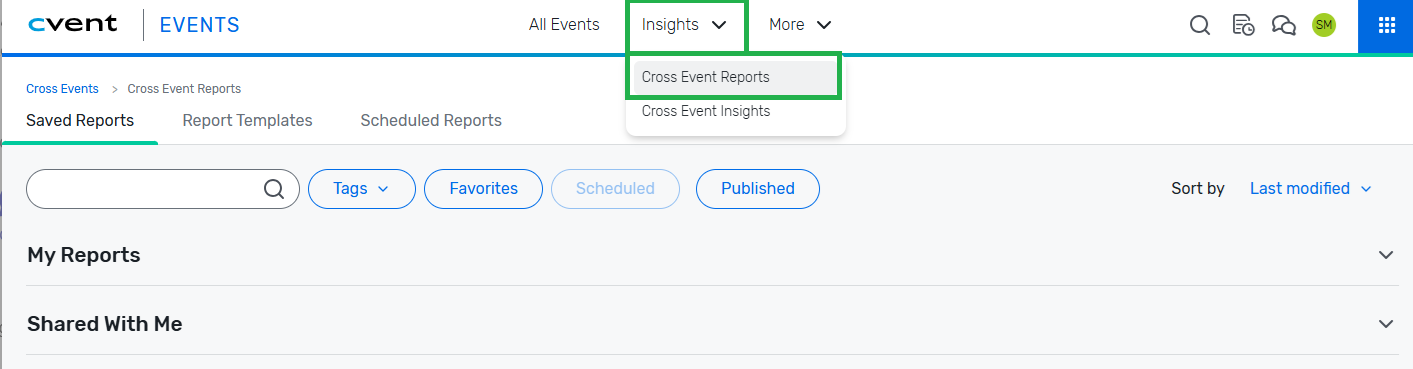
- Hover More in the top >> Select Cross Event Reports in the dropdown
eComm Hosted Sessions
June 2, 2025 Session Recording
Passcode: .bpKane0
Save When saving your Report, you can expand Report visibility to other licensed Cvent users. This is not the same as publishing reports to the Portal to get others access to reports for free.
You can also schedule a Report to get an email notification at a desired cadence. Only the person saving will get the notification, not all those who have visibility.
TIP FOR LONG RUN TIMES
Sometimes Reports can take a long time to run. Whether you are getting logged out or you just don't have the patience, queue the Report and access it when it's ready.
- When the Report is running, select the option below the spinning wheel to Queue Report.

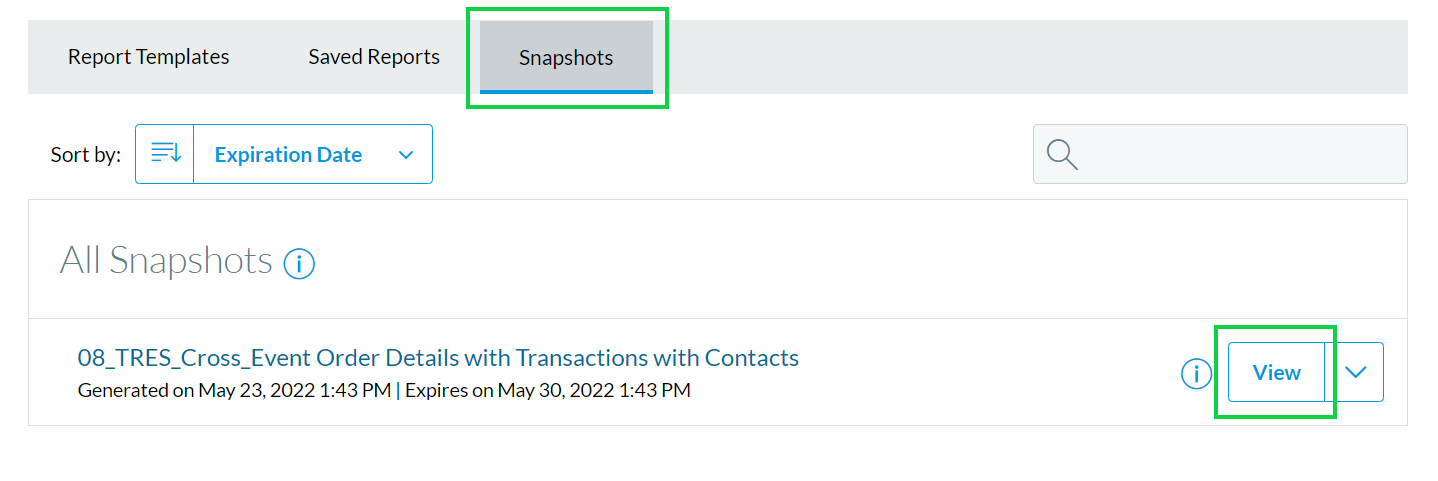
- Find the queued report in the Snapshots tab
- View the report. Remember the data reflects when the report was queued, not when it is viewed.
- Once viewing the report, users can export and filter as usual.
- Delete a view by clicking the dropdown arrow to the right of the View button
- Portal Users do not have the same ability to queue reports.