Cvent Portal
NOTE Publishing Reports to the Cvent Portal will require the support of your eComm specialist or Super User.
The University of Colorado Cvent Portal makes Cvent Reports available to stakeholders via a secure login. These free licenses grant individuals access to specific Reports that can be viewed in real-time, filtered and exported as needed. See below for instructions for existing users and those becoming Portal Users for the first time.
Access Reports for Existing Portal User
- Once a Portal User can log in to CU's Cvent Portal (bookmark this link) to input their username and password.
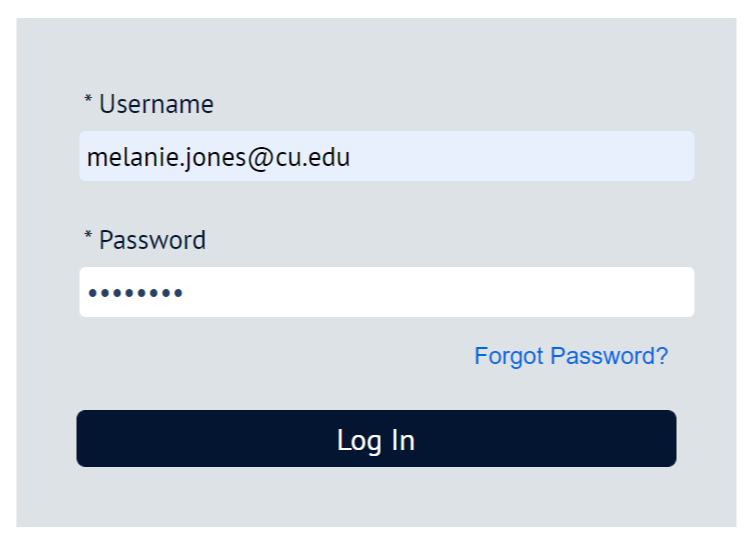
Forgot Password? If you can't login, click the Forgot Password? link. After providing your username (your email address) you'll recieve an email to reset your password.
- After logging in, Portal Users see Reports that have been made available to them to Run
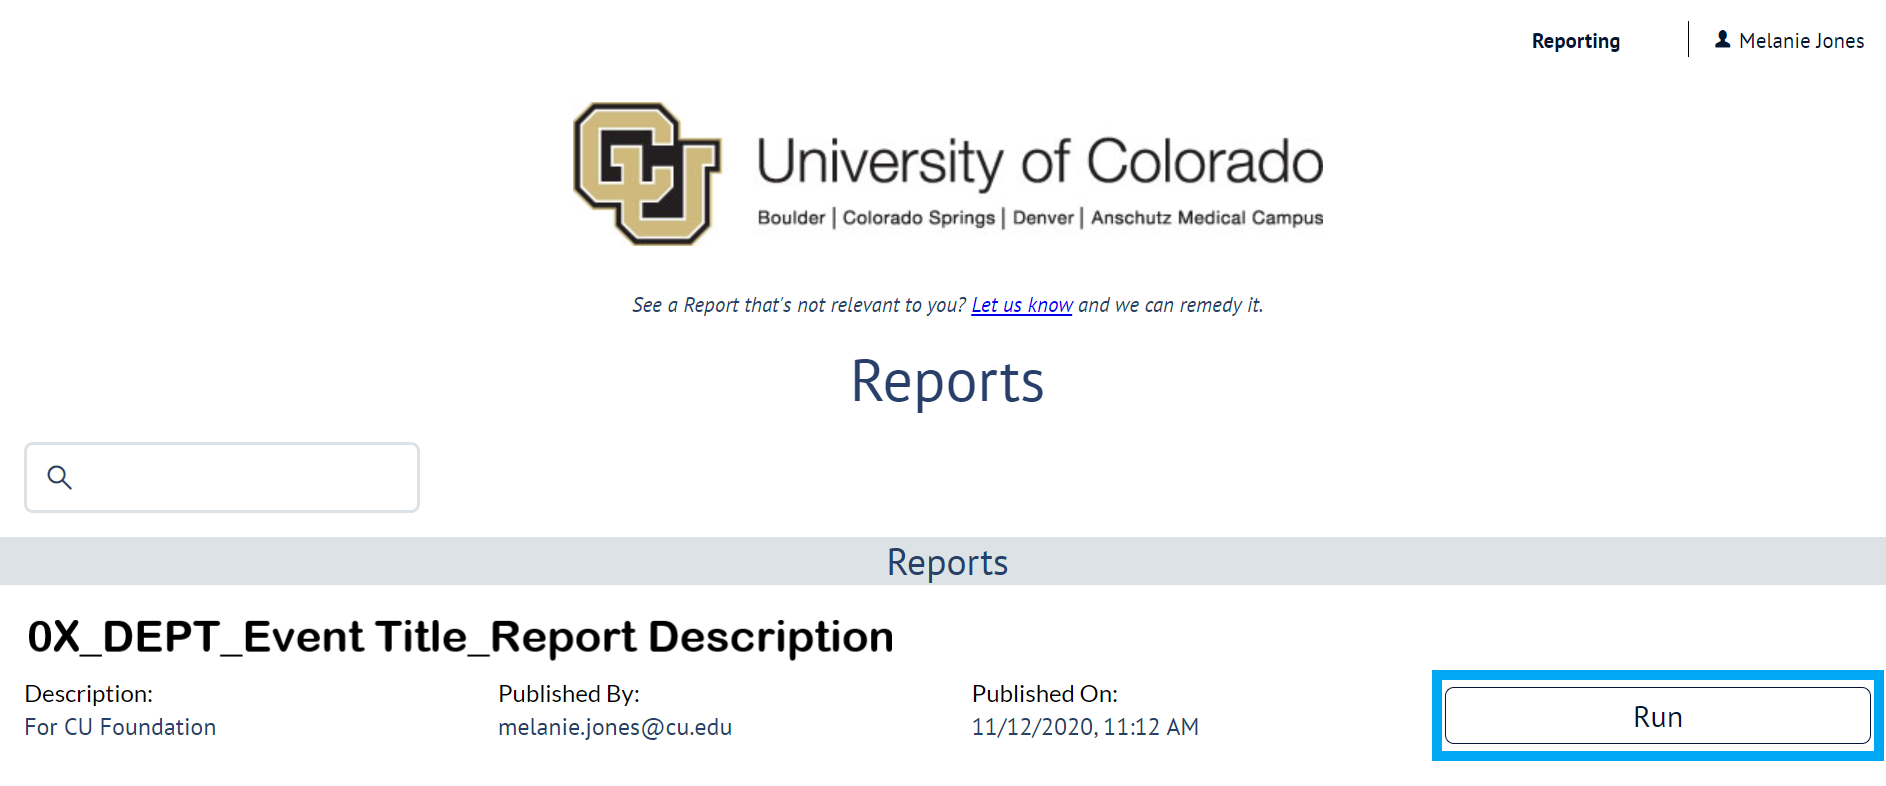
- Once a Report is ran, a portal user can view, filter and export the information as needed.
View Report Details without needing to export. You can scroll down to see more rows and to the right to see more columns.
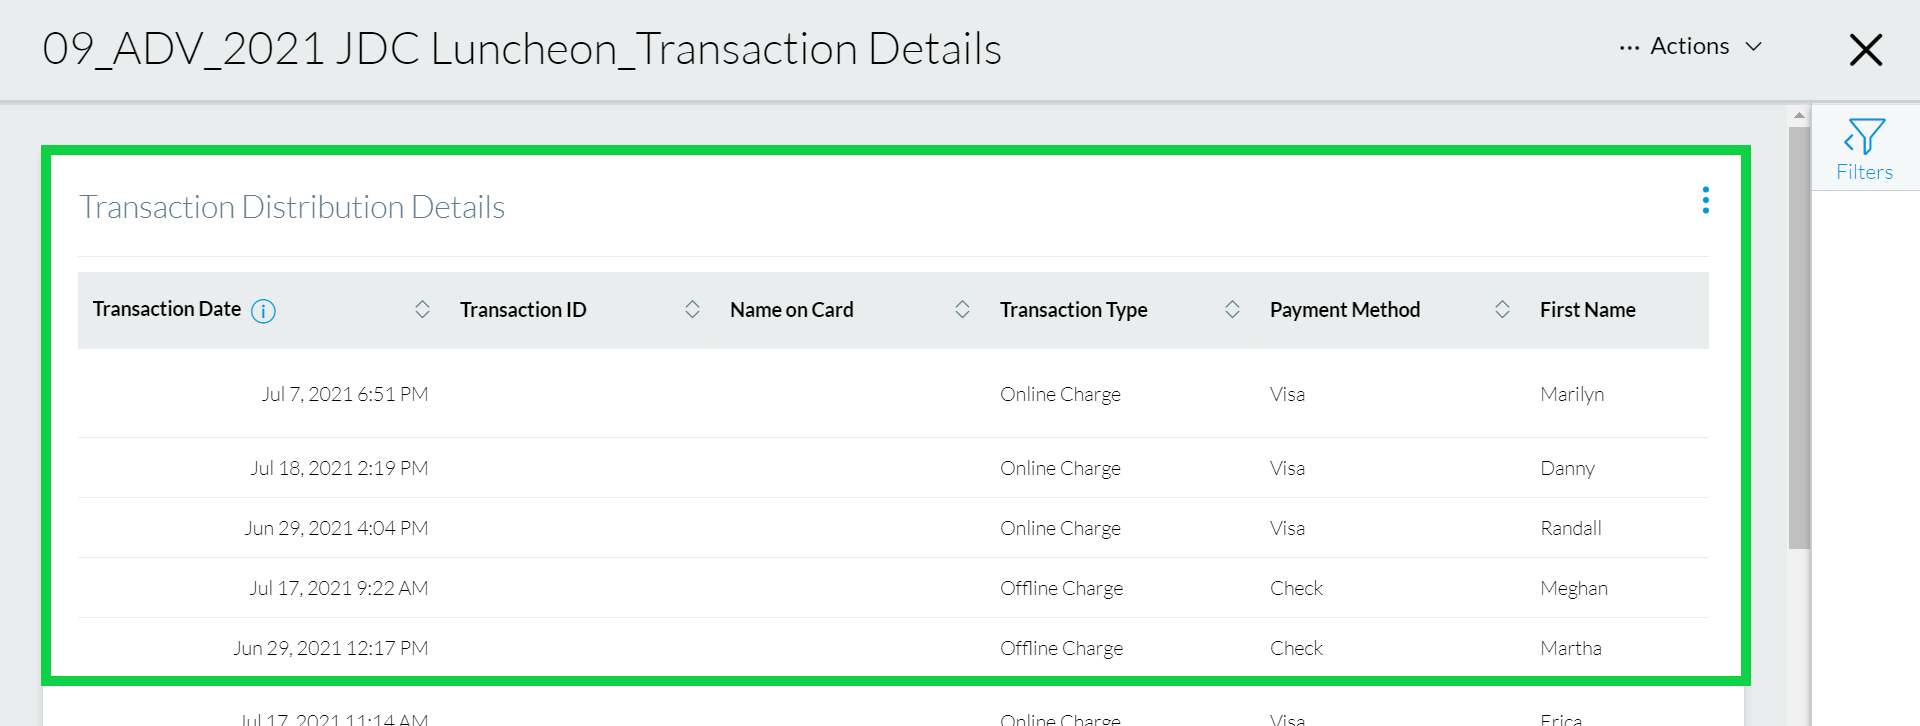
NOTE If another user has previously applied a filter, it may still be applied. This could result in you viewing or exporting a fraction of the data. Check the Filters to confirm you have your intended information.
The Report creator can make a variety of relevant filters available to be applied in the Report. Portal users can apply Filters to view and/or export a segment of the data in two easy ways:
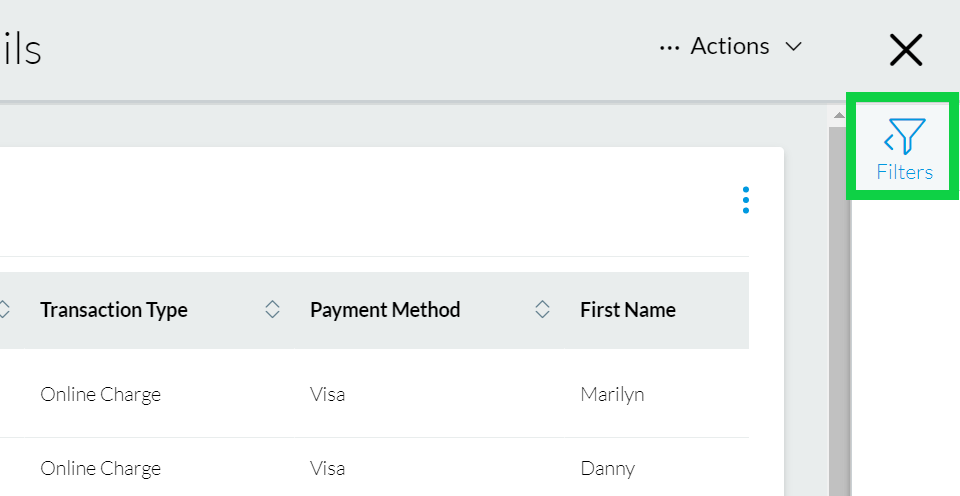
1 | Click the Filters on the right hand side
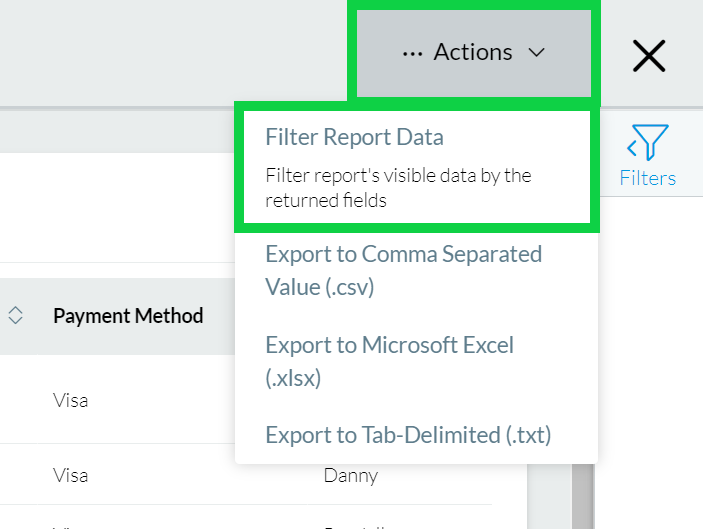
2 | Hover Actions in the top right >> Click Filter Report Data in the dropdown
- Either route will expand the Filters pane on the right side.
- Scroll through available filters to modify them, then click the green Apply button towards the bottom.
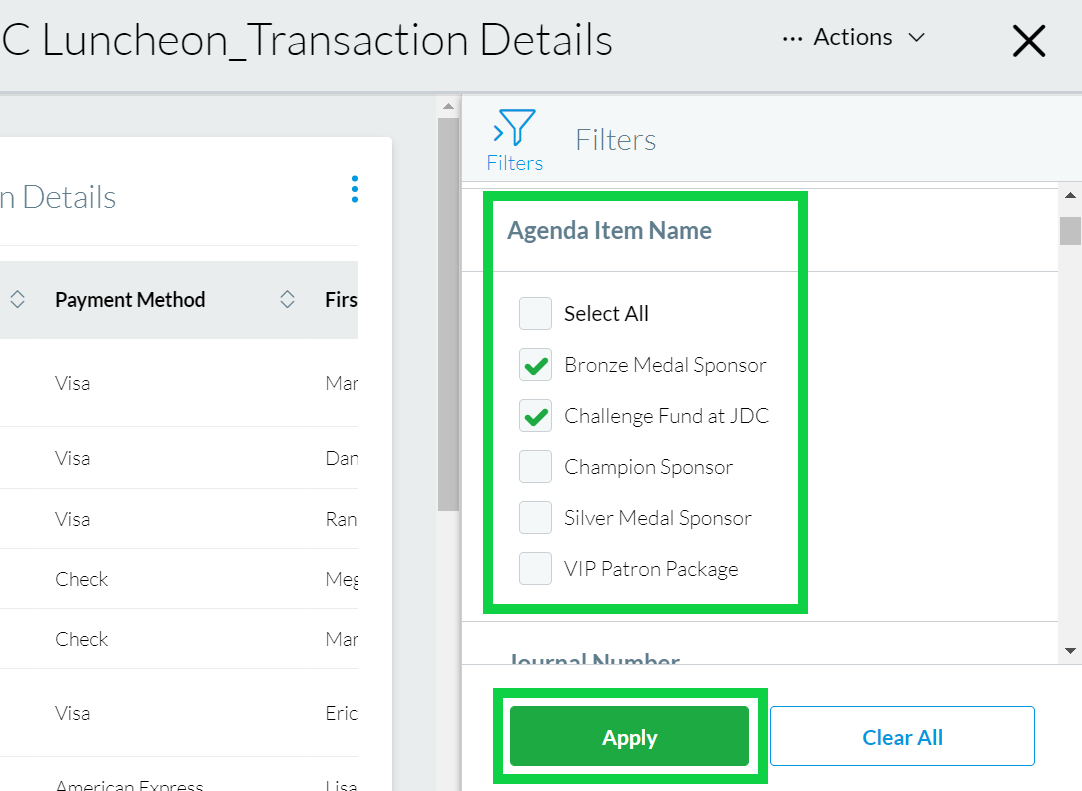
Click the Clear All button to remove any filters that have been added.
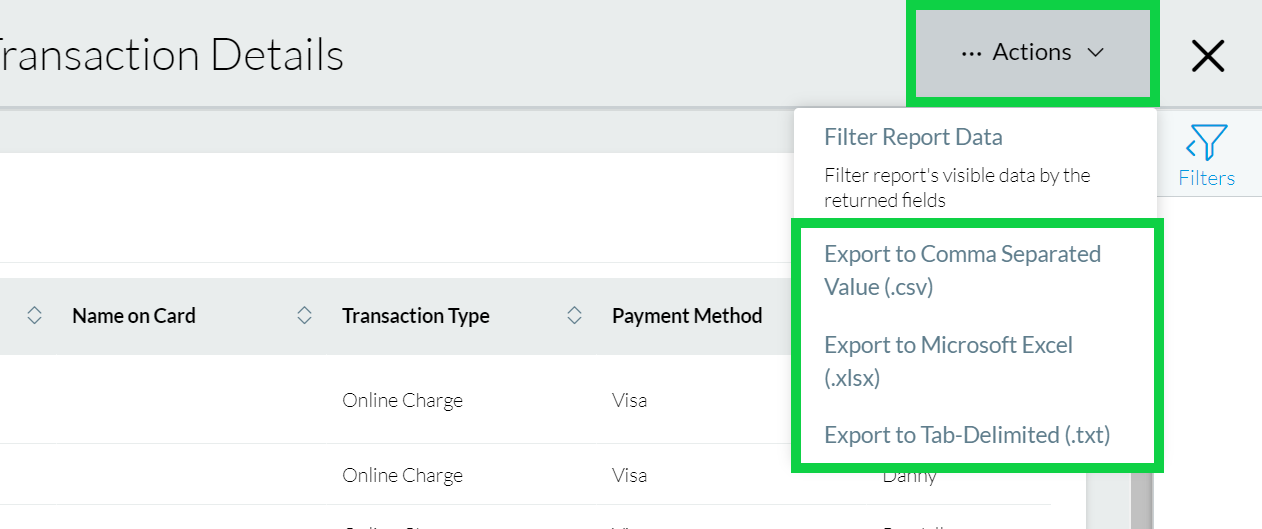
Portal users can Export Reports in their entirety or after applying Filters. Choose to Export as a .csv, .xlsx or .txt file.
- Hover Actions in the top right >> Select one of the export options in the dropdown
Grouping
If grouping has been applied to the Report, you will have the option to keep the grouping in your export or remove it (detailed view).
Initial Portal User Setup & Report Creator Details
STEP 1 | Request Portal User (free)
- Contact your eComm specialist to have a Portal User created for free. You'll need to provide a First Name, Last Name, and Email Address
- When someone's added to the Portal, they receive the following email (be sure to check your promotions or SPAM folder).
- The link to set your password will expire after a few hours.
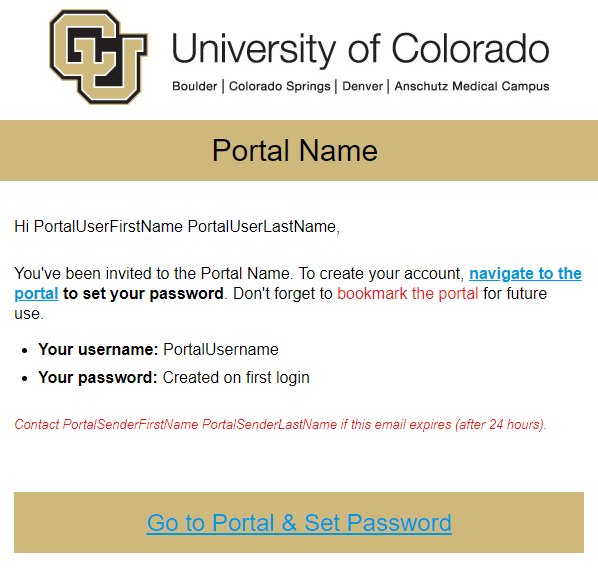
- Click Go to the Portal & Set Password and complete the steps to activate your account.
- TIP! Bookmark this page for future reference.
- Reports cannot be shared until a Portal User's account has a password set (or is active).
STEP 2 | Request Reports to be Published
- The Report(s) that you wish to have shared should already be created and saved.
- Share the Report Visibility with your eComm specialist.
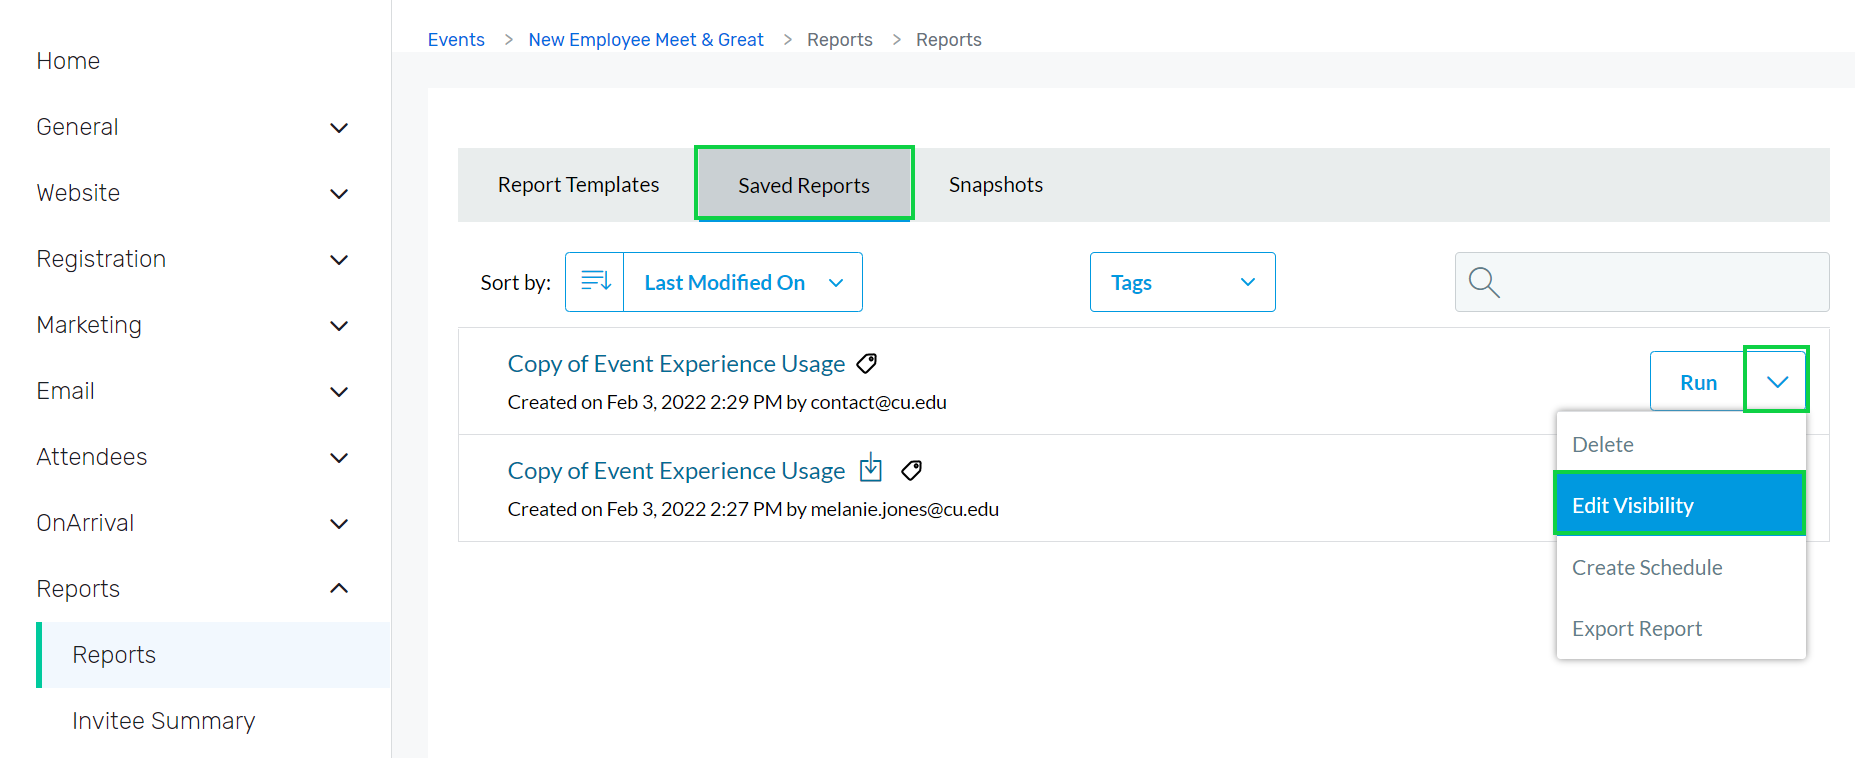
Navigate to your saved Report. Click the dropdown arrow next to the Run button. Click Edit Visibility in the dropdown.
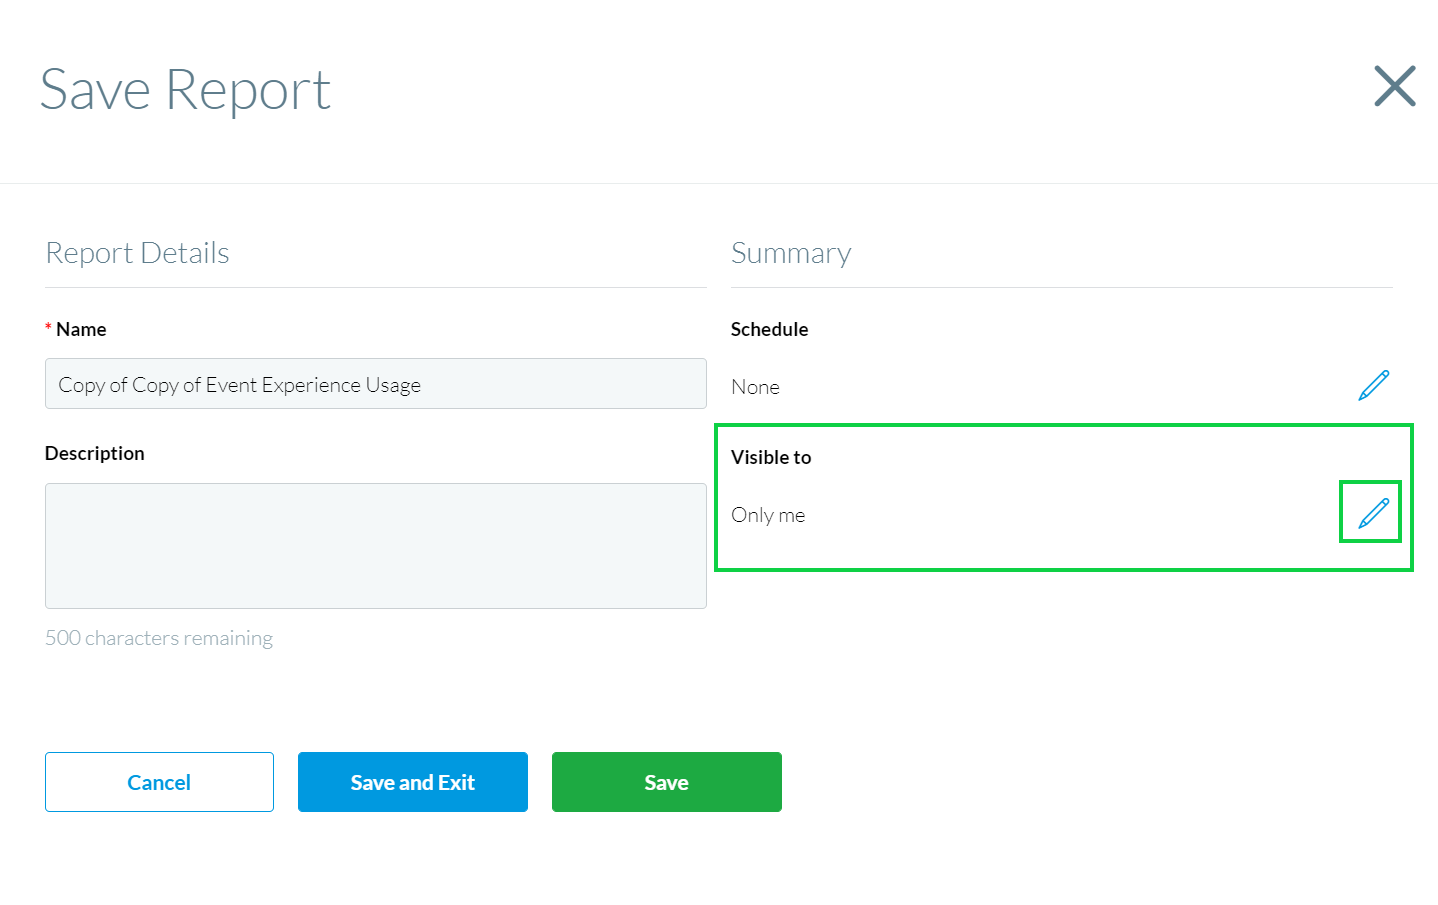
In the Visible to section, it is set by default to Only me. To expand visibility to others, click the pencil icon.
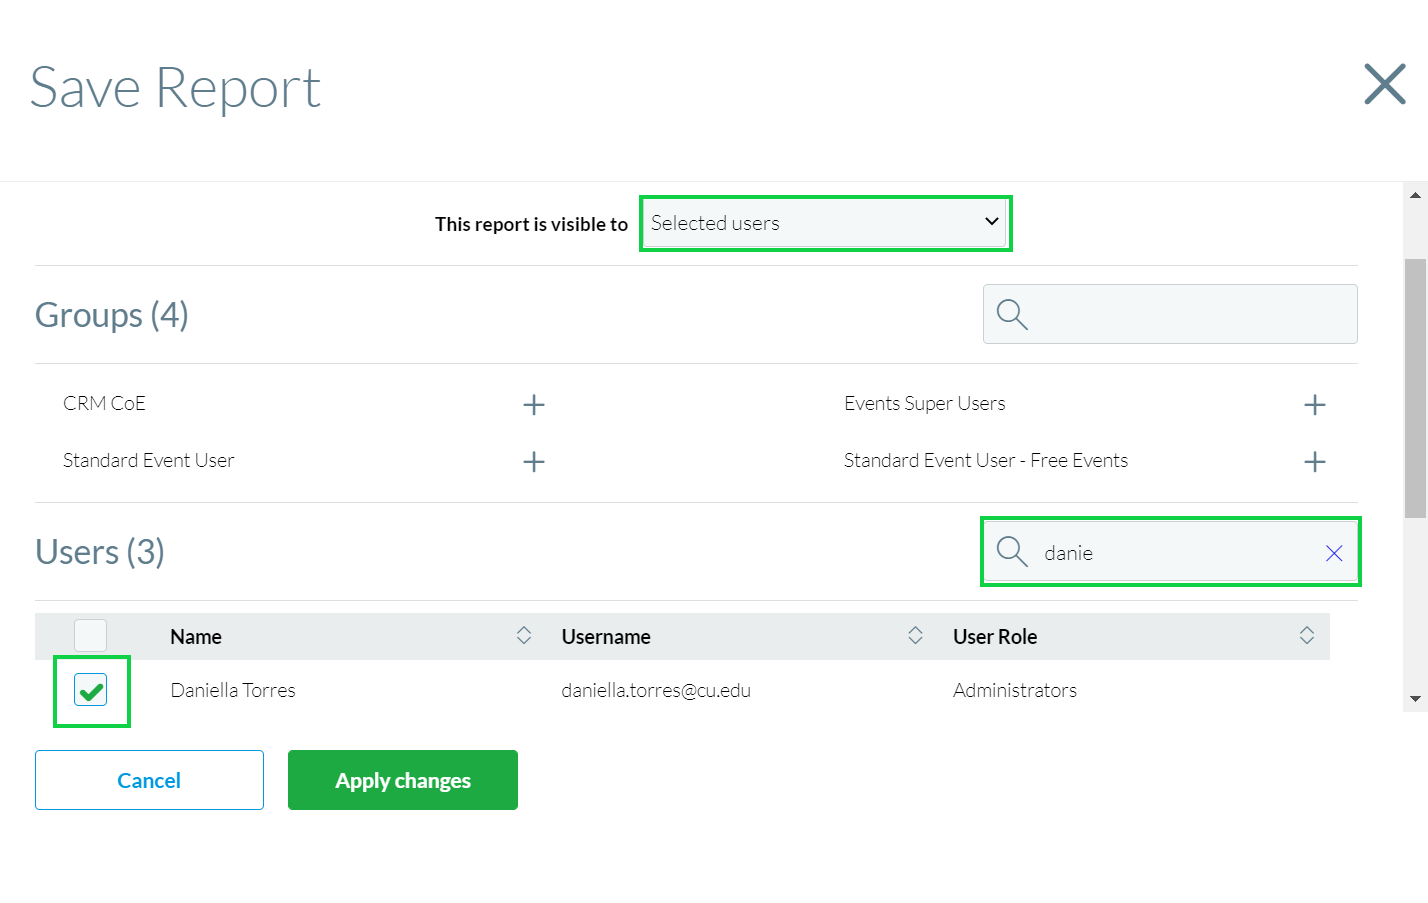
In the This report is visible to dropdown, choose Selected Users.
Scroll to the User section. Search for the person you want to share the Report with and check the box next to their name. Click Apply Changes.
- Your eComm specialist can then publish the saved Report to the Portal and share it with specific users.
- Event Reports | Provide the Event Title and Report Names you wish to have Published.
- Cross-Event Reports | Let them know it's a Cross-Event Report and provide the Report Name you wish to have Published.
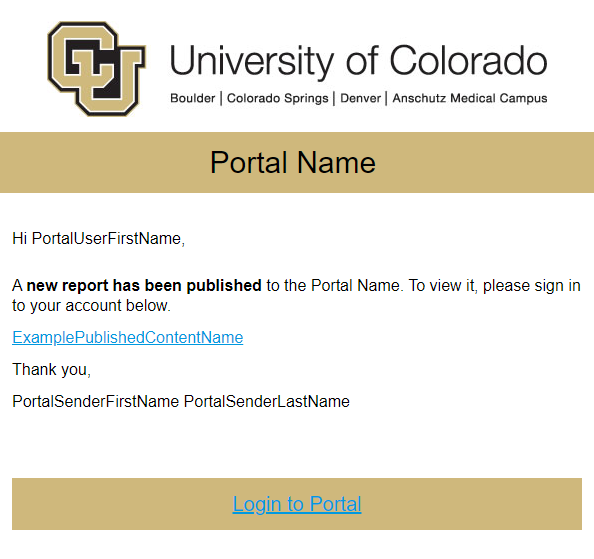
CHANGE OF PROCESS New Report Notifications were not used prior to Summer 2021.
- eComm specialists can opt to send a notification email (image below) through Cvent to let Portal Users know when a Report has been Published.