


Drupal Content Creation
The resource below is growing and details common topics. For less common topics, there is a 36-page how-to guide available.
Check out some basics that apply across numerous types of content below.
Login
- Use this link to log in: cu.edu/user
- Select CU Staff Login >> then login via SSO (select the correct campus and use your university credentials)
Find Existing Content
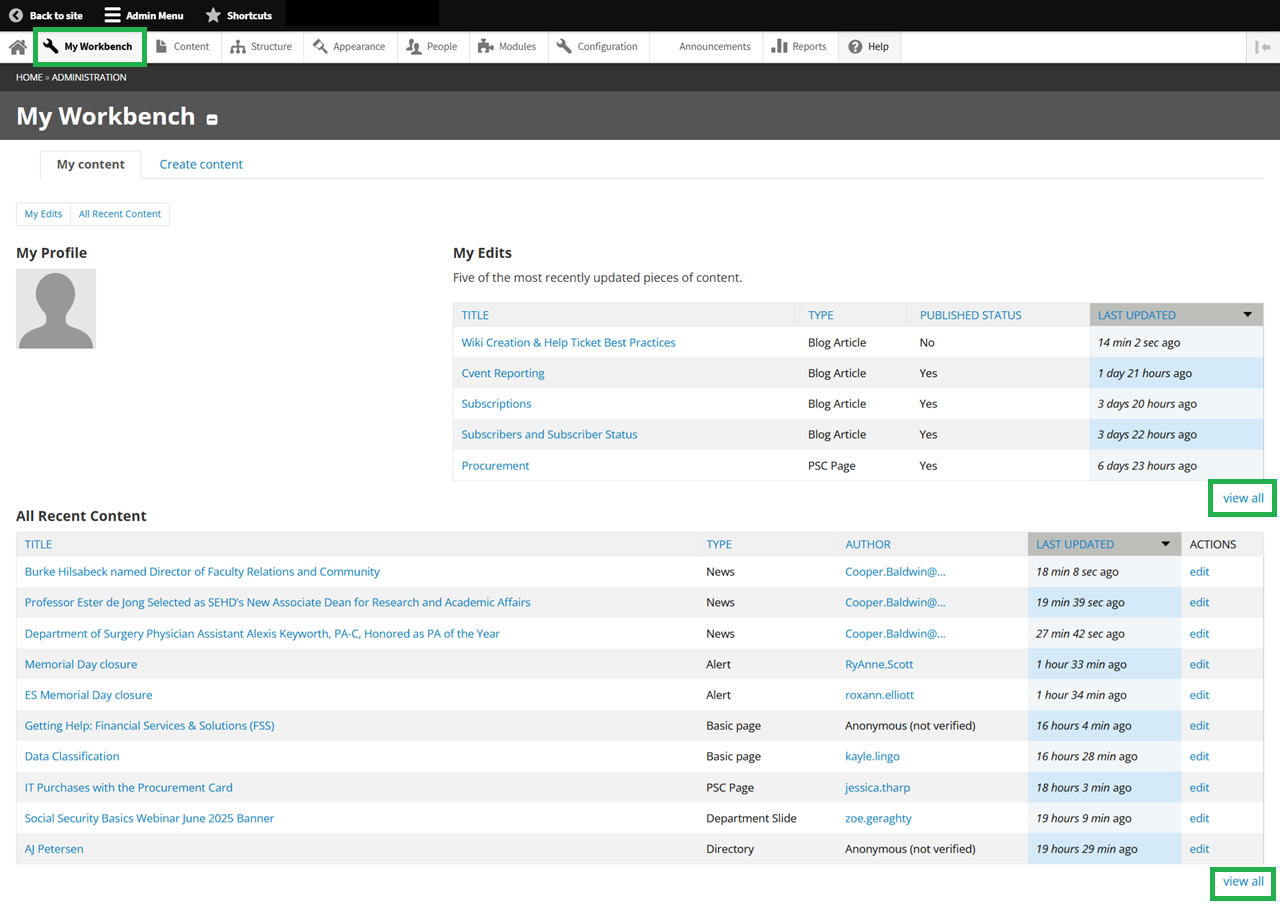
Workbench
- Once logged in, navigate to My Workbench in the top navigation.

- From there, two sections exist. You can 'View all' if you created the content originally. Or 'View all', for content created by someone else.
Edit From Page
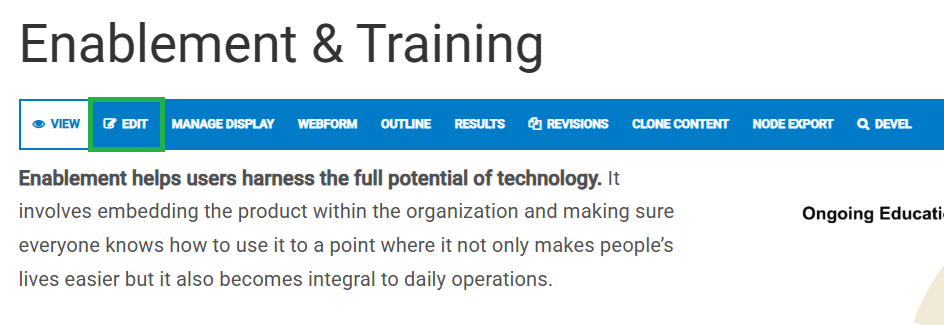
- Basic Pages and Blog Posts have an Edit option at the top. Department slides and homepages must be found via the Workbench option above.
New / Clone
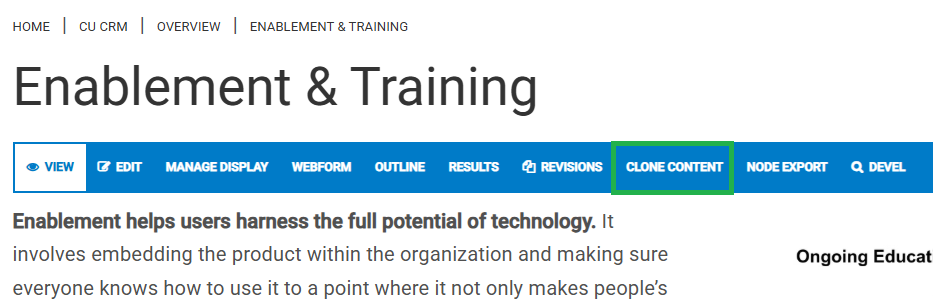
It is recommended to Clone an existing, similar piece of content rather than starting from scratch. Pages, Blogs, Webforms, Department Slides, and Department Layouts can all be cloned by selecting Clone Content across the top.
Publish Content
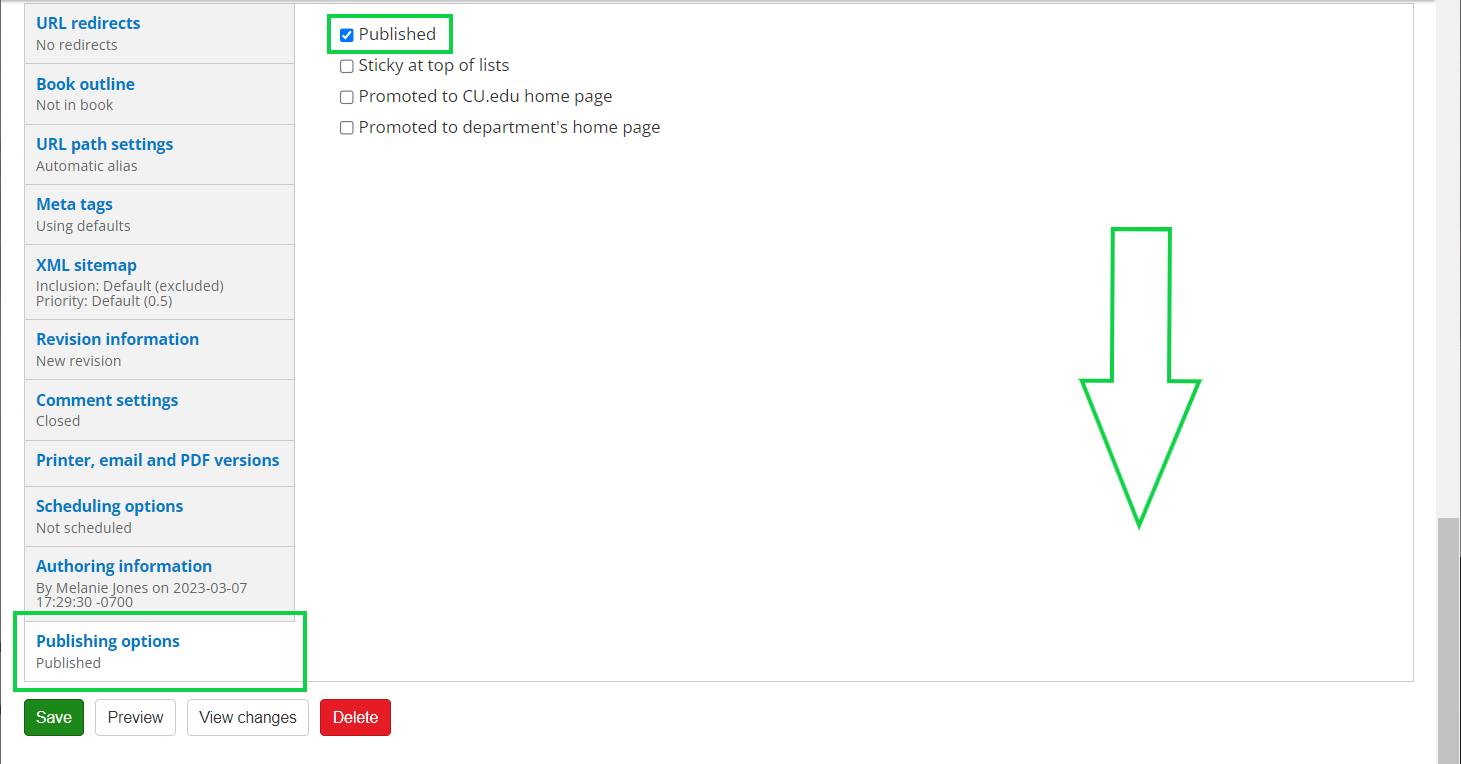
Published vs. Unpublished
Content can be published or not, which is found at the bottom, in the last option of the navigation.
- While creating content, if it's not 'ready', keep it unpublish (not checked) >> then select Save to view it. Once finalized, you can publish (check) it. The 'Preview' option is not recommended.
Revert to Previous
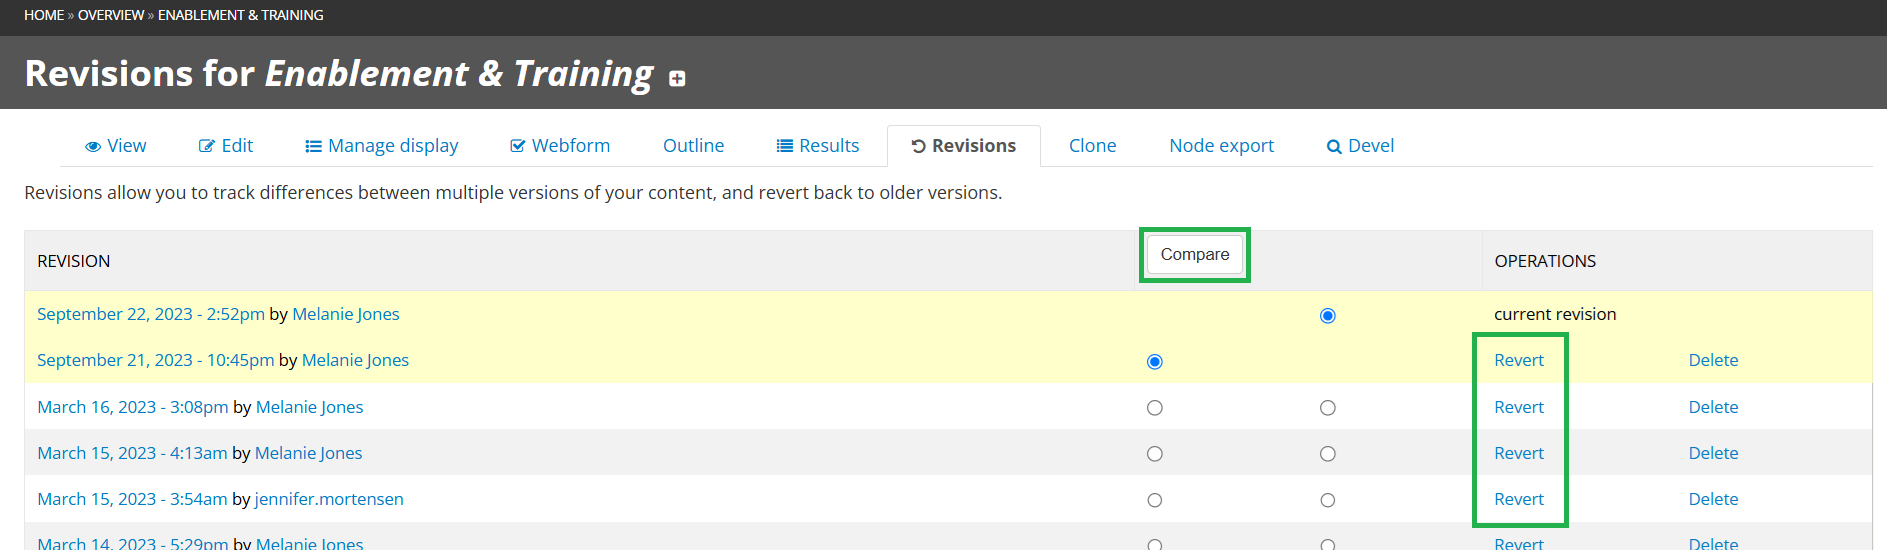
Revisions
- Ever 'break' a page? Revert to an earlier version.*
- *not available within forms.
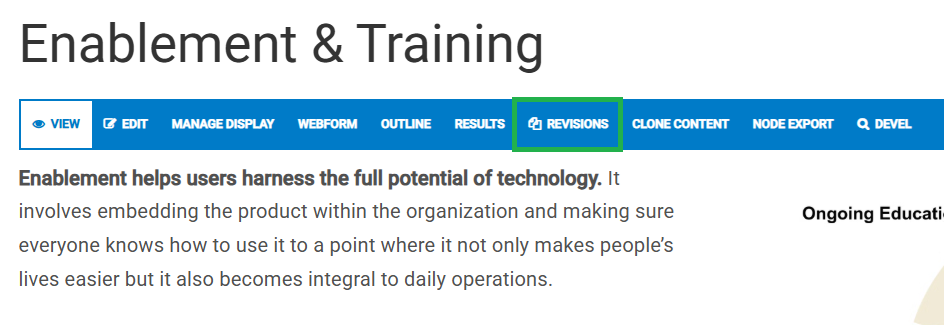
- You can Compare versions (if you are not sure which one is correct), and Revert to that version.
Below are specifics for different types of content.
Basic Page / Format Text (General)
Text formatting is relevant in many areas of Drupal, including basic pages, blog posts, homepages, department sliders, and more.
- To edit a Basic Page, navigate to it and then select Edit in the top navigation.
Text Formatting (Bold & Italic)
- Add bold or italics to the formatting of the text.
Bullets / Lists
- Add numbered or unnumbered lists, particularly for step-by-step instructions.
Links
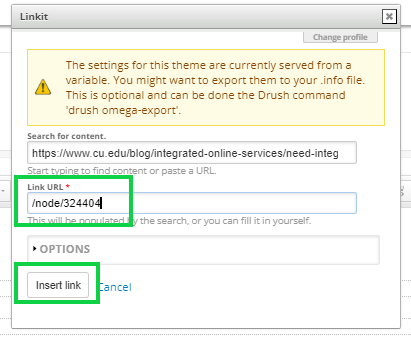
- Highlight the word(s) you wish to link, then select the link icon in the navigation.
- The Link info tab will open by default to include the URL
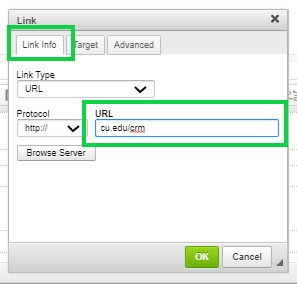
- Select the Target tab and choose New Window blank in the dropdown. Click the green OK button
- Highlight the word(s) you wish to link, then select the link icon with the plus sign in the navigation. It will read Link to Content when hovered.
- Paste the internal link (cu.edu). Once it finds the URL, click the green box
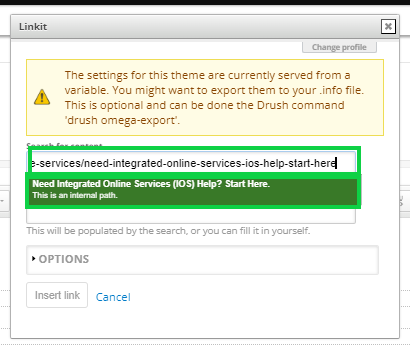
- This gets the Link URL field to populate with the node (a best practice when linking to internal pages)
- Select the Insert Link button
- Use the Internal Linking directions to set the Target = New Window Blank. This ensures the link opens in a new tab, rather than refreshing the existing page.
Images
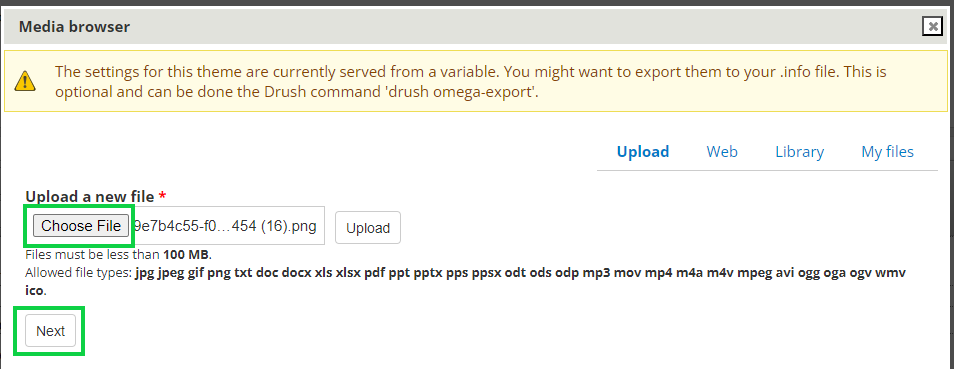
- Click in the body of the post, where you want the image to be inserted. It's usually best to be on its line/paragraph.
- Choose File, then click Next
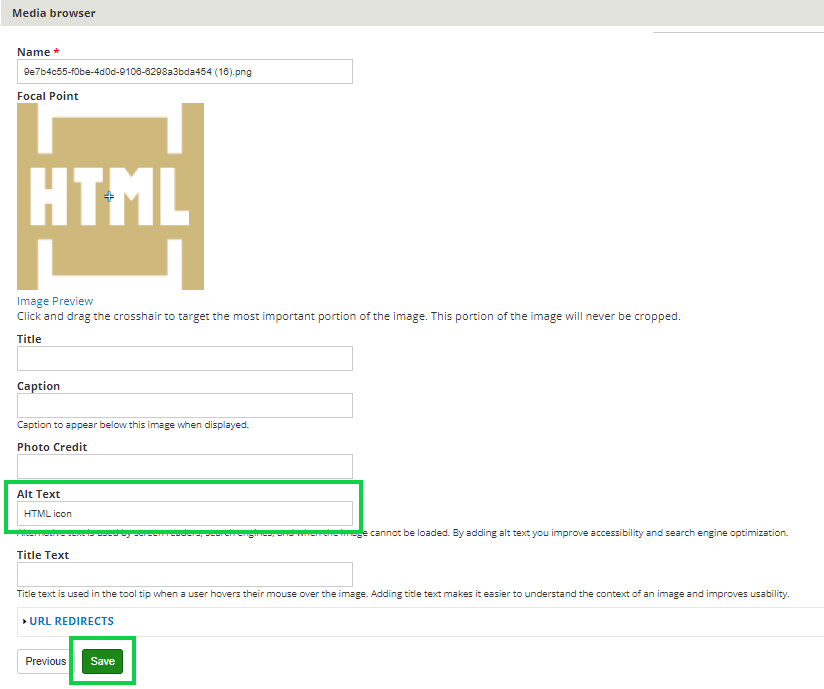
- Populate the Alt Text*
- Provide alternative (ALT) text that is contextually relevant, accurate, and concise. For example:
- lists the relevant data so that a bar graph can be understood
- to explain what an image contains and why it is being used, rather than details about how the image looks
- *DO NOT LEAVE BLANK. Although not a best practice, typing 'null' is better than leaving it blank.
- Provide alternative (ALT) text that is contextually relevant, accurate, and concise. For example:
- Click the green Save button
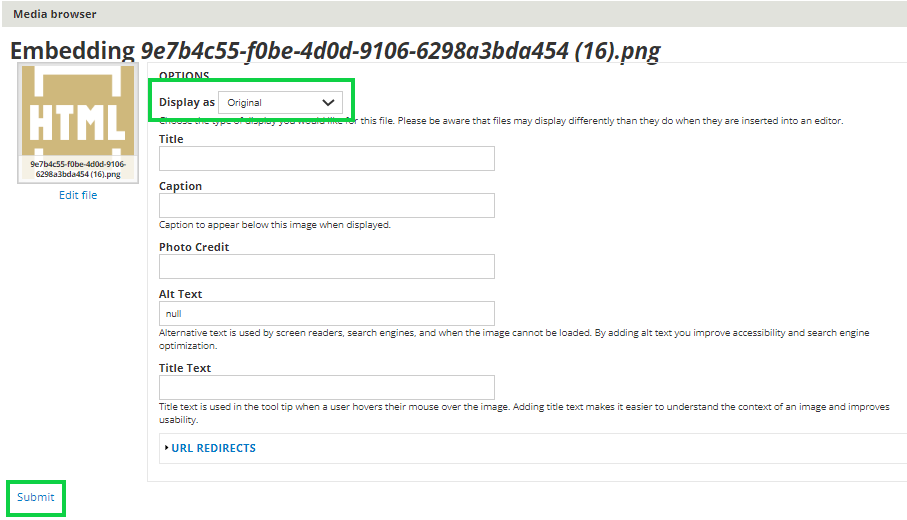
- Choose Display as: Original in the dropdown
- Click Submit
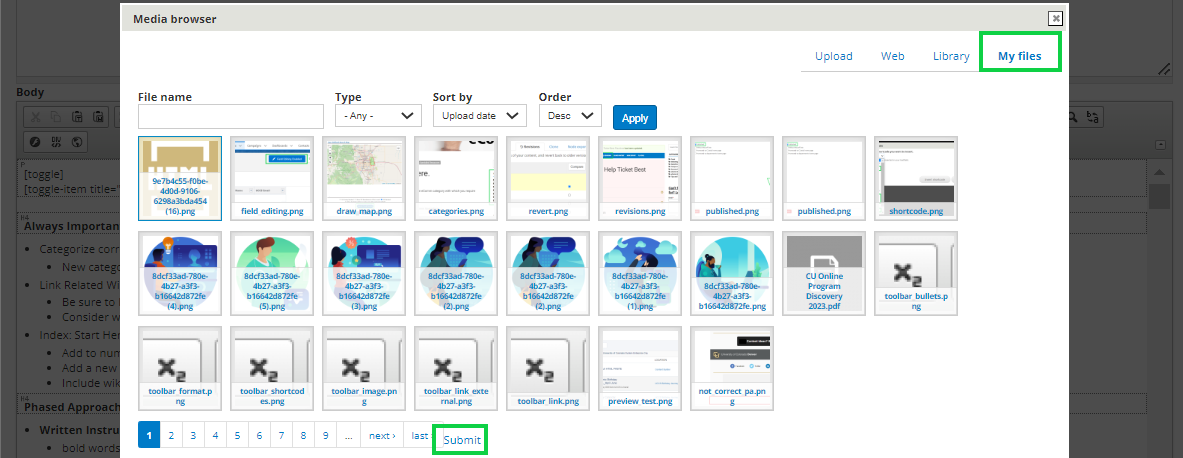
- Access previously uploaded images in the My Files or Library tabs
- Click the image, then select Submit
If you need to re-size an image, click the image after it has been placed in the body, then select the Image Icon found to the left. Input the size in the pop-up.
Shortcodes
- Click in the body where you want to insert the shortcode
- Select the Shortcodes icon (black box with down arrow) in the top navigation
- A pop-up will appear (may need to scroll up on the entire page to find it)
- Choose the Shortcode you want to insert via the dropdown
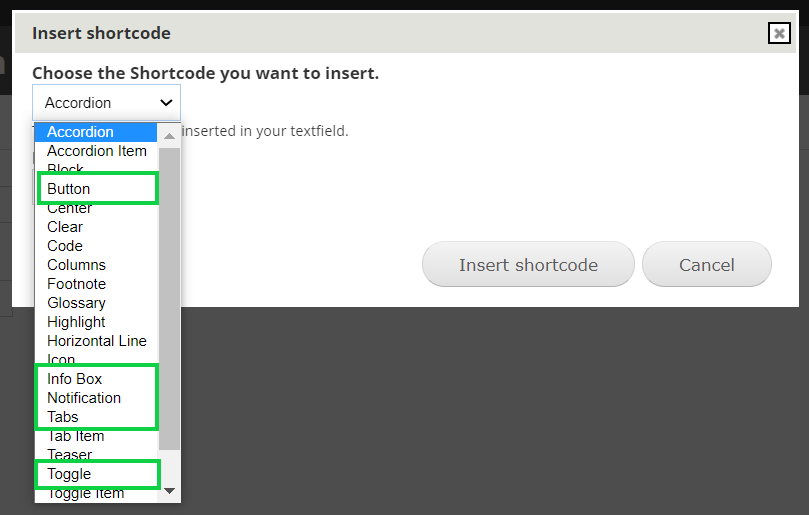
- Different fields will be presented based on the Shortcode you select.
- Fill out the details and select Insert shortcode.
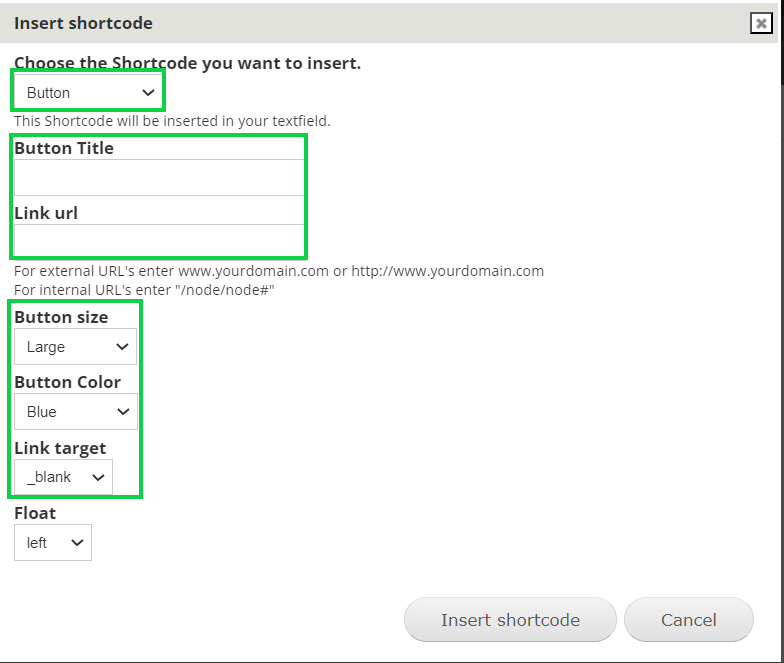
- In the example below, the Button was selected in the Shortcode dropdown.
- Populate details for:
- Button Title
- Button URL
- Button Size = Large
- Button Color = Blue
- Link Target = Blank
- Click the Insert Shortcode button
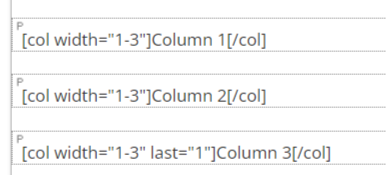
Shortcode Examples
You'll notice the shortcodes use brackets [] surrounding the shortcode name to start and end (with an additional /). This is important because after inserting some shortcodes, you must type in the body between these brackets to format your email as desired.
The tabs below show common examples of shortcodes used, so you can see how they render and what code is creating it:

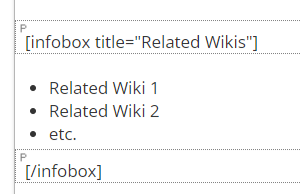
Related Wikis
- Related Wiki 1
- Related Wiki 2
- etc.
Important Callout warnings, important notes, or crucial pieces of information with red notification boxes.
Best Practices / Tips & Tricks / FAQs Add tips & tricks, best practices, frequently asked questions, or notes to blue notification boxes.

Toggle
Toggle Title Here
Toggle Title Here
Toggle Title Here

Accordion
Accordion Title Here
Accordion Title Here
Accordion Title Here

When in doubt, add space If you ever notice areas are overlapping others or formatting oddly, it's usually resolved with additional space.
Blog
Navigate to a blog post, then select Edit in the top navigation.
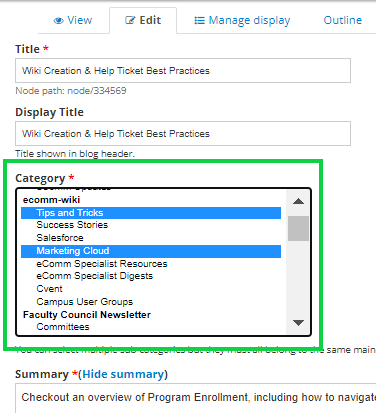
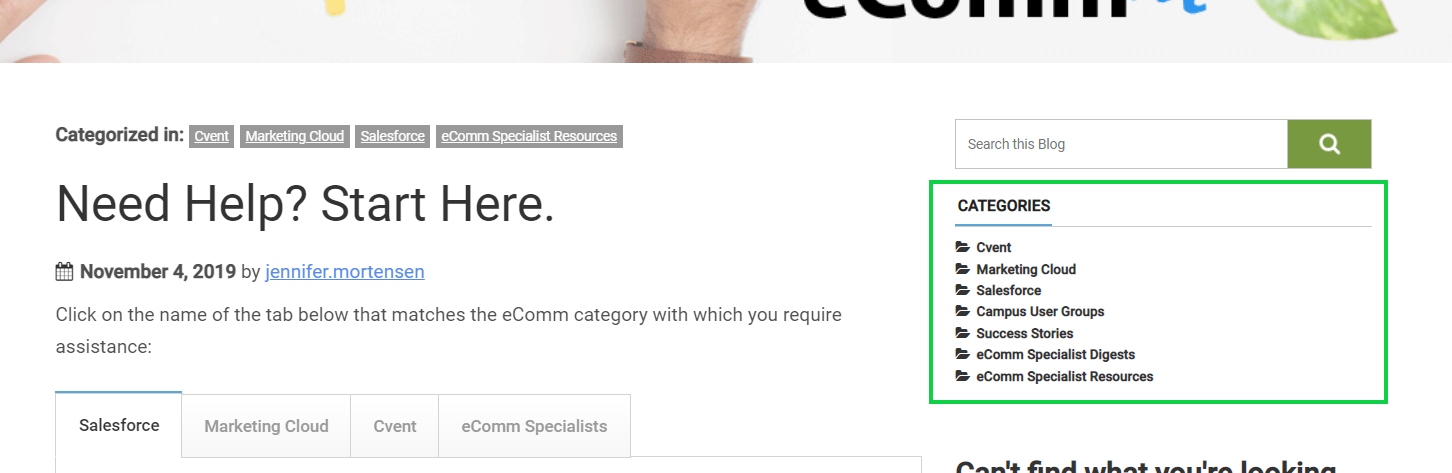
Categorize
Department Layouts / Homepages
Homepages are called Department Layouts
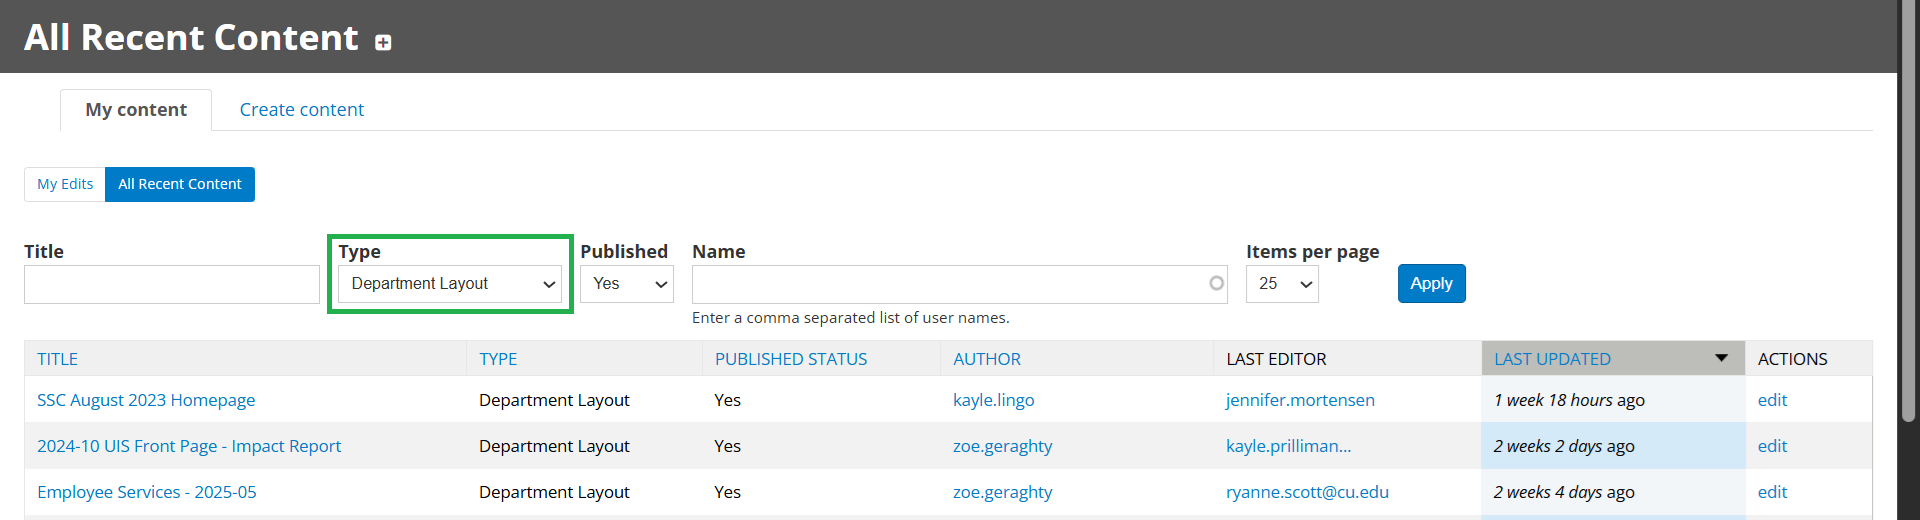
- Use the Find Existing Content section from above to find your Department Layout. Then filter for Type = Department Layout.
- Once opened, you can Edit.
- Department Layout are created with rows and columns. To edit an area, select the gear icon in the top right of the content (screenshot below).
- Rows can be edited with the gear icon in the top-left that reads Row Settings >> Edit Row in the dropdown.
- Columns can be edited with the gear icon to the top-left of the column area >> Edit Column in the dropdown. The entire width of a page is broken down into 12ths, so:
- a column that takes up 1/3 of the page will indicate 4 (out of 12).
- a column that takes up 1/4 of the page will indicate 3 (out of 12).
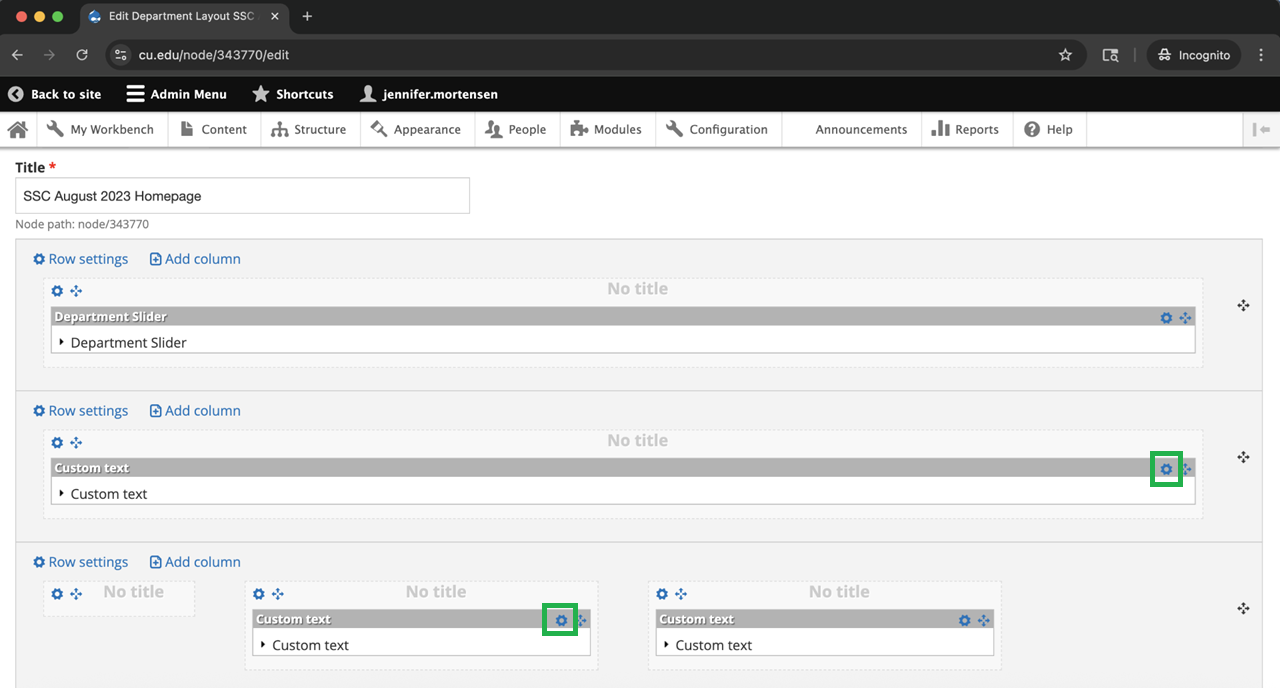
- When you edit a section, select Save. Then scroll to the bottom of the Department Layout and also select Save.
Department Slides
Department Layouts (above) often have the top section for Department Slides. There could be one or many slides published (in which case they will be flipped through).
- Use the Find Existing Content section from above to find your Department Slide(s) by using the Type filter = Department Slides.
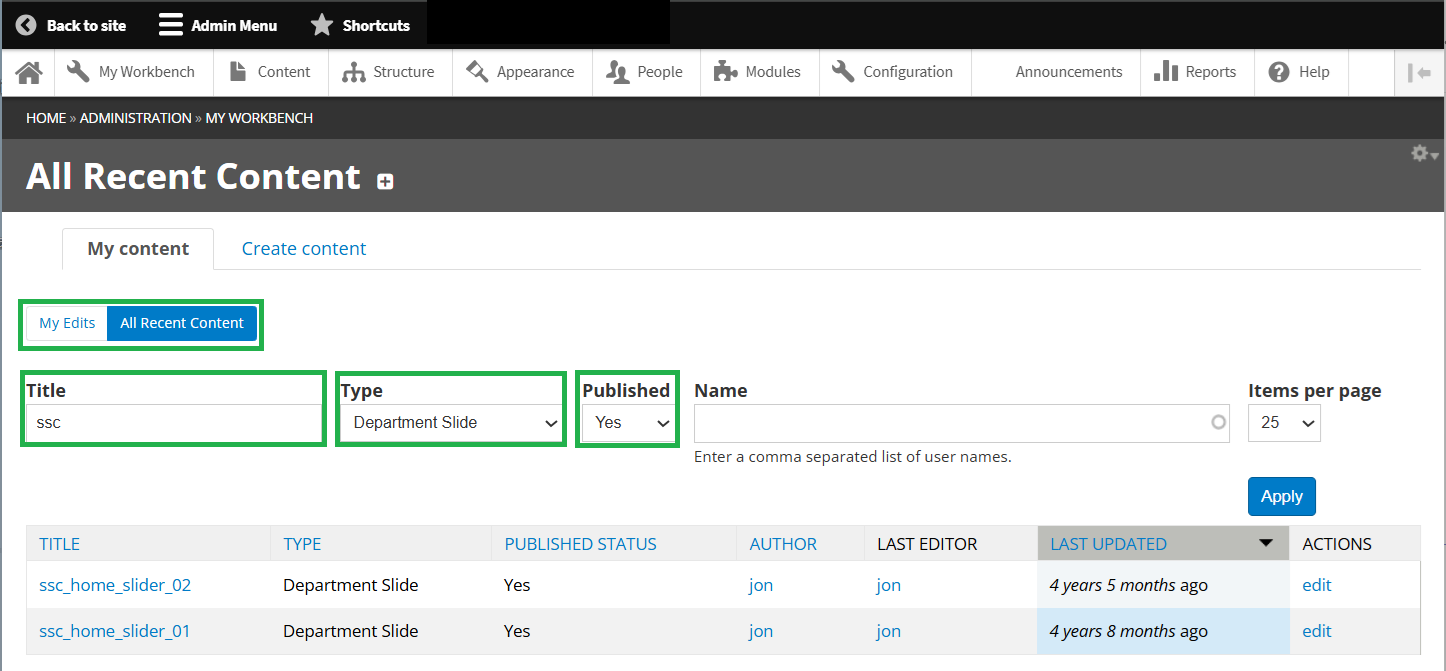
- After selecting the Department Slide title, you can Edit.
- Once opened, you can upload a different image or change the setting. Images should be high quality and around 1400 pixels wide and 300 pixels tall.
- Once complete, Save at the bottom. To view changes, you will need to look at the associated Department Layout.