


Updating Sender Profiles to Match SAP for Compliance
Updating Sender Profiles to Match SAP for Compliance must occur as quickly as possible so as not to impact email delivery. To achieve this, the system eComm team and campus eComm specialists will divide and conquer.
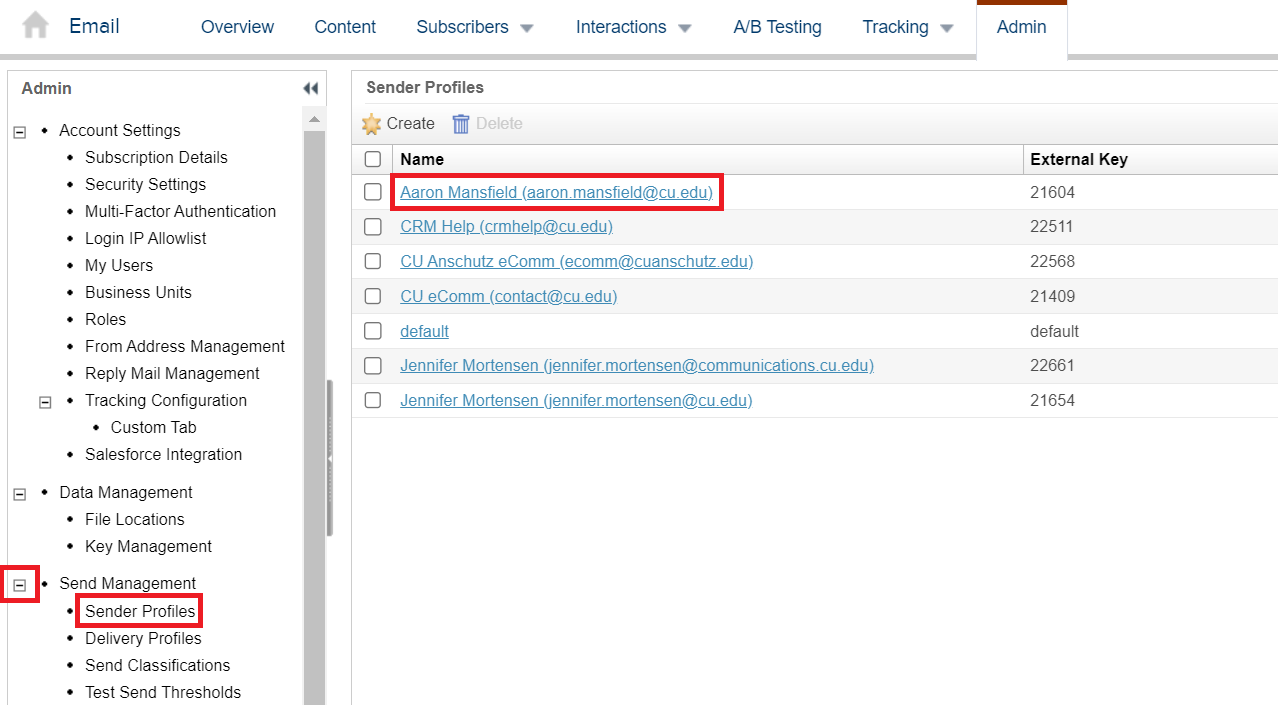
Update Sender Profiles
The following from address in the sender profile must match the following, based on the Business Unit:
- Advancement, System & Boulder SAP: com.cu.edu
- Anschutz SAP: com.cuanschutz.edu
- Denver SAP: com.ucdenver.edu
- UCCS SAP: com.uccs.edu
The following process must be done in ALL existing Sender Profiles and any created in the future. Failure to do so will impact email delivery.
- Navigate to the Business Unit (top right).
- Hover Email Studio in the top navigation >> then Email in the dropdown.

- Select Admin found in the right of the top menu.
- On the left, expand Send Management >> then select Sender Profiles.
- Select a Sender Profile Name to edit it (look for numerous pages of Sender Profiles, found in the bottom right).
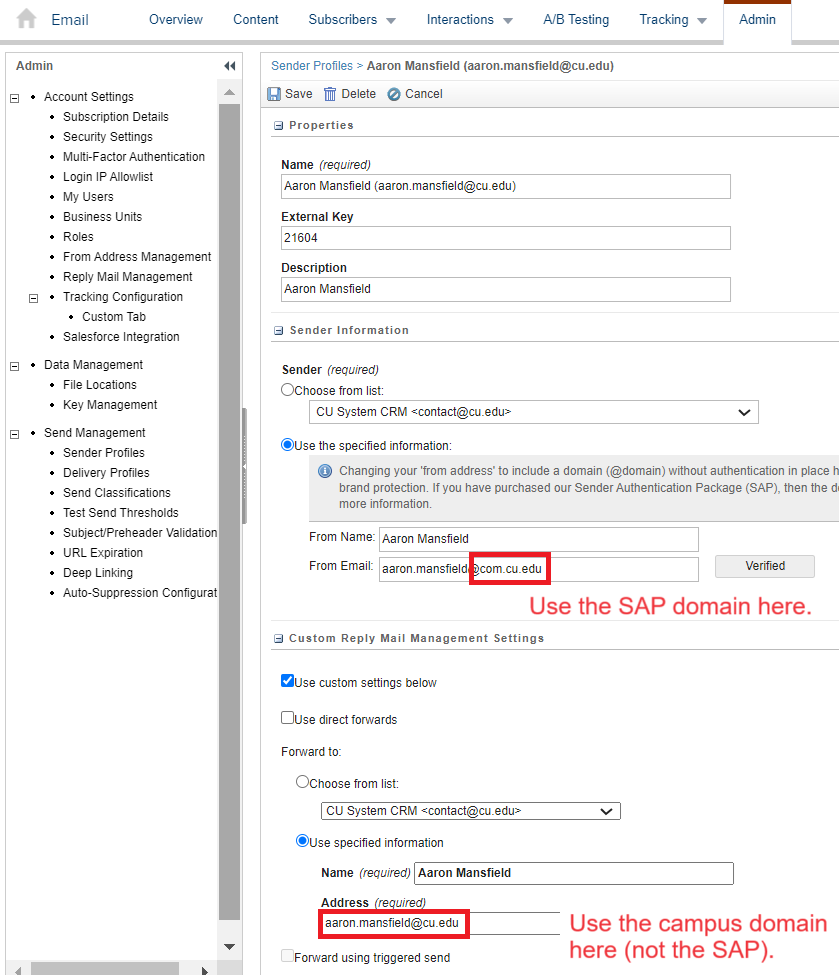
- Update the Sender Information:
- Edit From Email to contain new SAP domain.
- After the @ symbol use the following SAP:
- Advancement, System & Boulder SAP: com.cu.edu
- Anschutz SAP: com.cuanschutz.edu
- Denver SAP: com.ucdenver.edu
- UCCS SAP: com.uccs.edu
- After the @ symbol use the following SAP:
- When you click away from this area, it will automatically Verify.
- Edit From Email to contain new SAP domain.
- Use Custom Reply Mail Management Settings. The following settings should already be configured in every Sender Profile - meaning there is likely no change needed. If that is not the case, make changes so:
- Use custom settings below should be checked.
- The Use specified information radio button should be selected.
- Ensure the desired From Name and Reply Email Address is input here(NOT the new SAP domain with 'com' after the @ symbol.
Efficiency Tip! Open the Sender Profile in a new tab and update it there. Then close the tab and go back to the list of Sender Profiles in the other tab. The last Sender Profile that was opened will stay highlighted so you know which to move onto next.
You should only have two tabs open at most. In other words, you CANNOT open numerous Sender Profiles in additional tabs to edit, or there will be an error.
Custom Reply Mail Management Settings
Custom Reply Mail Management Settings should ALWAYS be used with:
- 'Use custom settings' checked and
- 'Use specified information' with the 'Name' and 'From Email Address' populated.
Never check the radio button for 'Choose from list'.
Update Send Classification
Confirm any Send Classifications have the the correct Sender Profile tied to it.
- To do this re-select the Sender Profile >> Save.
The system office performs the following two tasks for each Business Unit.
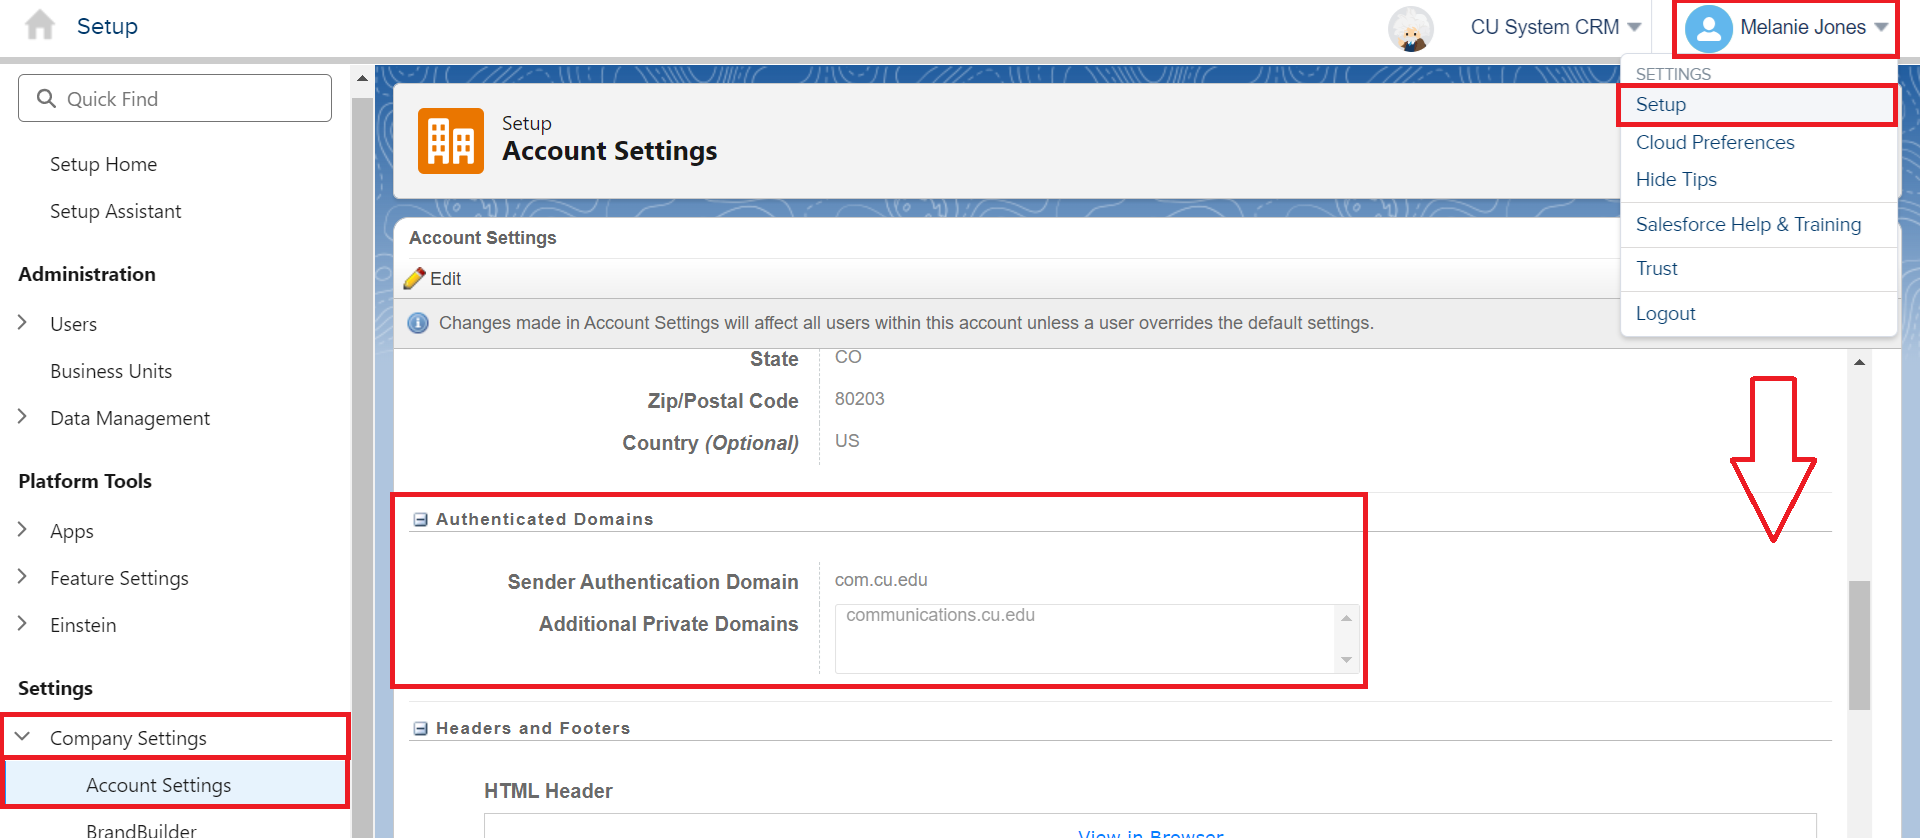
Authenticated Domains
The system office performs this task.
- Hover your name >> Select Setup
- Expand Company Settings on the left
- Select Account Settings
- Scroll down to the Authenticated Domains section
- Confirm 'com' is in the Sender Authentication Domain
- Confirm Additional Private Domains is the previous communications.cu.edu
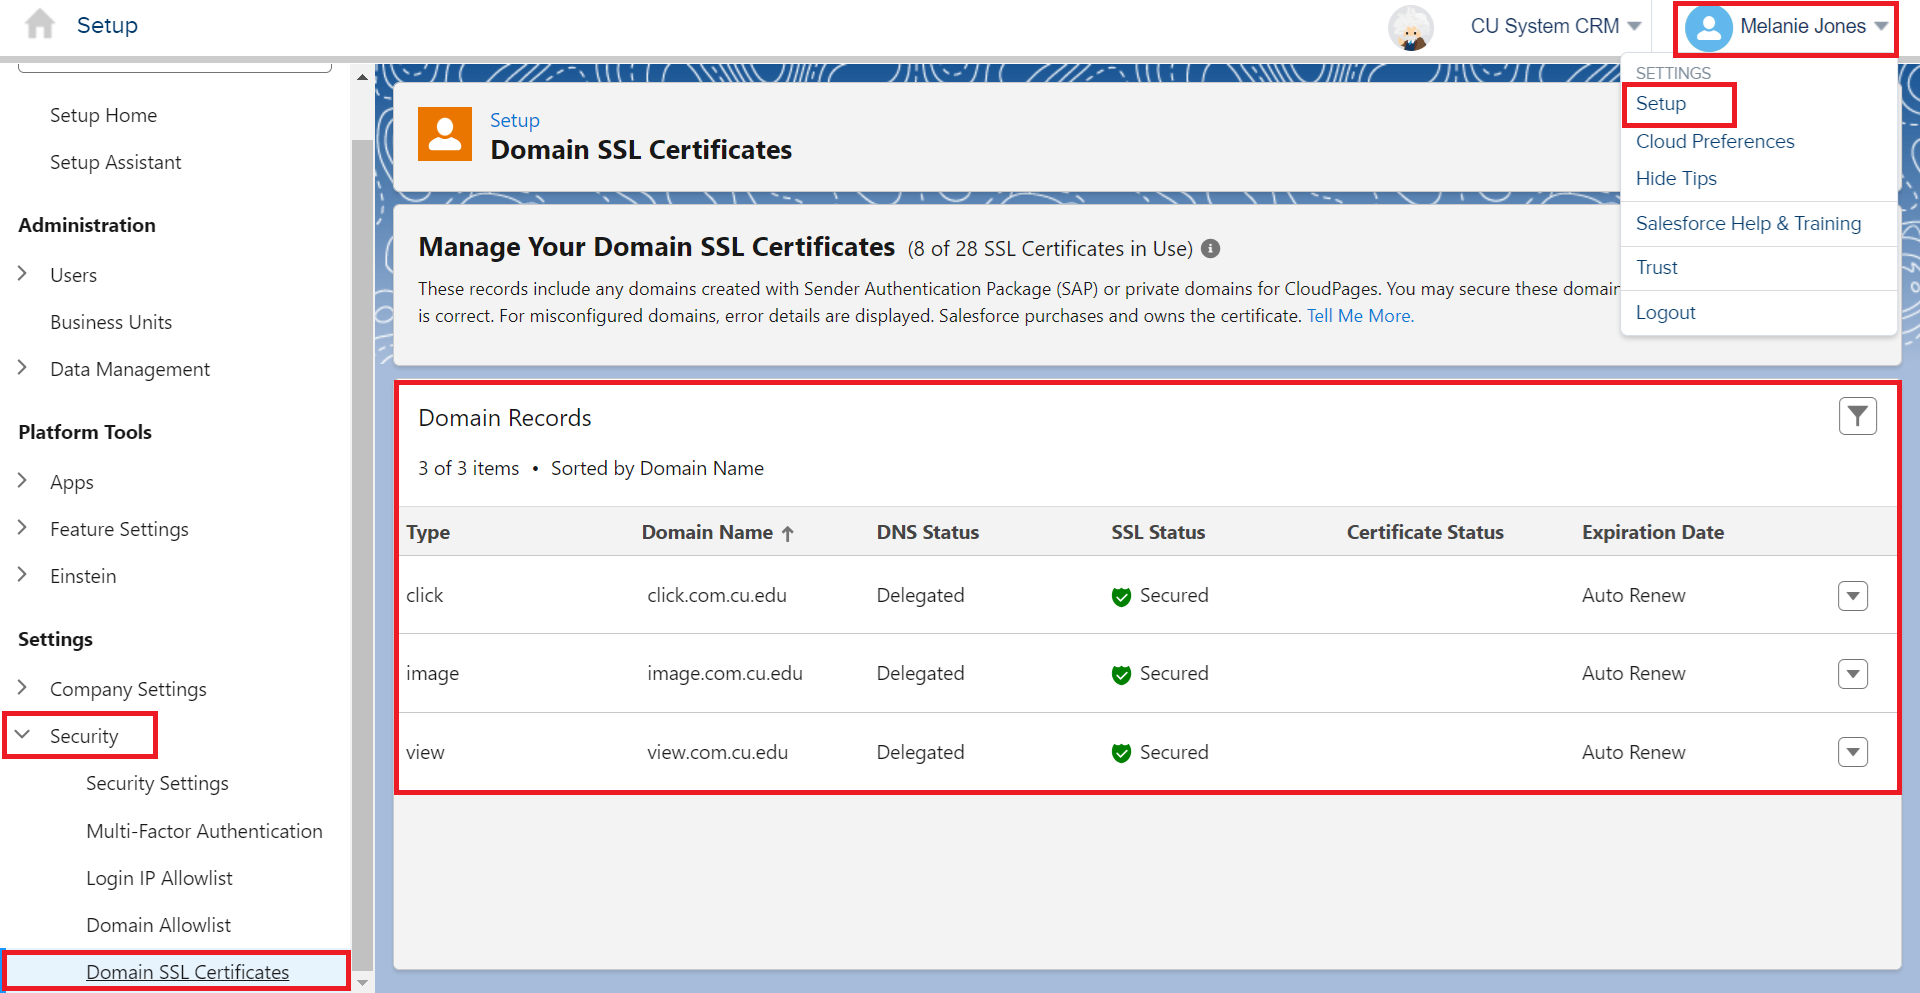
Domain Records
The system office performs this task.
- Hover your name >> Select Setup
- Expand Security on the left
- Select Domain SSL Certificates
- Confirm the SSL Statuses are all secured
Related Content
- Bulk Sender Compliance
- Sender Profiles, Delivery Profiles and Send Classifications (for Users)
- Creating Sender Profiles, Delivery Profiles and Send Classifications (for eComm specialists)