Viewing and/or Canceling a Scheduled Email Send
Learn how to view scheduled sends along with cancelling (and rescheduling) an email in Marketing Cloud. Note, if your email is scheduled, you can cancel it at any time. If you have just sent your email, it is gone. There's no way to bring it back.
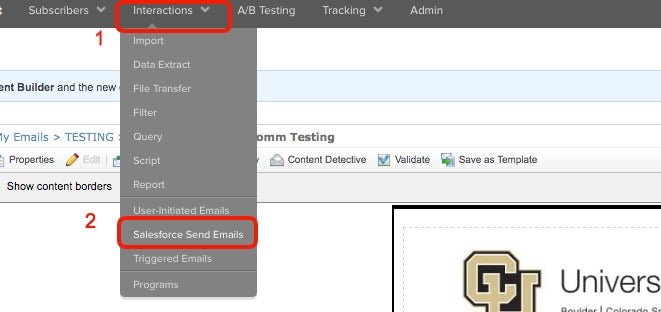
Step 1 Navigate to Interactions in the top Marketing Cloud menu.
Step 2 Select Salesforce Send Emails from the dropdown
Step 3 Click the View Active Sends button.

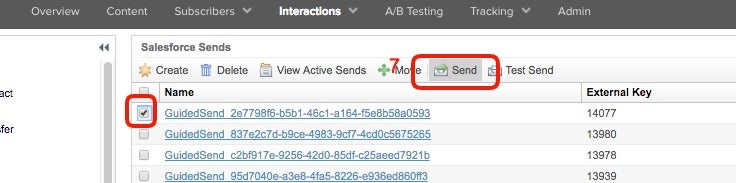
Step 4 To cancel, click on the checkbox (left column) next to the email you want to cancel.
Step 5 A Cancel Send button will activate above the list of emails. Click that button.

NOTE: You can cancel any email that is set to Schedule in the Status column.
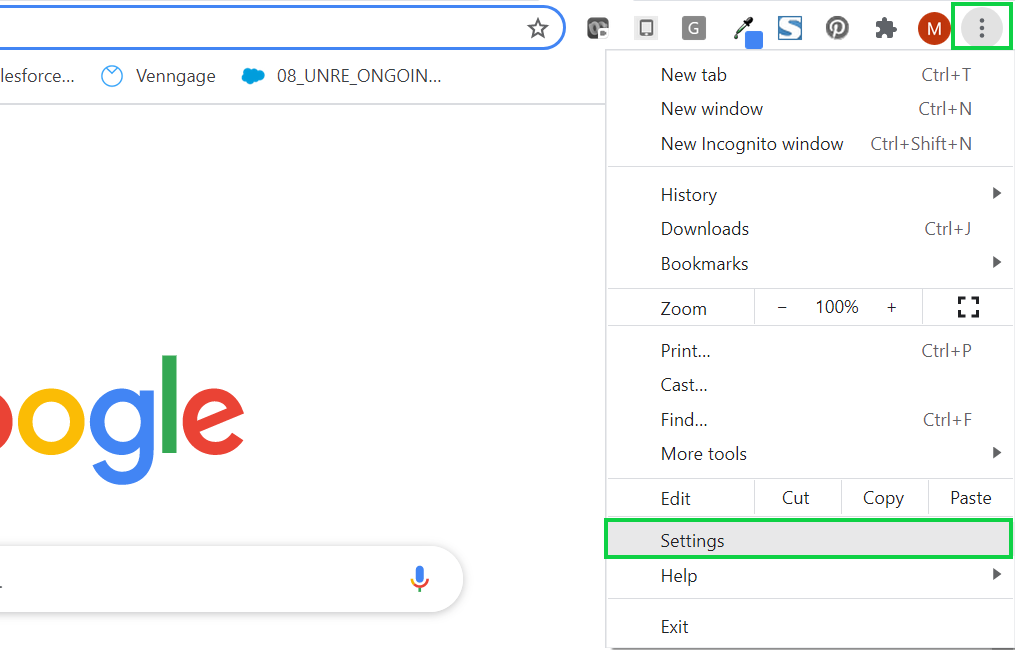
Unable to select the Cancel button while using Chrome? You might need to update your Chrome settings to remedy the issue.
How To Update Chrome Settings
- With Chrome open, click the ellipsis in the top-right corner
- In the drop-down, select Settings
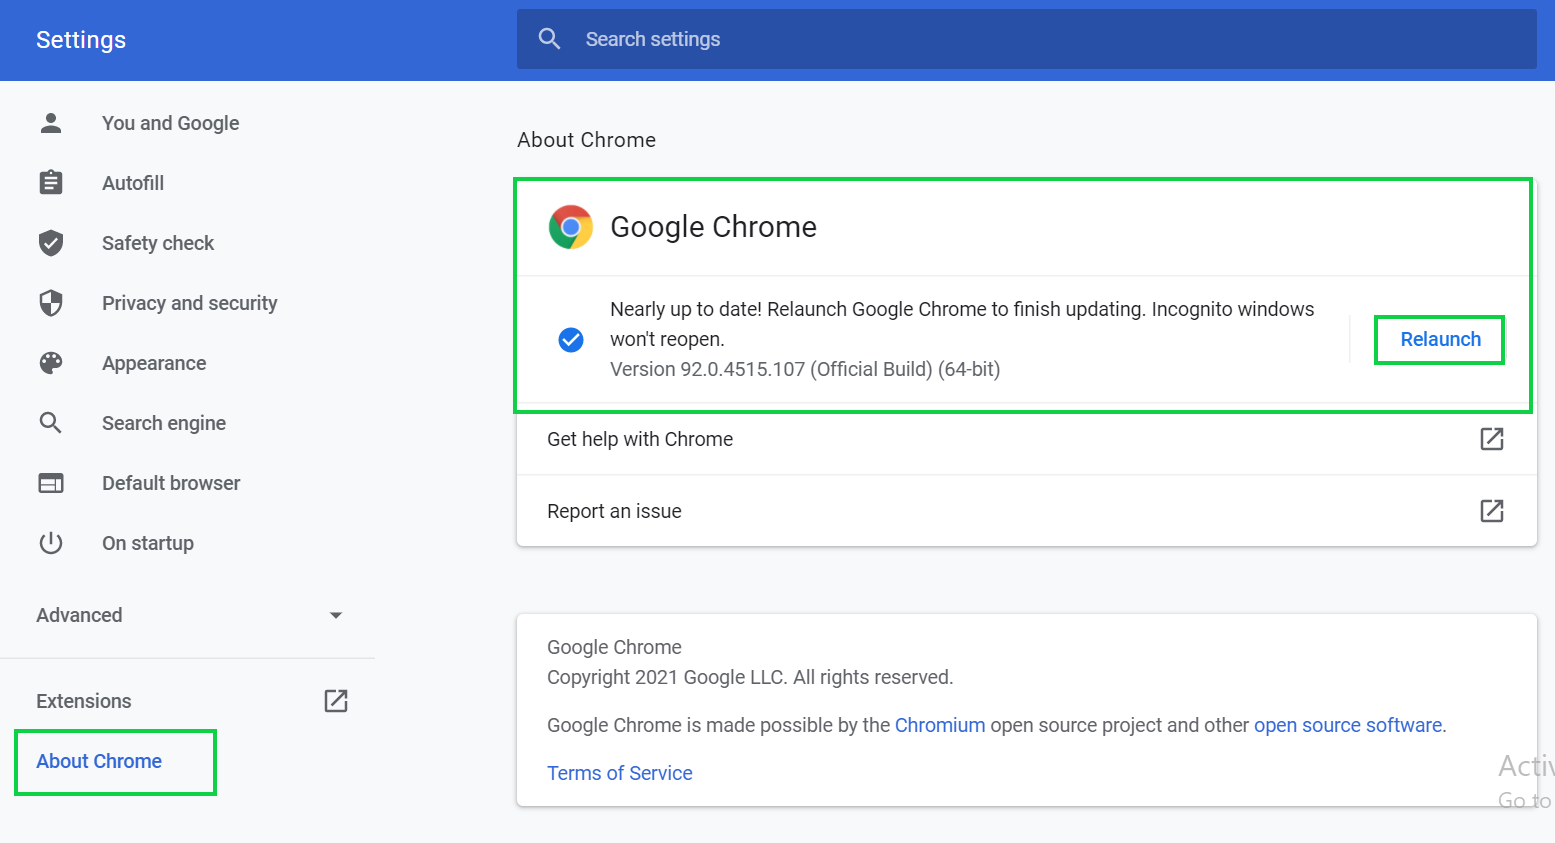
- On the new page, use the left navigation to click About Chrome, the last option.
- Here you can see what version of Chrome you have. You may need to trigger an update and Relaunch, depending on your current version.
If the cancel button still doesn't work for you, please let your eComm specialist know.
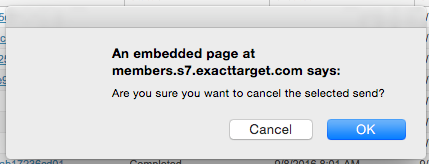
Step 6 An alert will pop-up asking you to confirm the cancelation. Click OK and your email will be canceled.
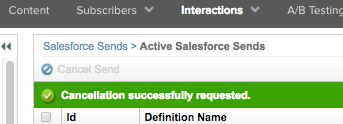
Step 7 Your email will still be available in the list of emails under Interactions > Salesforce Send Emails.
If you want to resend your email but at a different time, click the checkbox next to it and click the Send button (above the list of emails). From here you set the new day/time.