


Categorized in:
Cvent | Sessions
February 1, 2022 by Melanie Jones
Within your Flex event you have the option to add sessions. Learn to enable them in the event, how to approach setting up those session details and how to display it to registrants throughout the event lifecycle.
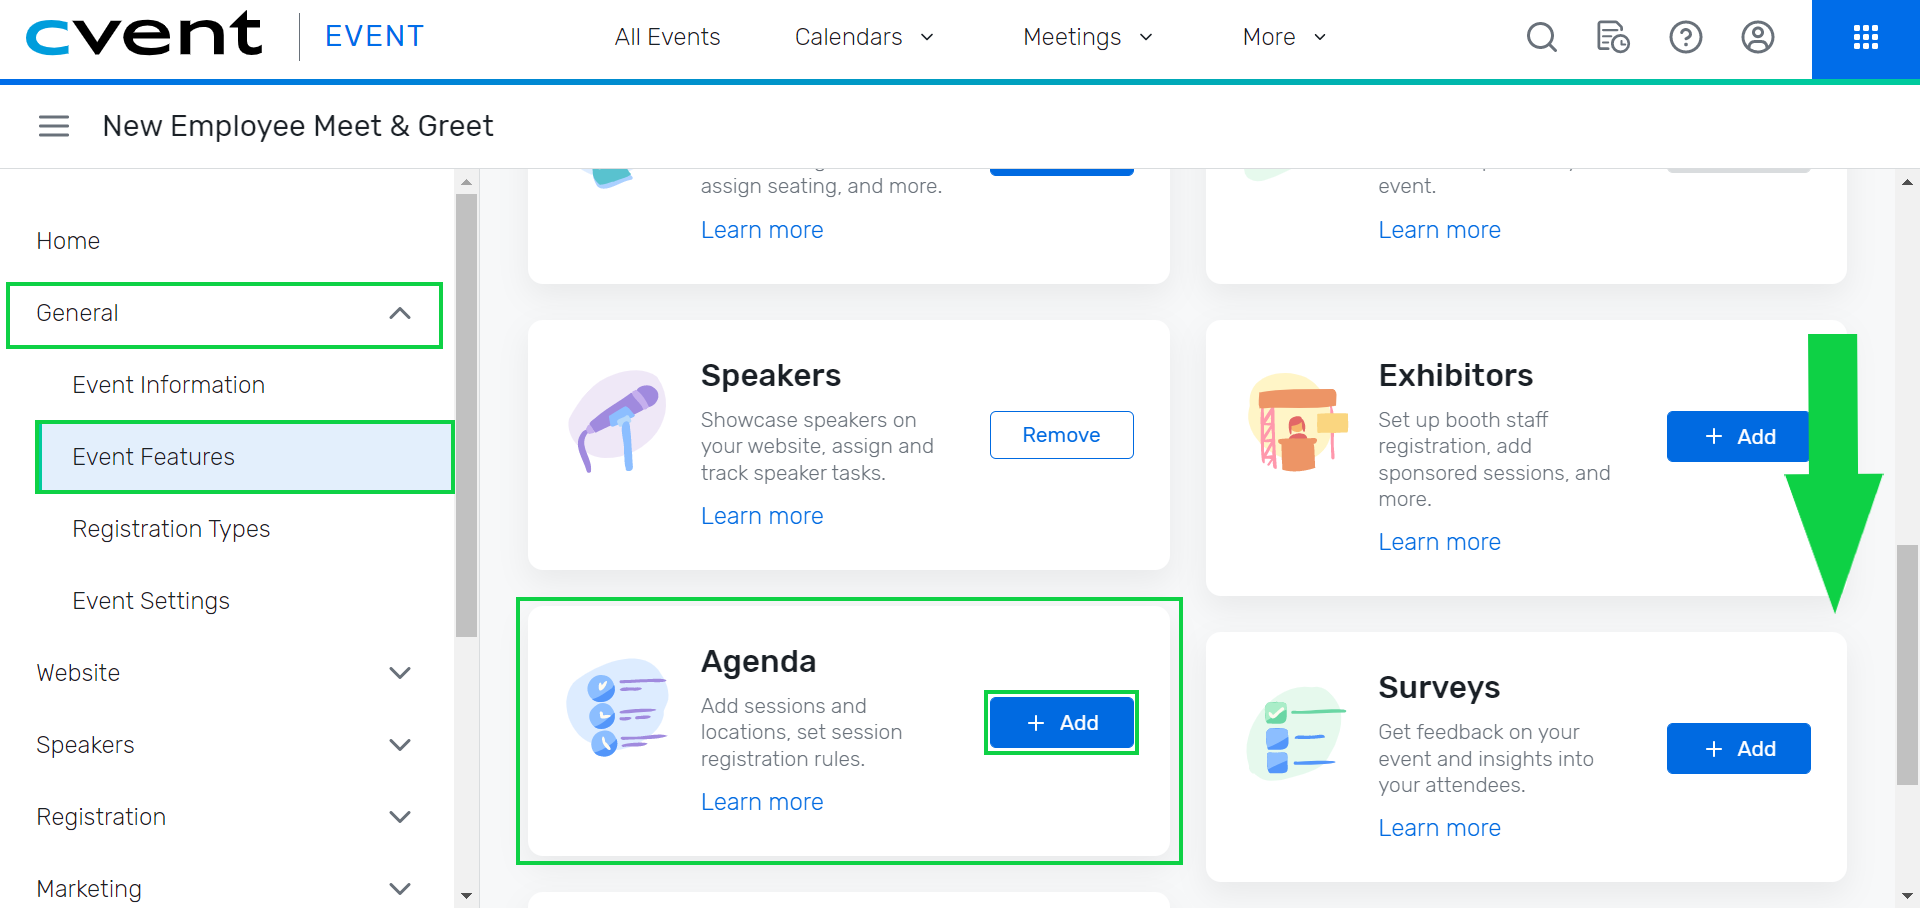
STEP 1 | Enable Sessions
Sessions aren't automatically enabled in an event. Turn on the Agenda feature to start adding your session details.
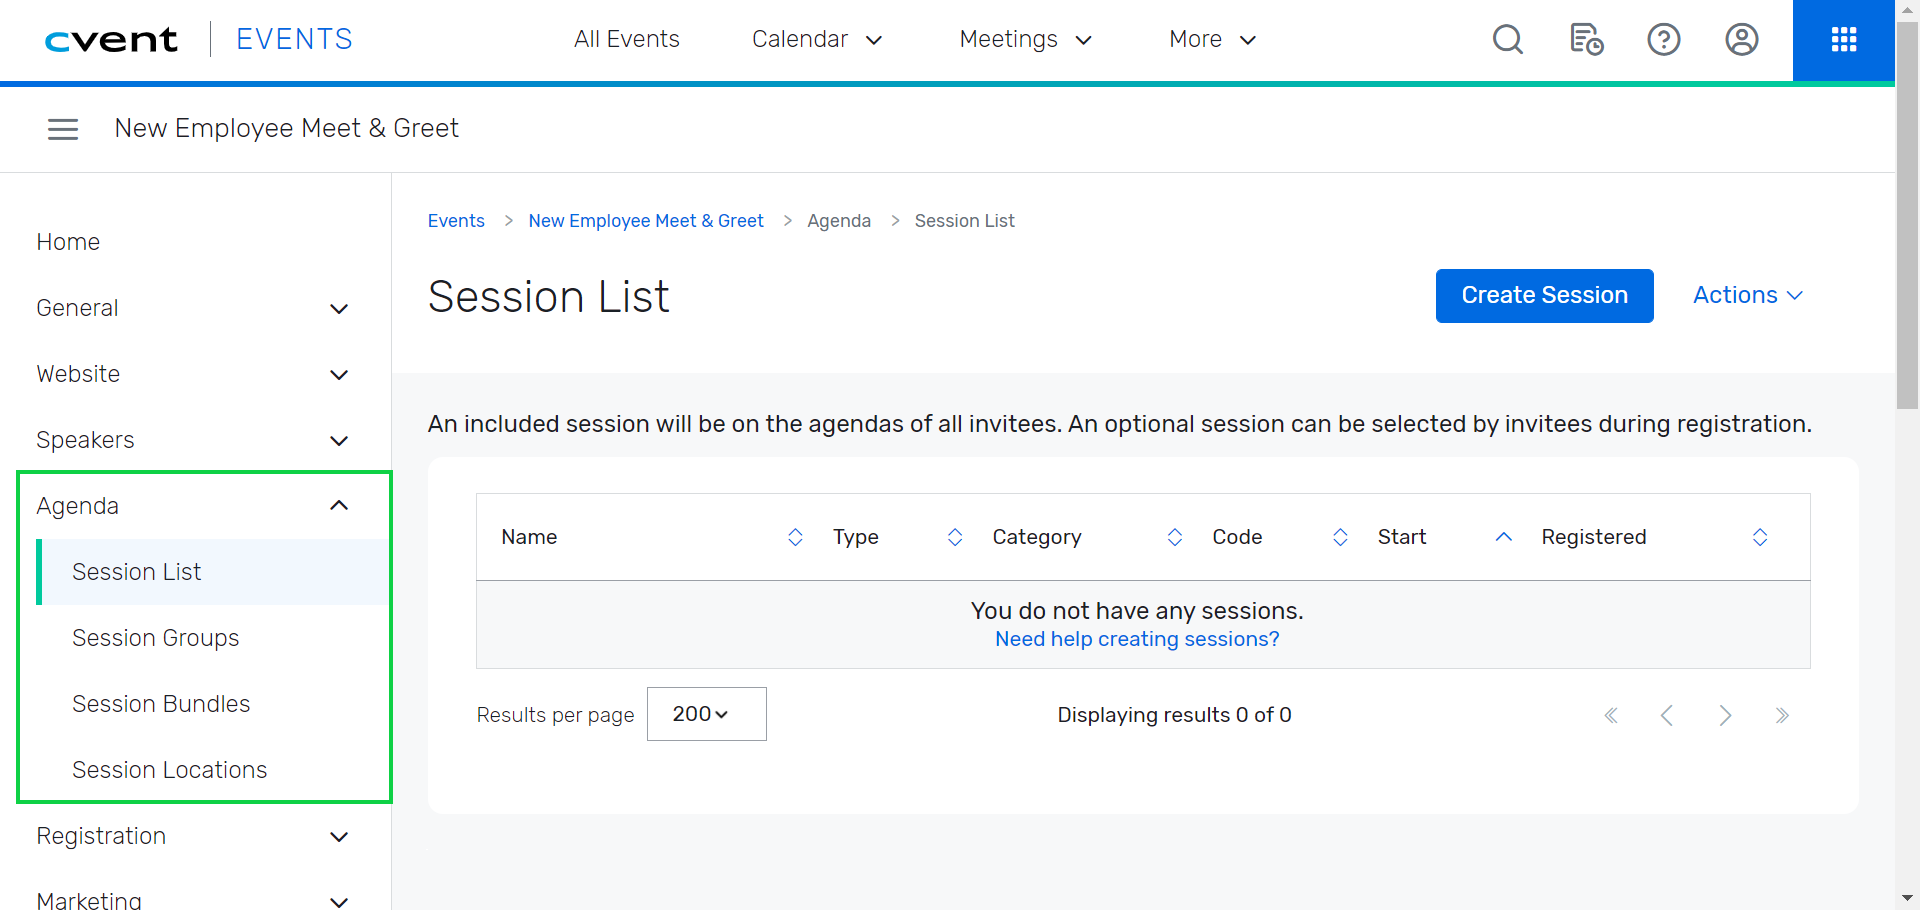
STEP 2 | Setup Sessions
After enabling sessions, you'll need to configure them. Learn more about setting session types, availability, advanced rules, session groups and more.
STEP 3 | Display Sessions
Sessions have been created, but how do you get this information displayed to folks throughout the event lifecycle? We have some tips:
- Event Website
- Add the Agenda at a Glance or the Session Widget? so your website to potential registrants can get a good sense of the event before starting the registration process.
- Event Registration
- Add the Session Widget to your registration process. If your registration process is long, it might be worth using multiple pages.
- Registration Summary & Confirmation Page
- Show which sessions the registrant is signed up for. Provide a Modify Registration button in case someone realizes they mis-selected their sessions.
- Emails
- There are many widgets one can include to have a registrants' session selection included in their post-registration or 'Know Before You Go' messages.
- Session Details
- Agenda
- Registration Details
- There are many widgets one can include to have a registrants' session selection included in their post-registration or 'Know Before You Go' messages.