Marketing Cloud Multi-factor Authentication (MFA)
Marketing Cloud requires multi-factor authentication (MFA) upon login as an additional security precaution. This wiki will walk you through the process of enabling MFA when you log in to Marketing Cloud.
What is MFA?
According to Wikipedia, MFA is "an electronic authentication method in which a user is granted access to a website or application only after successfully presenting two or more pieces of evidence to an authentication mechanism: knowledge, possession, and inherence."
While this sounds complex, you're likely already familiar with using MFA in other aspects of your daily life such as connecting to CU's VPN, verifying your identity on social media sites, or receiving a text message from your bank when you're logging in so you can prove that you are who you say you are.
How will I authenticate in Marketing Cloud?
Marketing Cloud will automatically prompt you to enable MFA when you log in. Complete these steps to enable MFA in your Marketing Cloud account.
1. When you log into Marketing Cloud, you'll receive an invitation to enable multi-factor authentication on your account (see screen shot below). Click Get Started to begin.

2. Marketing Cloud will send a verification code to your email. Copy and paste the verification code that you received into the Verification Code text box. Click Verify to proceed.
- TIP! Check your Junk or SPAM folder for the email and code.

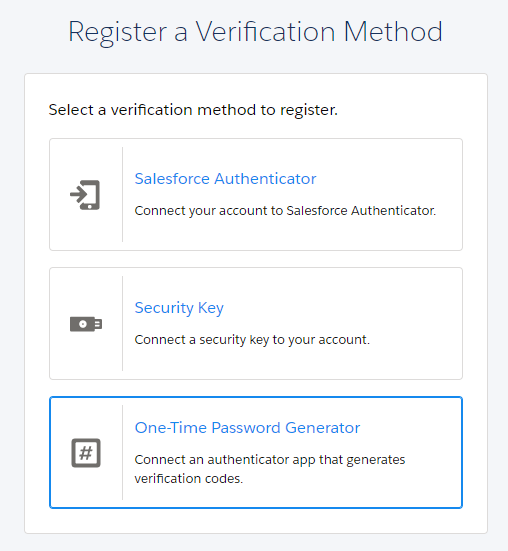
3. Next, Marketing Cloud will ask you to register a verification method (additional instructions are in the tabs below). One option works on desktop while the other two require you to download an app onto your mobile device to enable the authentication process. If none of these options meets your specific needs, please contact the Executive Director of Electronic Communication.

1. Go to the App Store and search for Salesforce Authenticator. Install the app on your mobile device.

2. Once Salesforce Authenticator is installed on your mobile device, open it and follow the prompts it provides. First, the app will ask you to provide your mobile number. When entered, click Send to proceed.

3. Once you've provided your mobile number, the app will send you a text message to verify your identity. When you receive the text, click the link provided within it to start setting up your account.

4. Next, the app will ask you to create a 4-digit passcode you can use to restore your account in the future (if needed). Enter a 4-digit code of your choice. The app will ask you to verify your entry, so you'll need to enter the same code twice.

5. Once your passcode is set, the app will ask you to add your Marketing Cloud account. Click Add an Account to get started.

6. Marketing Cloud will automatically provide your account data for connection. Your username should match your Marketing Cloud user name with which you normally login, and the service listed should be Salesforce. When you've verified that the information listed is correct, click Connect.

7. Once you click Connect, you will receive a message that your account has been added, and you'll be logged into Marketing Cloud. When you click Got It in the app, you'll be presented with location services options that you can configure at your discretion.

What will happen when I login to Marketing Cloud after enabling MFA with the Salesforce Authenticator?
1. After entering your Marketing Cloud user name and password on the normal login screen and clicking Log In, you'll receive an on-screen notification that the Salesforce Authenticator will attempt to verify your identity.

2. You'll receive a notification from the Salesforce Authenticator on your mobile device. Click Approve to login to Marketing Cloud.

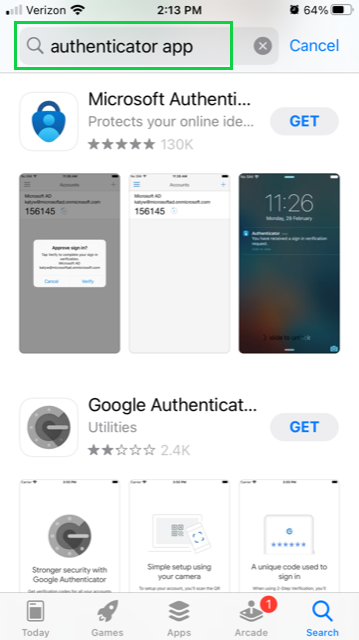
1. Go to your App Store and search for Authenticator App. Install any of these available apps on your mobile device, open it and follow the initial prompts provided.
| Duo Mobile | Apple | Google Play |
| Microsoft Authenticator | Apple | Google Play |
| Google Authenticator | Apple | Google Play |
| Twilio Authy | Apple | Google Play |
2. You'll need to add an account to the app by scanning the QR code presented on the Marketing Cloud screen. Your account details should pre-populate with your Marketing Cloud username and the service listed as Salesforce.
3. When you've verified that the information listed in the app is correct, input the provided Verification Code to Marketing Cloud and click the blue Connect button. You should be logged into Marketing Cloud now.

Troubleshooting
New Device? Your previous method of MFA must be revoked.
If you got a new device, you won't be able to set up MFA again unless your previous one has been revoked. By design, MFA cannot be configured on two computers at the same time. Ask your eComm specialist to revoke your current MFA.
If the method you use for authentication was lost or stolen, please let your eComm specialist know ASAP. They will revoke the authentication method to ensure your Marketing Cloud account remains secure.
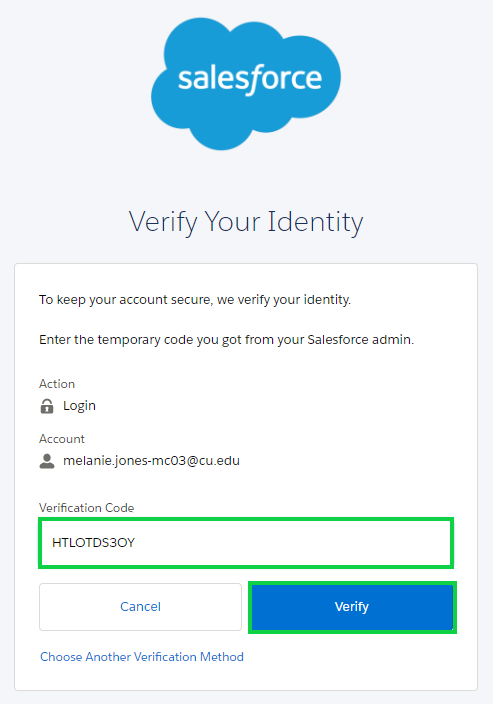
Temporary Code
If you find yourself without your multi-factor authentication (MFA) verification method, your eComm specialist can help generate a temporary verification code to access your Marketing Cloud account. This same code will be effective for 24 hours.
- Let your eComm specialist know you need a Temporary Code and they will provide you one.
- You will get a email indicating a code was generated although it will not be included in the email.
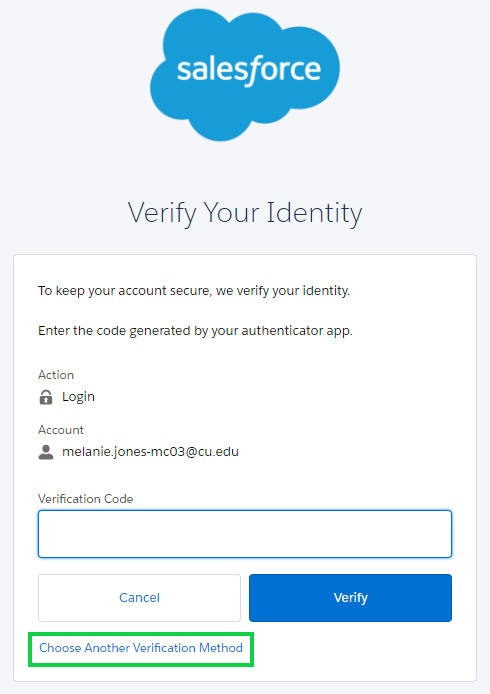
- Start logging into Marketing Cloud as usual. Once on the Verify Your Identity page, select Choose Another Verification Method found under the Cancel button.
- Select the second option: Temporary Code
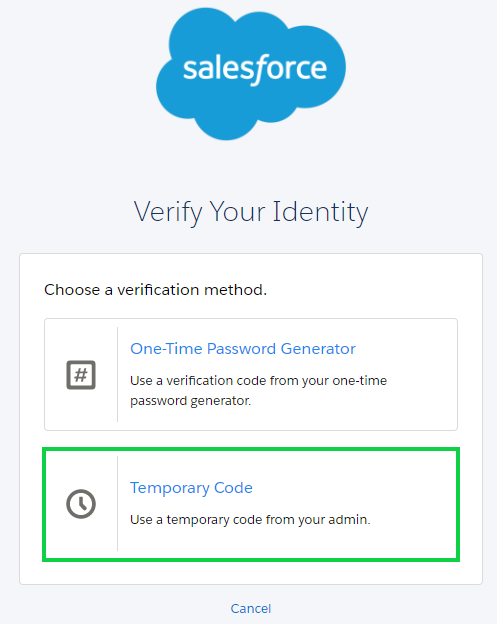
- Input the Temporary Code provided by your eComm specialist and select the blue Verify button. You should now be logged into Marketing Cloud.