





Categorized in:
Cvent | Event Approval & Launch
October 15, 2026 by Melanie Jones
All done creating and testing your event? Contact your eComm specialist to approve your event. They will double-check numerous items, such as having an Event Planner Email Address and a CU brand-compliant website, along with correctly configured post-registration emails and financial information so money transfers to the right accounts, among other things. Then you will be ready for launch!
Request Approval
All events must be approved by an eComm specialist (or other event approver) before it can be launched.
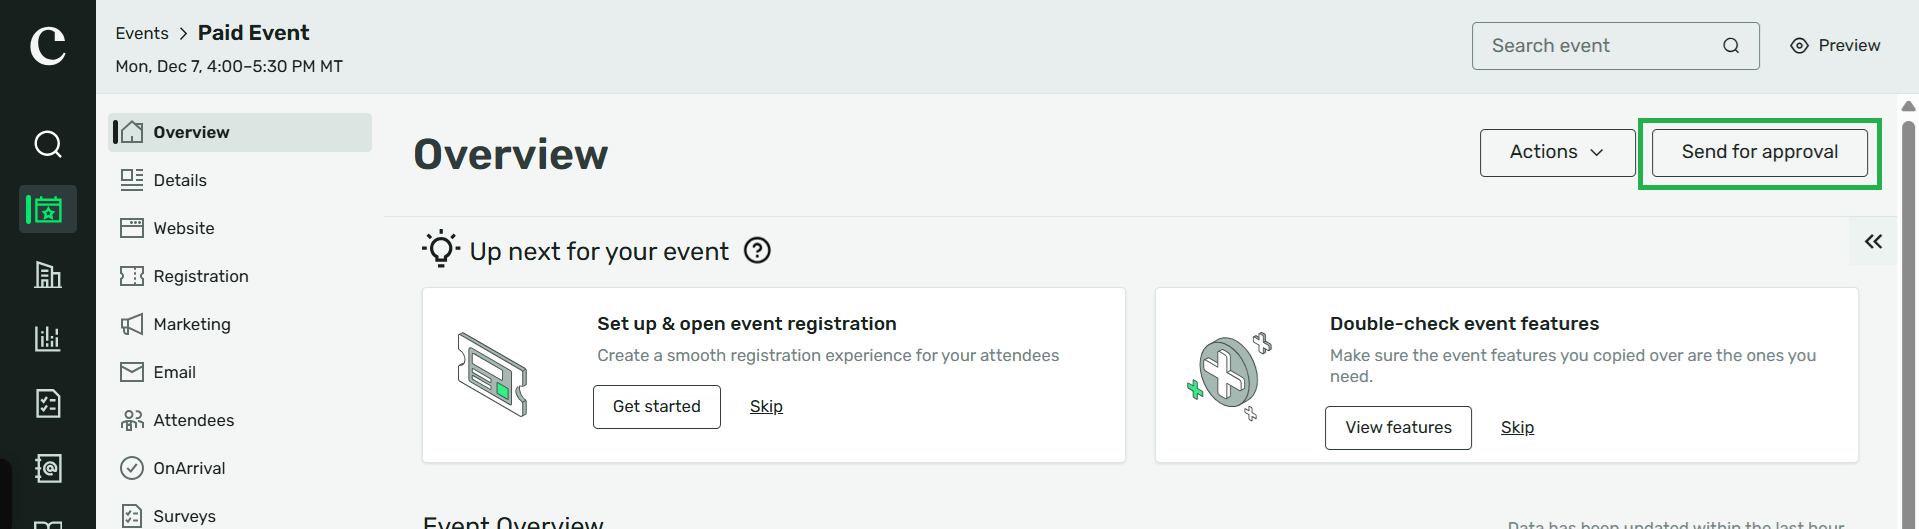
- Navigate to your event. The Overview tab will open by default.
- Click the Send for Approval button in the top right
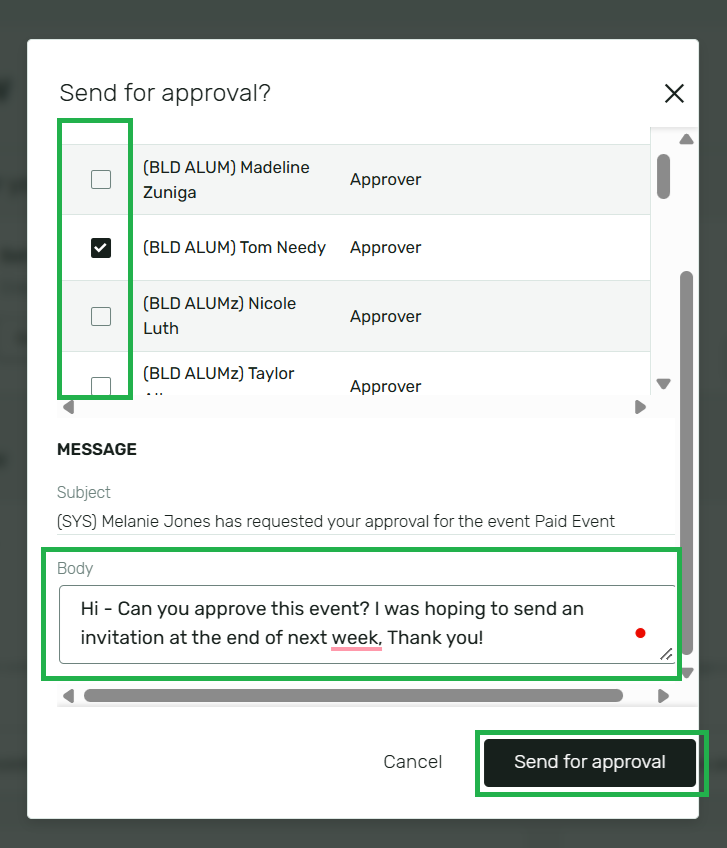
- In the pop-up, check the box next to your eComm specialist
- Do NOT select every approver or unknown names
- Write a comment in the Body
- Click the Send for Approval button
- Event approval turnaround times vary by eComm specialist.
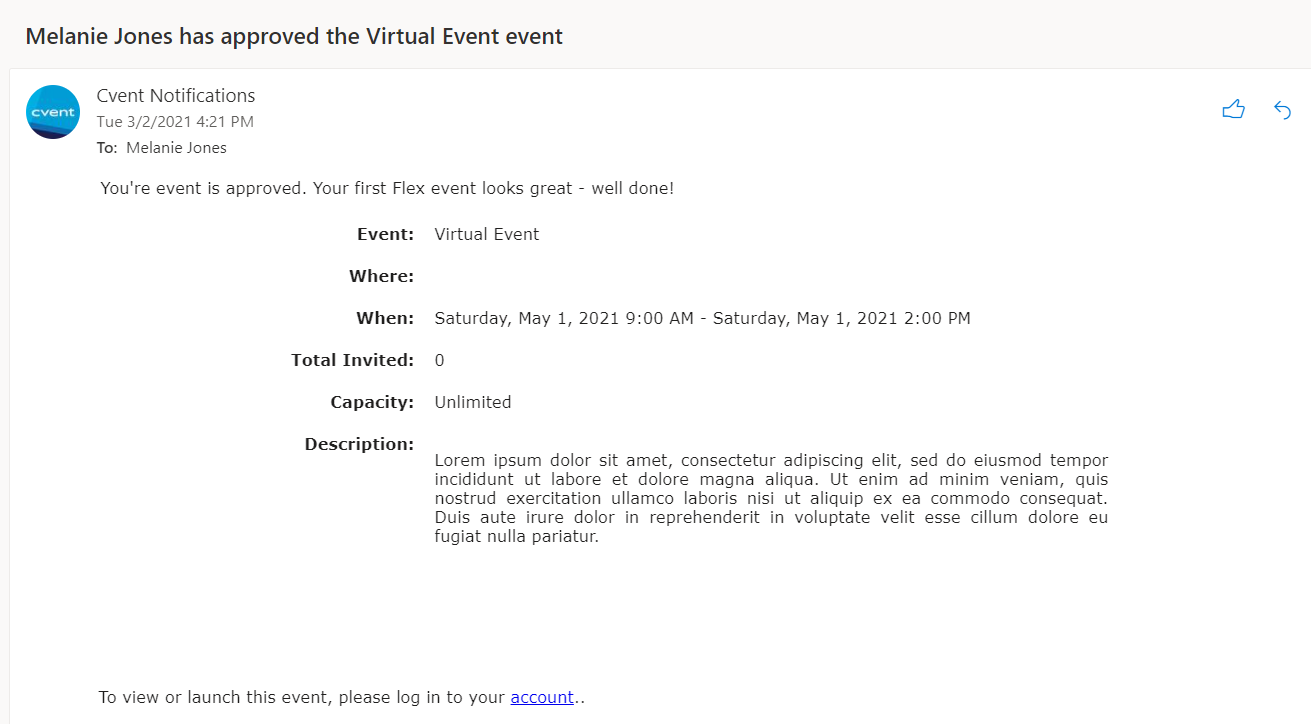
- You're eComm specialist can choose to send you an email notification when the event is approved, like the one below.
Launch Event
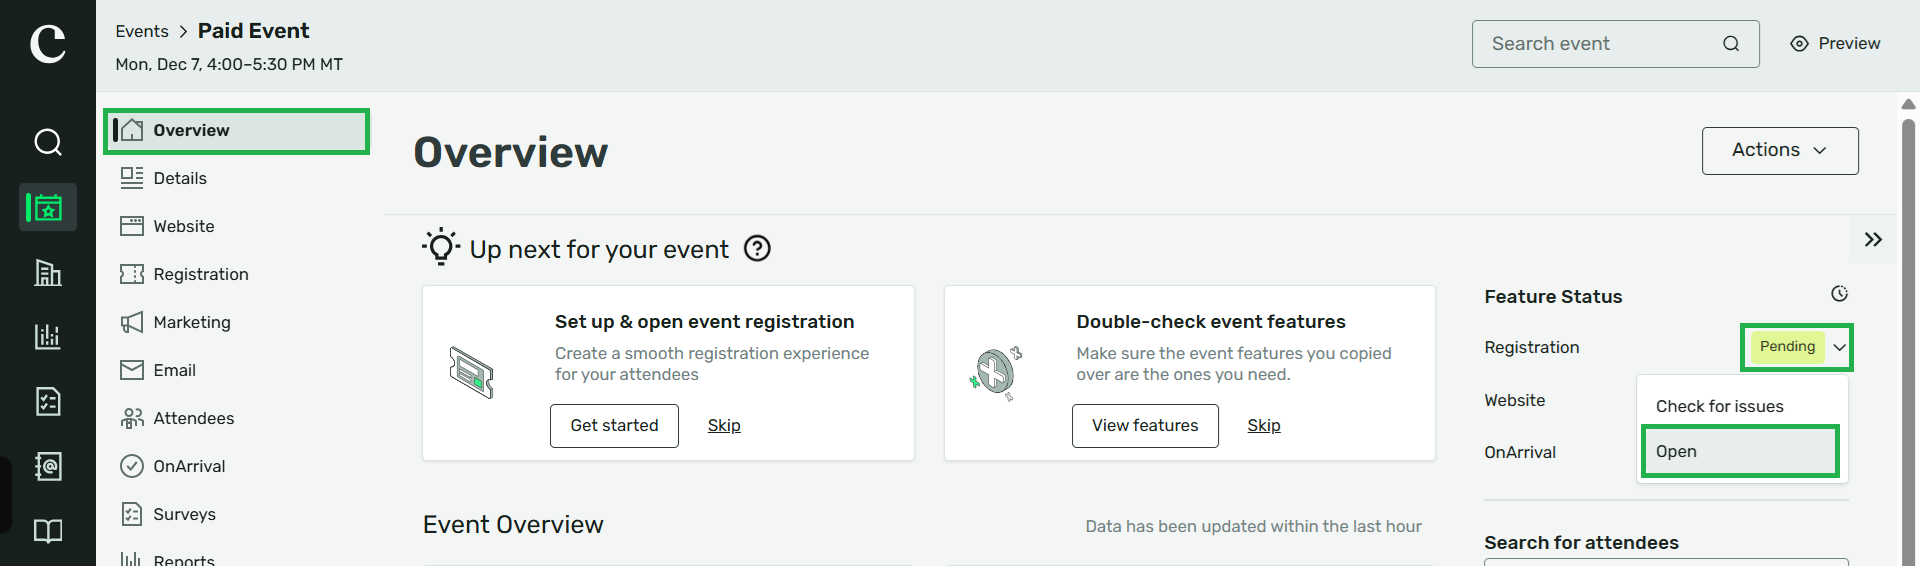
- Once approved, your event isn't live. Notice the Feature Status section towards the right when on the Overview tab. To launch the event:
- Select the arrow next to Registration: Pending and select Open in the dropdown (image below). There will be a confirmation pop-up.
- Similarly, select the arrow next to Website: Not live. Choose Go live in the dropdown. There will be a confirmation pop-up.
Do Not Enable OnArrival OnArrival is an additional product that comes at an additional cost to users. OnArrival should remain Not live.
Understanding Event Statuses: https://cventhelp.force.com/apex/CommunityArticle?id=000002824