

UIS Maintenance for Production Systems Complete for May 30
Description: Production maintenance occurring Saturday, May 30, 2026 is complete. There are no outstanding issues.
Portal Status: Green


Outlook's color categories let you tag messages with a color and label, making it faster to scan, sort and find related emails. Use them to group newsletters, project threads or messages from a specific team — without moving anything out of your inbox.
For example, you might create a green "Finished Requests" category for emails you've already handled, a "UIS" or "ES" category to spot messages from a specific department at a glance or a "Work/Life" tag for a recurring newsletter you want to find quickly.
In classic Outlook
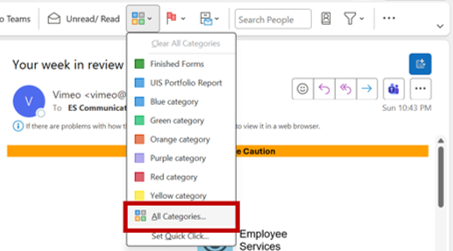
1. From your inbox, select Home on the ribbon, then Categorize > All Categories.
2. In the Color Categories dialog box, select New.
3. Name your category and choose a color. Optionally, assign a shortcut key.
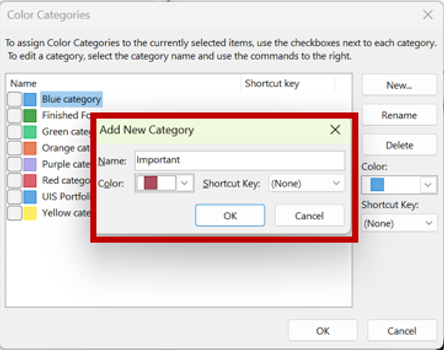
4. Click OK, then click OK again to close the Color Categories window.
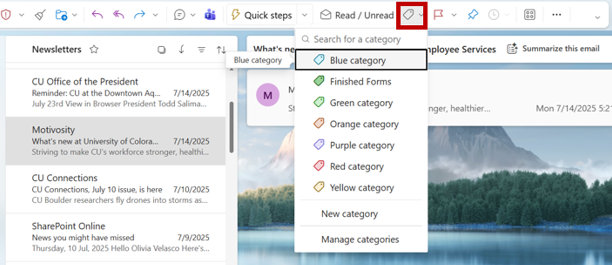
In new Outlook for Windows
1. On the ribbon, select Categorize, then New category.

2. Name your category and select a color.
3. Click Save. Your new category appears in the Categorize menu.
In classic Outlook
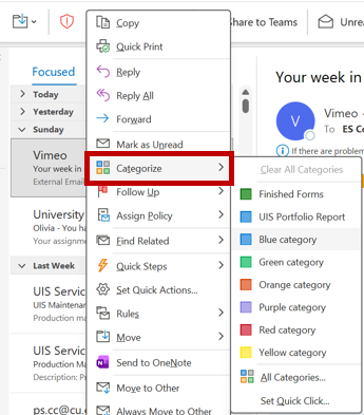
1. Right-click any email in your message list, then hover over Categorize.
2. Select the category you want to apply.
TIP: To assign more than one category to a message, repeat the steps and select an additional category.
In new Outlook for Windows
1. Assign a category using either of the following methods:
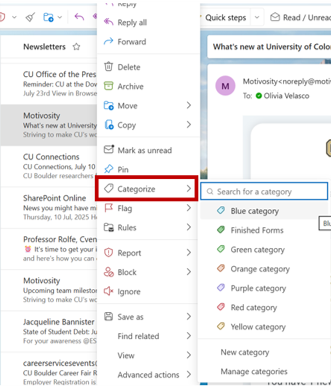
a. Right-click any message in your message list, select Categorize and choose a category.
b. From an open message or the reading pane, select Categorize on the ribbon and choose a category.
TIP: To assign more than one category, repeat the action and select another. If you don't see the category you want, select Manage categories at the bottom of the menu.
Once you've tagged emails, find them by typing the following in the Outlook search bar:
category:"Category Name"
Replace "Category Name" with your category's label. Outlook returns every message with that tag.
You can also create a rule to automatically tag incoming emails with a color category.

Add new comment