

Production Maintenance Complete for Saturday, July 25, 2026
All enterprise and business applications are in service at this time.
Portal Status: Green


Microsoft Word’s Transcribe feature allows users to convert audio recordings or live speech into text. Word automatically separates speakers and adds timestamps , allowing you to review specific sections and make edits as needed. You can save the full transcript as a Word document or insert sections of it into an existing file.
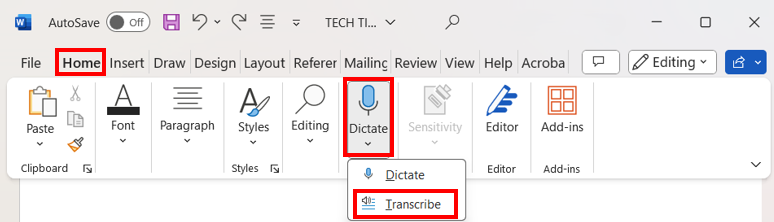
1. Open a new blank document.
2. Select Home, then select Dictate. From the drop-down menu, choose Transcribe.
3. In the Transcribe panel, select Upload audio to transcribe an existing file, or select Start recording to capture live audio using your microphone.
TIP: Transcribe currently supports more than 80 languages. Select the correct spoken language before uploading or recording to improve transcription accuracy.
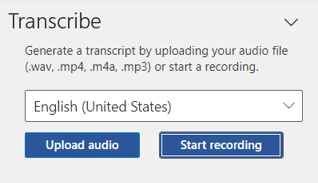
4. Select the audio file you want to transcribe. Supported file types include .wav, .mp4, .m4a and .mp3.
5. Word will begin transcribing the selected audio file. Keep the Transcribe panel open until processing is complete.
After your transcript is ready
Using Transcribe can help streamline note-taking for interviews, meetings and recorded presentations, while allowing you to review and refine the final document.

Add new comment