


In the Finance System (FIN), you can attach and view supporting documentation for transactions in all modules, including Assets, Billing, Accounts Receivable, etc. This page focuses on adding attachments to journal entries (JEs).
A JE typically needs one or more attachments that provide supporting documentation for the entry. There are several ways you can do this:
- You can add attachments to an individual JE using the Journal Entry - Header Page.
- You can add attachments to one or more JEs at a time using the Upload Journal Attachments page.
- You can add the same or different attachments to multiple JEs using the Multiple File Attachments link on the Upload Journal Attachments page.
Read the procedures
Adding Attachments to one JE at a time – using the Journal Entry - Header page
Watch the video
To add attachments to one journal from the Journal Entry - Header page:
- On the Header tab of the Journal Entry, click the Attachments link. A popup will appear.
- Click Add Attachment.
- Click Choose File.
- Locate and select the file on your network.
- Click Open. Depending on the size of the attachment it may take a little time to upload.
- Click Upload.
- You can now enter a Description to help other viewers understand the context of the attachment.
- Repeat this process to add multiple attachments.
- When you finish adding attachments, click OK.
- The popup window closes, and you’re back on the Journal Entry - Header tab.
- The Attachments link will update to display the number of attachments in parentheses. Click the Attachments link to view your attachments.
- Save your JE after adding attachments.
Adding attachments to multiple JEs - using Upload Journal Attachment on the Upload Journal Attachment page
Rather than adding attachments when you create a JE, you can visit one page that lists all your JEs and then add attachments to one or more JEs at a time.
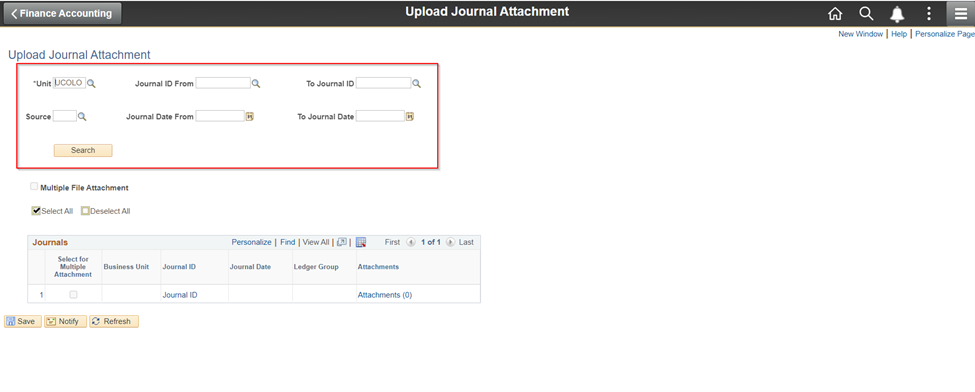
- From the Finance & Accounting homepage, click on the General Ledger tile.
- Use the menu on the left to select Process Journals > Upload Journal Attachments.
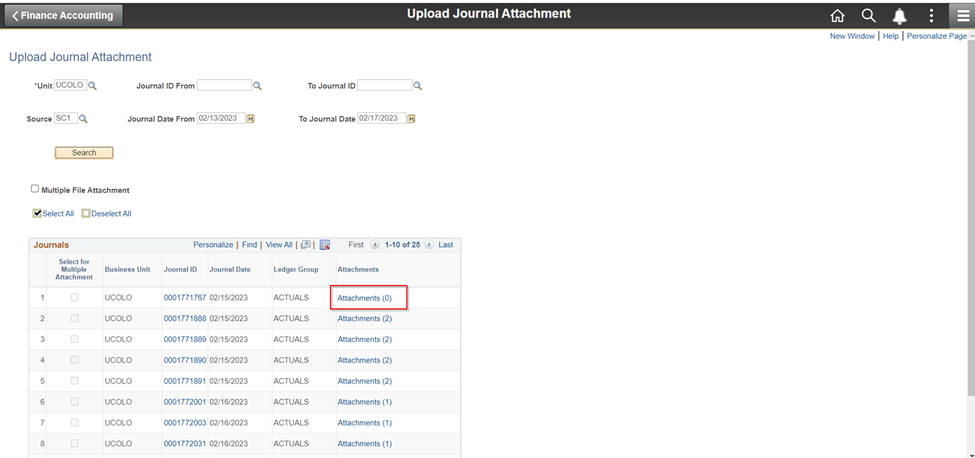
- Search for JEs by JE ID, Source code, and Date.
- Select the appropriate JE and click the Attachments link.
- Click Add Attachment.
- In the File Attachment popup, click Browse to locate and select your file, then click Upload. Depending on your file attachment size, uploading may take a little time.
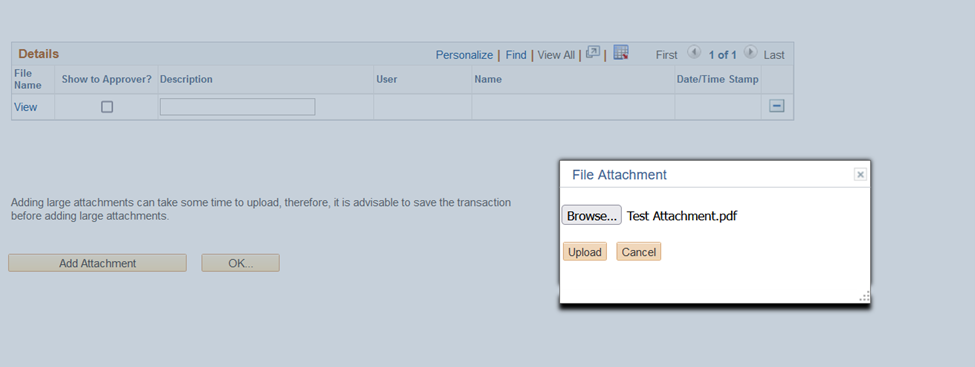
- When you finish adding attachments, click OK.
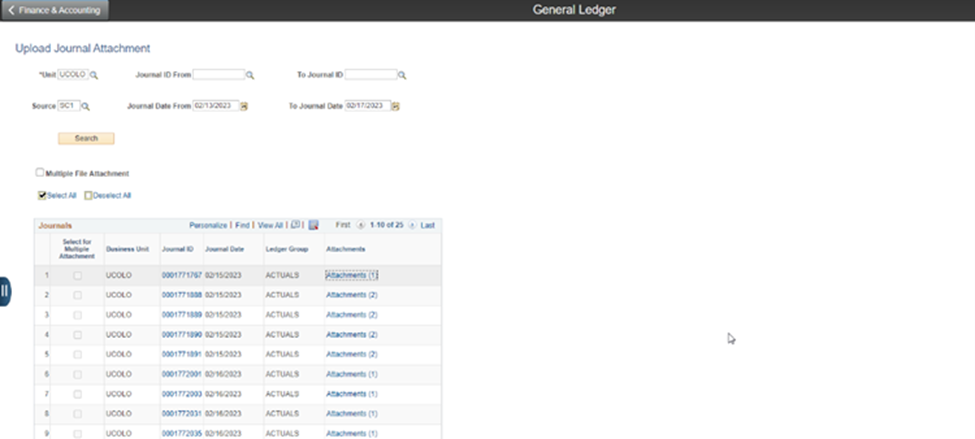
- The Attachments link for the JE will update to display the number of attachments in parentheses. You can click it to view your attachments… or you can click the Attachments links for other JEs in your list to continue adding attachments.
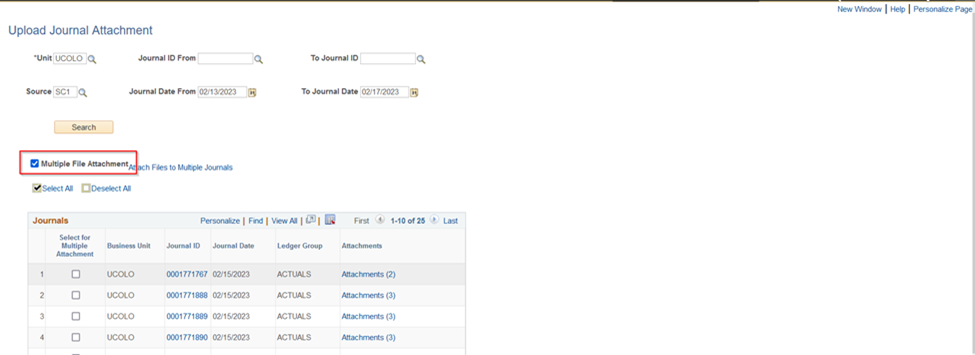
Adding the same attachment to multiple JEs at a time using the Multiple File Attachments
Using the Multiple File Attachments link saves time when you want to upload the same attachment to more than one JE simultaneously.
- From the Finance & Accounting homepage, click the General Ledger tile.
- Use the menu on the left to select Process Journals > Upload Journal Attachments.
- Search for JEs by JE ID, Source code, and Date.

- Select the Multiple File Attachments checkbox.
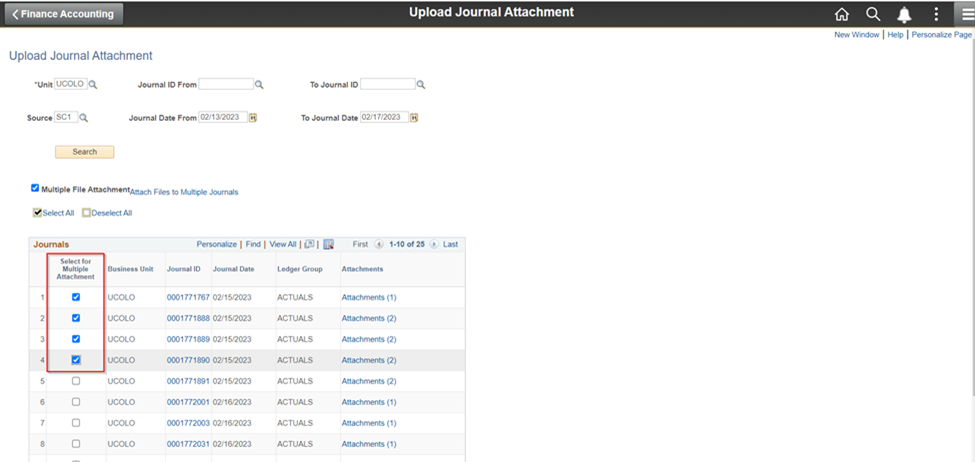
- Select all the JEs that will use the same attachment.
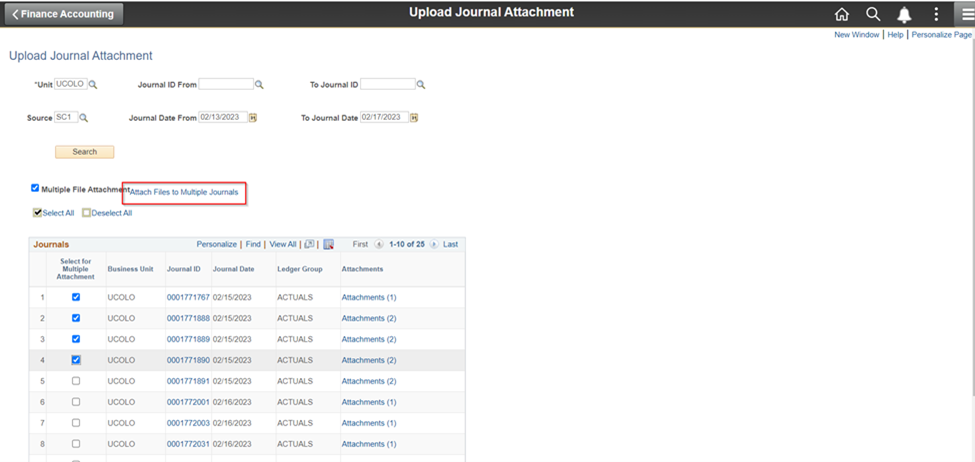
- Click the Attach Files to Multiple Journals link.
- From the Multiple Journals Attachment page, click Add Attachment.
- In the File Attachment popup, click Browse to locate and select your file, then click Upload. Depending on your file attachment size, uploading may take a little time.
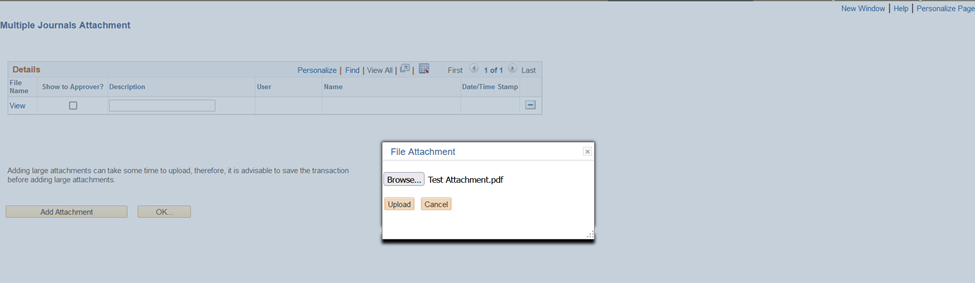
- When you finish adding attachments, click OK.
- The Attachments link for your selected JEs will update to display the number of attachments in parentheses. Click the Attachments link to view your attachments.
Helpful Tip!
Is there something you forgot to attach? You can add supporting documentation at any time, even after the journal has posted. (Just be sure your Approvers have all the information they need when they review.)
Have a question or feedback?