


Folders in Marketing Cloud
We know how cluttered your Marketing Cloud account can get if you are a frequent sender. Use these different types of folders (and other tips) to stay organized.
Content Builder Folders
- Navigate to Email Studio >> Content Builder. On the left panel folders are listed.
- To add a new folder:
- Right click the top, Content Builder folder
- Select Create Folder in the dropdown
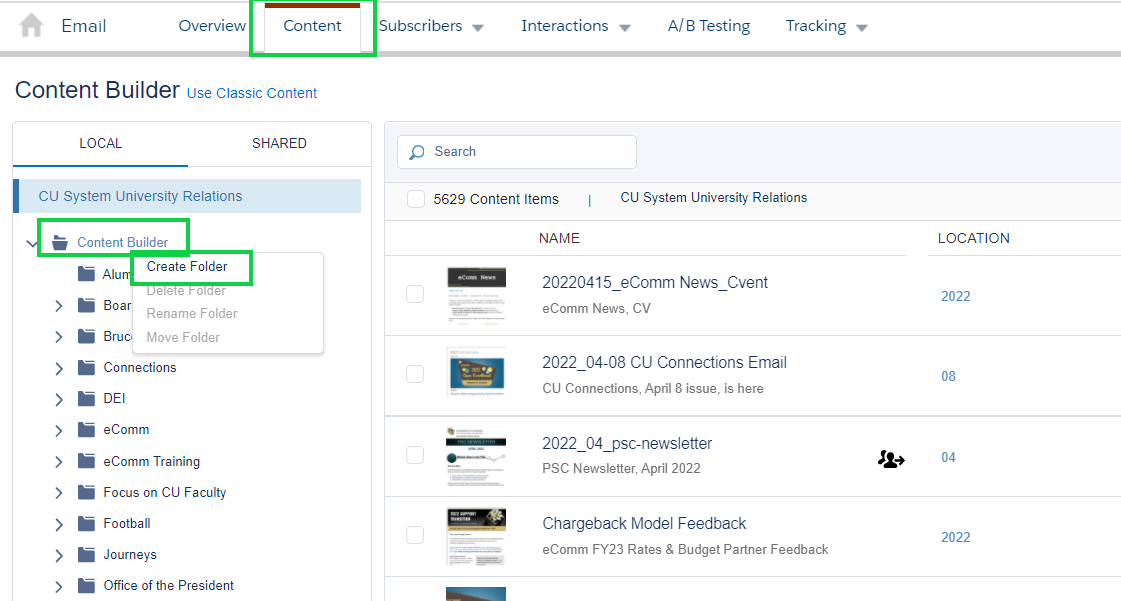
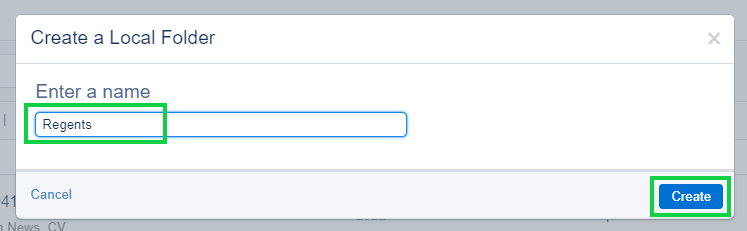
- In the pop-up, give a name to the folder.
- Click the blue Create button in the botton right.
- The new folder will be listed in alphabetical order.
NEST FOLDERS Folders can be created within other folders. To do so, simply right click on the folder name rather than the Content Builder folder.
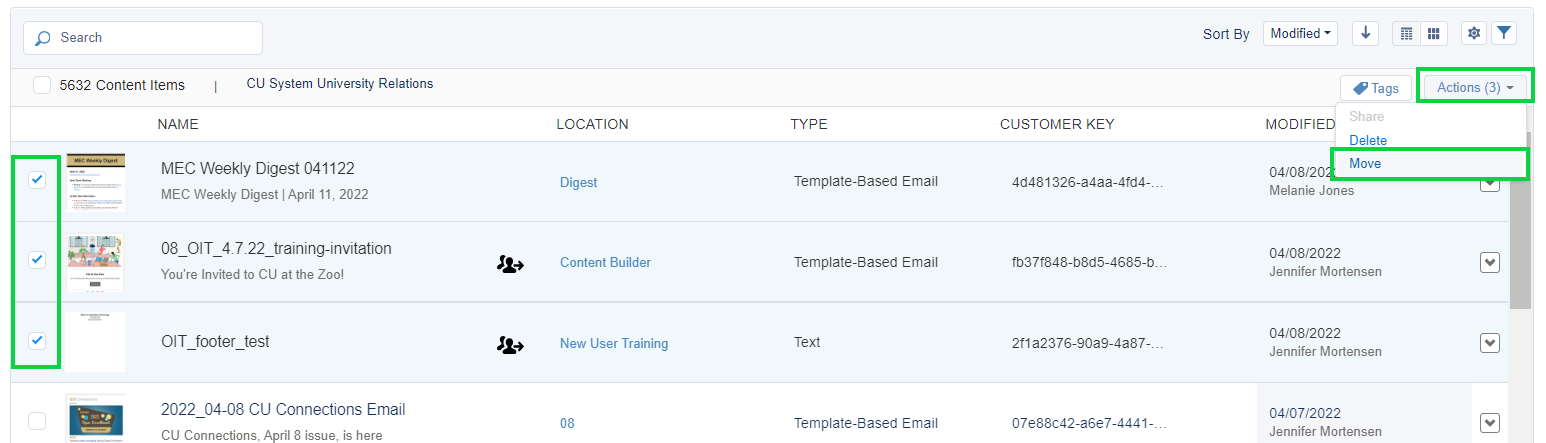
Need to move content from one folder to another? There are two methods:
- Check the box on the left of the content (multiple can be selected)
- Click the Action(s) button in the top right
- Select Move in the dropdown
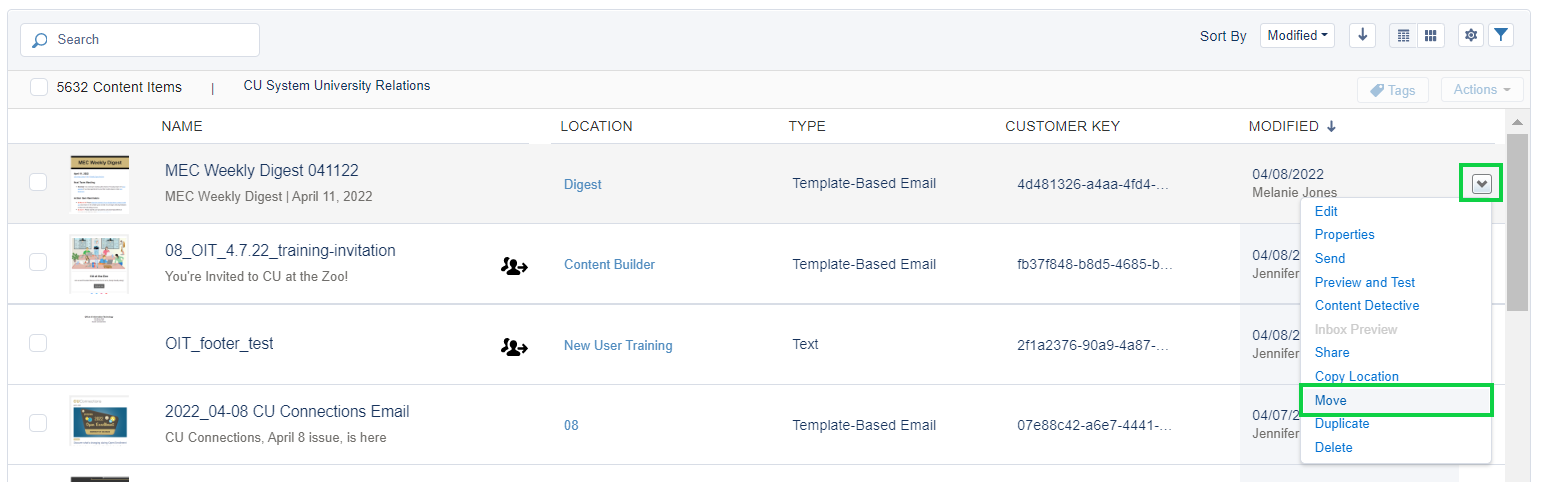
- Select the quick action down arrow on the far right side of the piece of content you want to move.
- Click Move in the dropdown
Salesforce Send Folders
There's two ways to send emails through Marketing Cloud. Guided Send (with a step-by-step wizard) and Salesforce Send Emails. Both methods get your email out the door, but I prefer Salesforce Send Emails to help stay organized. You can can name email sends and create a custom folder structure (how-to below).
If you're used to scheduling Salesforce Send emails, your Marketing Cloud Salesforce Send Email screen might look something like the example below with:
- one Salesforce Email Send with a unique name for each send.
- You can avoid this redundant effort with a slightly different (and more organized) approach.

1. Create subfolders under the Salesforce Send Email parent folder.
- From Email Studio hover Interactions then click Salesforce Send Email in the dropdown
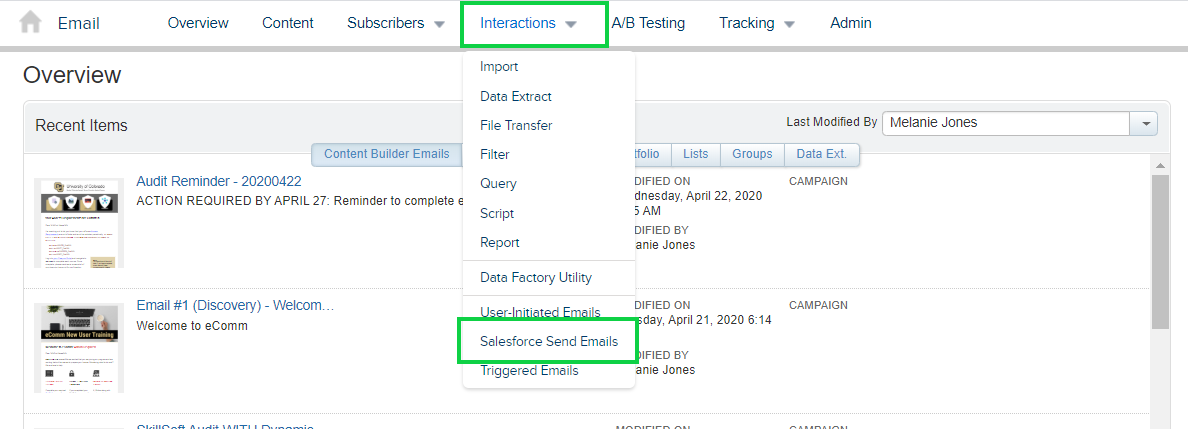
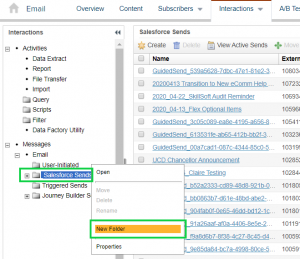
- Right click on the Salesforce Send Email folder in the left navigation pane
- Select New Folder in the dropdown and proceed to organize your work as desired.
- For this example, we've grouped our work into Monthly, Weekly, and Periodic Sends.

2. From there, you can create new Salesforce Sends in the desired folder.
- For example, after clicking into our 'Weekly Sends' folder, we created two Salesforce Send Emails reflecting our two regular, weekly messages: one communication for CU's eComm Specialists, and other for CU Connections.

- Build your weekly Salesforce Send Email as you normally would - select your audiences, your send classification, delivery profile, etc.
- For the content, just select the email that you last sent that falls into this weekly category. Since you aren't scheduling anything yet, there's no risk in connecting a previously sent message to your Salesforce Send Email configuration. We'll update the content before actually sending the message.
- When you're done, Save your work.
3. When you're ready to send or schedule the content you create (each week in our example), modify your Salesforce Send Email so that it points to the correct content.
- !TIP! You can also change the name of the weekly send to reflect the date associated with it.
- For example, we modified 'Weekly Send - CU Connections' to 'Weekly Send - CU Connections 103119'. We update that date every week.

REMINDER If you make ANY changes to your email content after saving your Salesforce Send Email, you'll need to re-select your content in the send configuration to ensure that the changes are captured.
Data Extension Folder
Only eComm specialists and Super users have access to move Data Extensions.
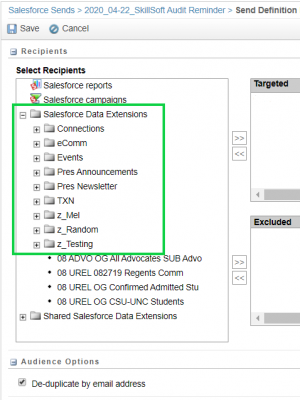
Do you have numerous Data Extensions in your Marketing Cloud account? Create folders to organize your Data Extensions to make finding your audience easier when sending.
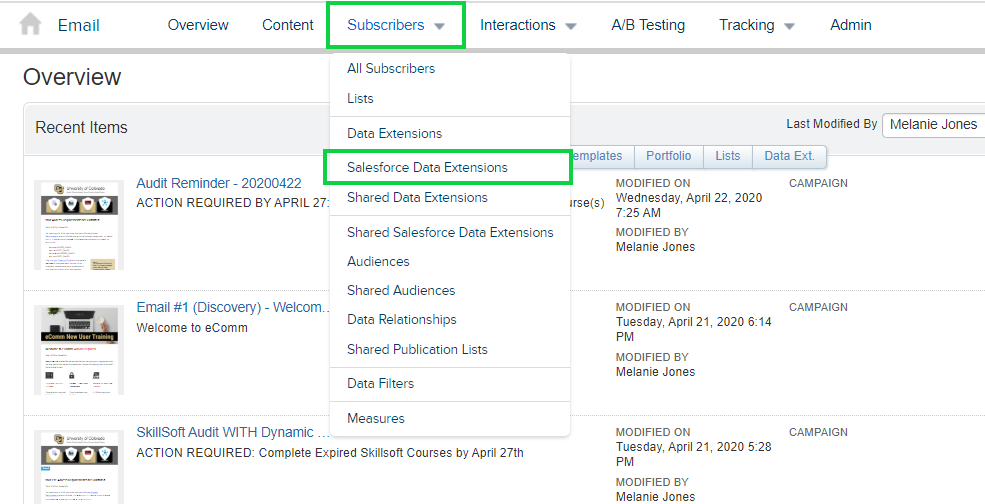
- From Email Studio, hover Subscribers in the navigation
- Click Salesforce Data Extensions in the dropdown
Use the panel on the left to:
- Create New Folders | right click on the Salesforce Data Extensions parent folder and click New Folder in the dropdown

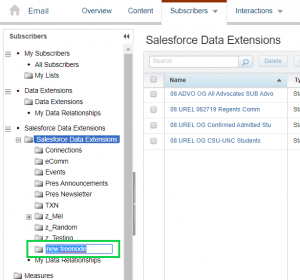
- Name your new folder
- The new folder will order alphabetically automatically.
- Move Data Extensions | from the Salesforce Data Extension Folder Check the Data Extensions then select Move in the top
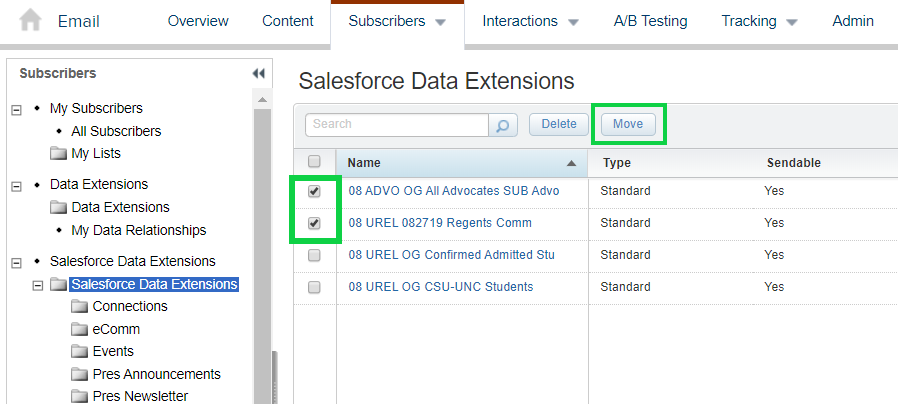
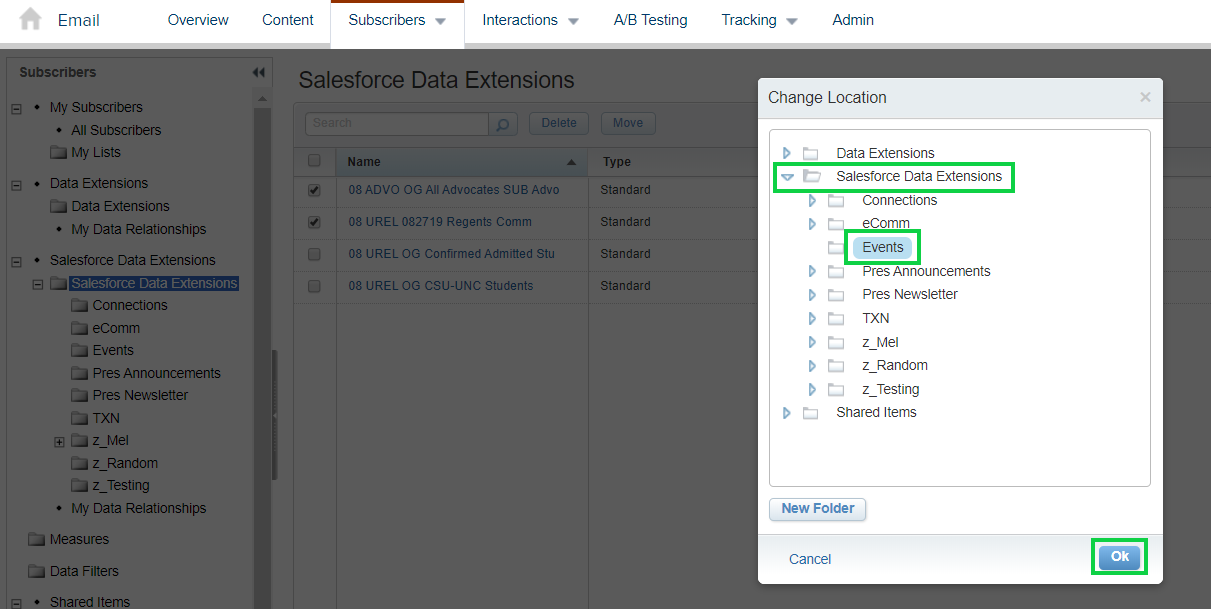
- In the pop-up, select Salesforce Data Extension to expand the sub-folders
- Select the folder you want the Data Extension(s) moved to
- Click Ok
EXAMPLES
CATEGORIES | Email Preference Category, communications, commercial vs. transactional, audience Affiliation, internal/external audience, etc.
OTHER COMMON FOLDERS | Testing, TXN (for Transactional audiences)
View the folders structure wheen sending your Marketing Cloud message, via the Guided Send wizard or Salesforce Send Emails.
Tracking Folders
Tracking folders makes grouping related sends together possible - so comparing their success against each other is easy.
Create Tracking Folders
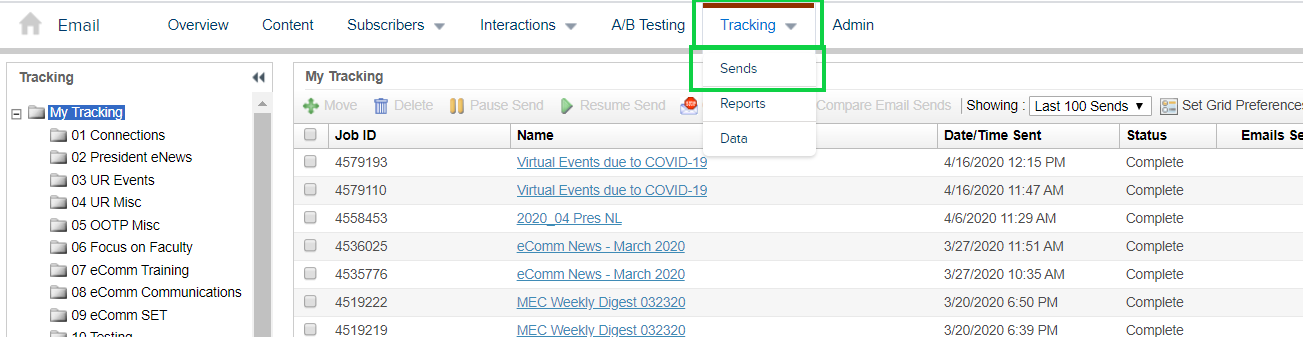
- Hover Tracking in the top navigation
- Click Sends in the dropdown
- Right click on the My Tracking folder displayed in the panel on the left
- Select New Folder
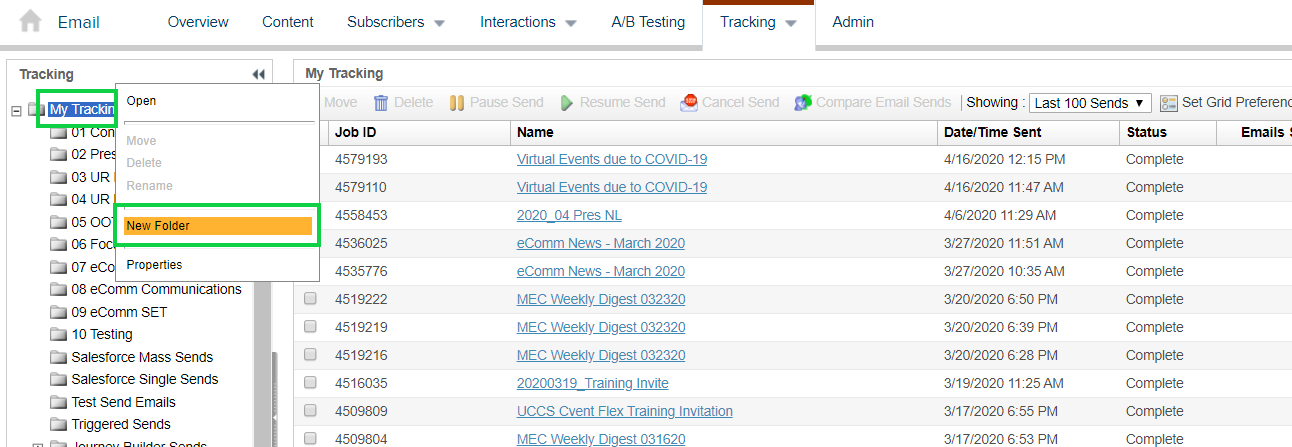
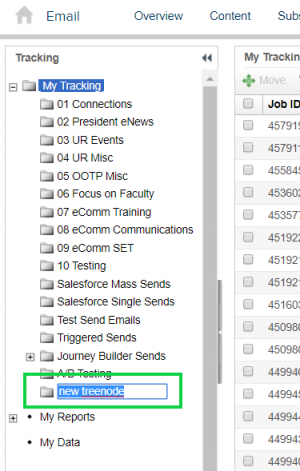
- Name the folder
- Folders will automatically order alphabetically
Place Emails in Tracking Folders
Guided Send
The Configure Delivery phase of the Guided Send wizard is used to control the send timing.
- You can also Change the Tracking Destination Folder here.
- Choose the desired folder and click Select
Salesforce Send Email
- Choose the Tracking Destination Folder by scrolling to the bottom of your Salesforce Send.
- From Email Studio >> Tracking >> Sends
- Check the box next to the passed Email Sends that you wish to move
- Select Move
- In the pop-up, select the folder you wish to move the Email Sends to.
- Select the move button
IMPORTANT Users can Delete and Rename folders as well as nest folders within other folders. If deleting a folder, ensure it is empty or it's contents may also be deleted. Deleted items can be restored from the recycling bin for 30 days.