


Identifying Duplicates
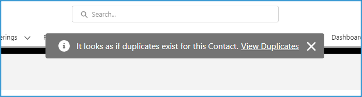
When viewing a contact that the Salesforce duplicate rules identify as a potential duplicate you will be presented with a notification upon loading the page:
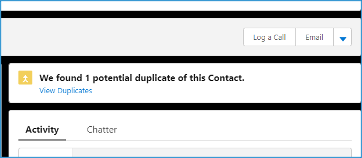
There will also be a persistent notification on the right side of the contact layout; above the activities section.
Non-Salesforce Identified Duplicates:
There will be instances where the automated duplicate rules do not identify two records as potential duplicates. For example, if the potential student fills out a form on the website with one email address but then provides a completely different one during their application process.
When this occurs, you have the ability to force the system to recognize the records as duplicates using the “Merging” field at the bottom of the contact record.
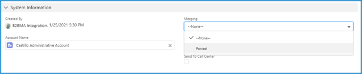
Setting this field to “Forced” on the records you want to be identified as duplicates will cause the system to recognize the records as duplicates.
IMPORTANT
This needs to be set on both contact records you want to merge.
Merging Duplicates
Whether the duplicates have been identified by Salesforce automatically or forcibly set via the “Merged” field, the process for merging is the same. Written instructions will come first with notes then screenshots of the process.
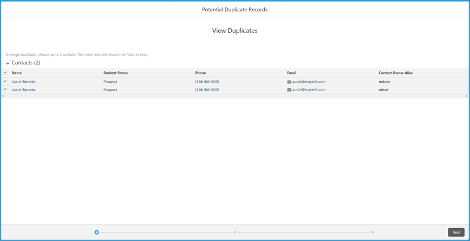
- Click the “View Duplicates” link on either the pop up notification when loading a page or the “View Duplicates” link on the duplicates section above the activities section.
- On the Potential Duplicate Records wizard that pops up, select the records you want to merge
- Make sure you are selecting only the records you want to merge, not all records that are present. There may be instances where another user is forcing the merging of records while you are forcing the merging of records. When this occurs, both of your records will show up here until they are merged.
- Click Next
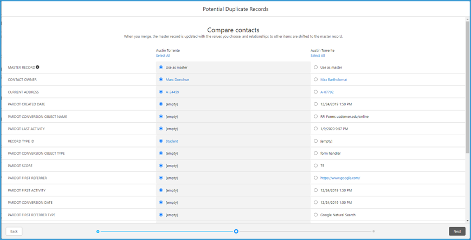
- This page will show you the discrepancies between the selected records. You will select which values to keep between the two records. You can either select one entire record by using “Select All” or individually select values to keep them.
- For example, if you Contact A has all the right information except the wrong Program of Interest listed; you can click “Select All” on Contact A and then manually select Program of Interest on Contact B. This will keep all the information from Contact A but use the Program of Interest from Contact B instead.
- Marketing fields that need to be brought over in the merge are:
- Source Channel
- Lead Source
- Pardot Campaign for the corresponding Lead Source/Source Channel selection
- ANY UTM fields (Term, Source, Name, Medium, Content)
- Try your best to match "First" UTM values from the contact that was created first.
- Ad Campaign Name, Ad Name, Ad Set Name
- Either record can be used as the “Master Record” and does not directly influence the merging process from your standpoint. The system automatically keeps the earliest Created Date value.
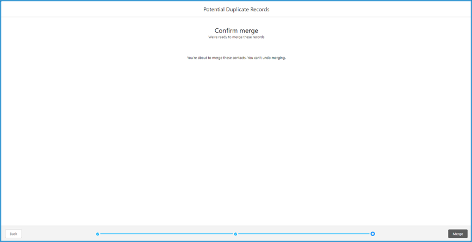
- Click Next
- Click Merge
This will complete the merging process. One contact record will be removed from the system and the remaining contact will have the values you chose in step 4. All related objects from the removed object (applications, tasks, SMS, etc.) will be reassigned to the single remaining contact.
Step 1:
Step 2/3:
Step 4/5/6:
Step 7:
Other Notes:
- Merging cannot be undone. Once a contact record is merged, it is gone forever.
- Up to 3 contact records can be merged at once.
- If there are “Internal” AND marketing terms (Facebook Paid, LinkedIn, etc.) in the Lead Source/Source channel fields, always select the marketing terms.