Find suitable times and schedule meetings with Outlook’s Scheduling Assistant [1]
Outlook’s Scheduling Assistant helps you easily see your colleagues’ availability so you can schedule meetings at a time that works for everyone – avoiding double-booking and back and forth messaging.
Scheduling a meeting using Scheduling Assistant
1. In Outlook, click the Calendar icon from the left-side menu.

2. Select New Meeting and add required and optional attendees.
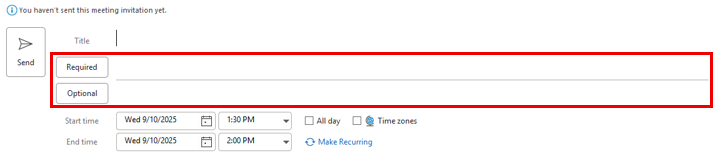
TIP: You can also press CTRL + Shift + Q to open a new meeting invitation.
3. Select Scheduling Assistant from the top ribbon.
a. Each attendee will appear in their own row.
b. To add more attendees, type their name in any blank row.
4. Review the availability grid:
a. Dark blue = Attendee is busy.
b. Light blue (hashed) = Tentative appointment (time is blocked out on attendee's calendar).
c. Light gray = Outside working hours.
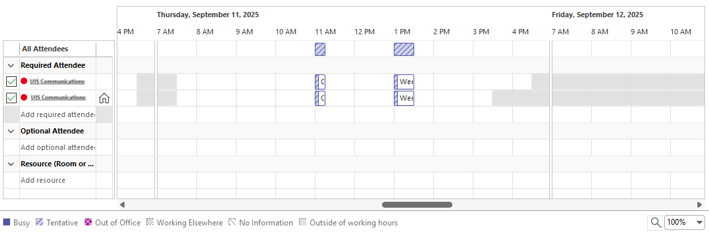
5. Select a meeting time when all required attendees are available.
TIP: Click AutoPick from the top ribbon to automatically find the next time all attendees are available.
6. Add a meeting title, location and details, then click Send.
For more information, visit Microsoft Support’s Scheduling Assistant article [3].